I think it’s fair to say that for most people, the idea of a ‘smart home’ conjures up images of devices doing things for you without your intervention, or performing chores when needed, on schedule, so you don’t have to think about it. Of course, there’s a world of difference between what’s currently on offer, and some sort of Jetsons robotic utopia, but sometimes companies through a curveball and surprise even seasoned smart home users, like myself. The device I’m referring to is SwitchBot’s Universal Remote, which as you can gather by the name is a remote control. You’d be forgiven for thinking that remotes are on their way out perhaps (hence the curveball here), with connected smart TVs and set-top-boxes, like Apple TV, having a reasonable amount of internconnectivity and ‘smarts’. That’s a little naive to think that way, however, as I’ll attempt to point out in today’s review…
PACKAGING | CONTENTS
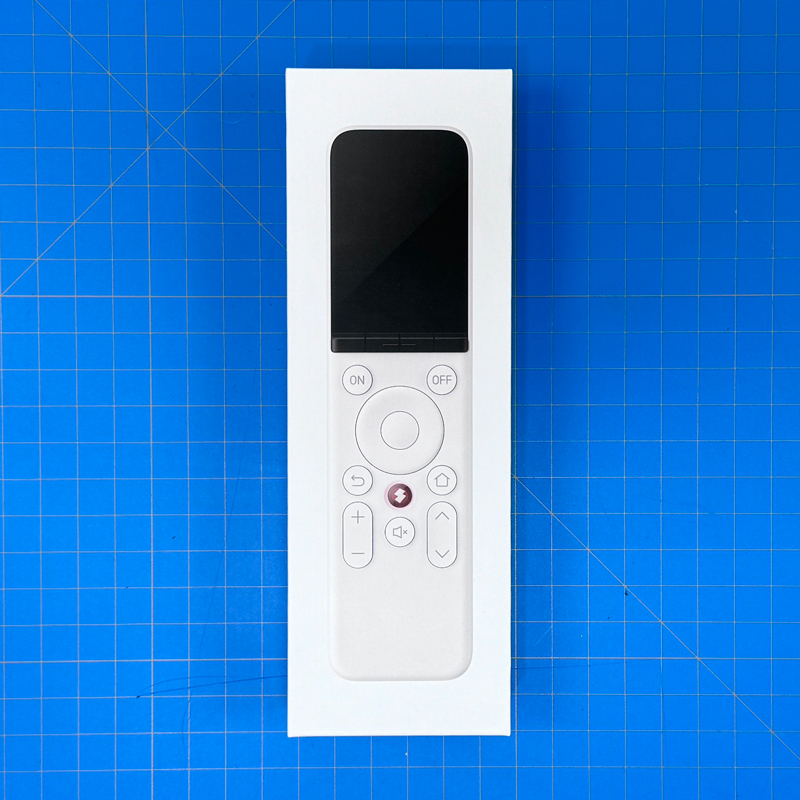
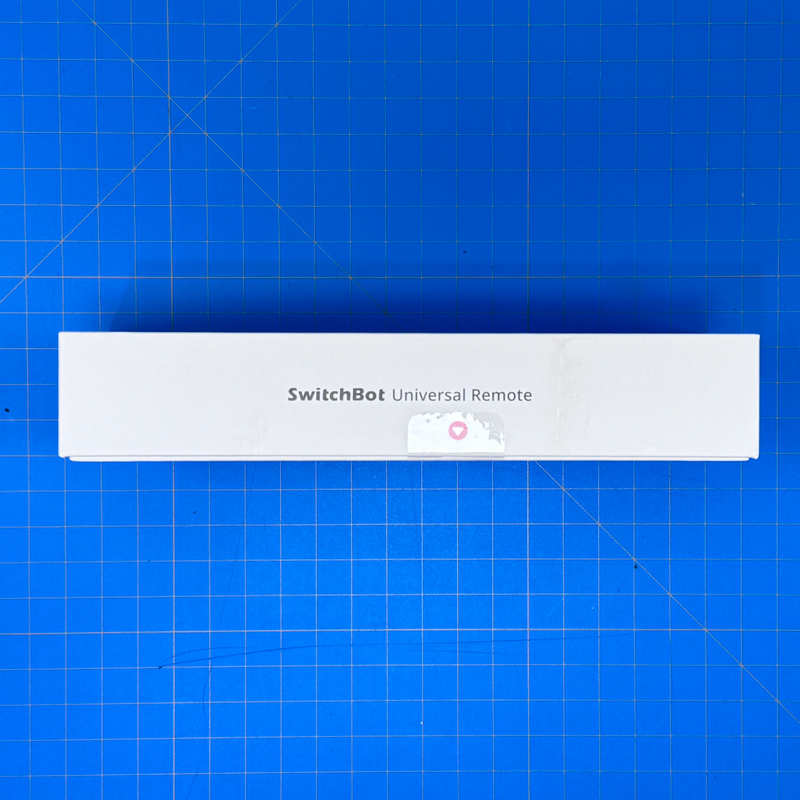
Like many companies for the last 15 years or so, Switchbot take the Apple packaging route, with just the remote on the front of the box, leaving the rear to host the details. The side is equally minimal, with just the name of the product. The box is pretty sturdy, in an ‘Apple’ way too, so less chance of damage to the contents, thankfully.
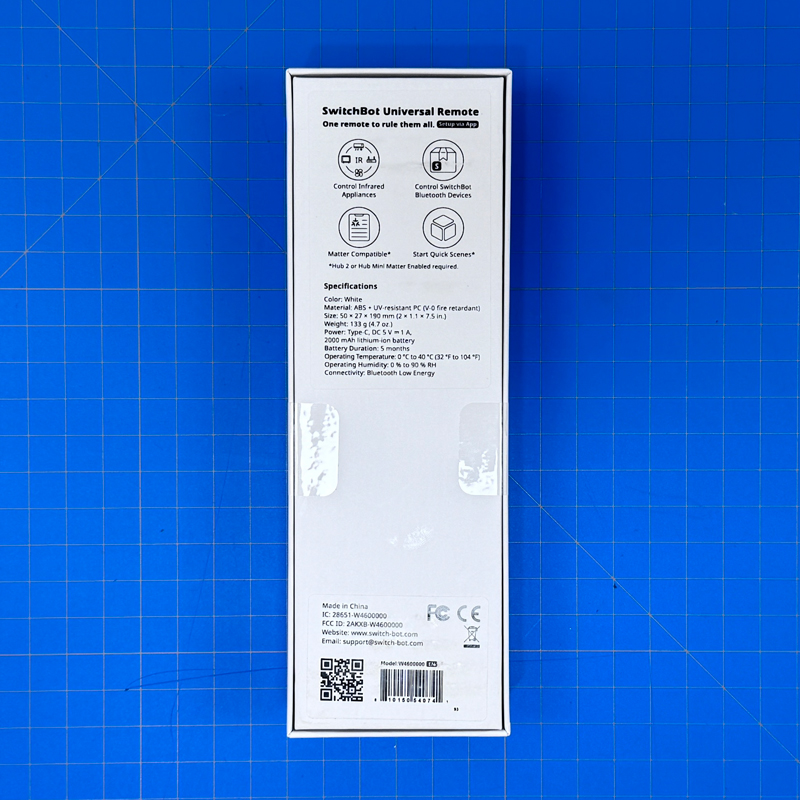
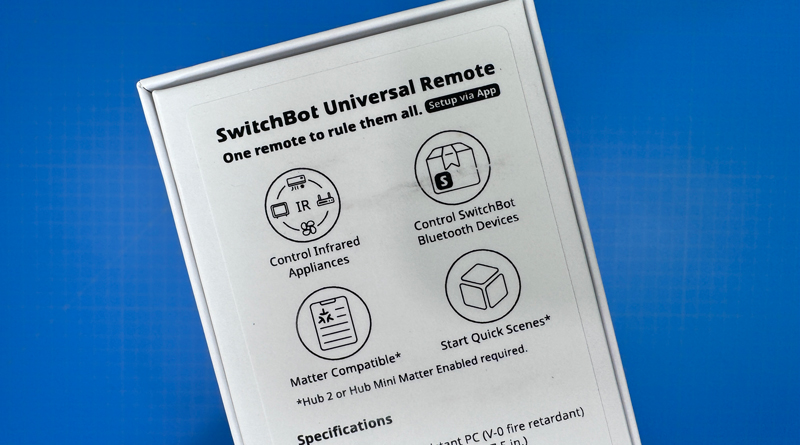
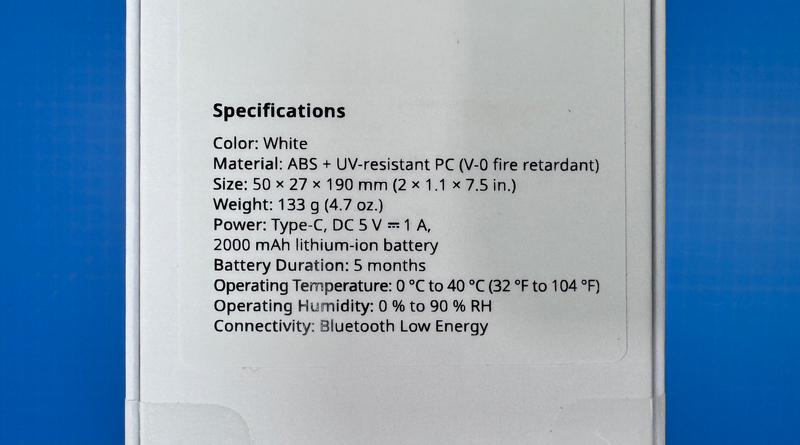
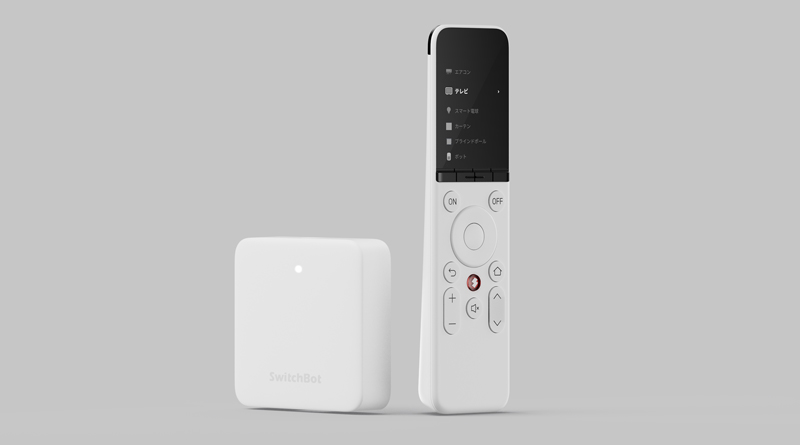
The back spells out the features pretty well, so it works with devices that typically use an infrared (IR) remote control, thus replacing said remotes. It also works with SwitchBot’s own devices, using Bluetooth, which is the communication method of choice for SwitchBot. It does state the remote is Matter compatible, although this is only the case once it’s connected to one of SwitchBot’s own Matter enabled bridges/hubs, of which there are two – the Hub 2, and the Hub Mini Matter. The fourth point stating ‘Start Quick Scenes’ also requires that the remote be connected one of their hubs, to both trigger scenes in the SwitchBot app, and other Matter platforms. The remote comes with a built-in lithium-on battery that offers up to 5 months of average use between charges.
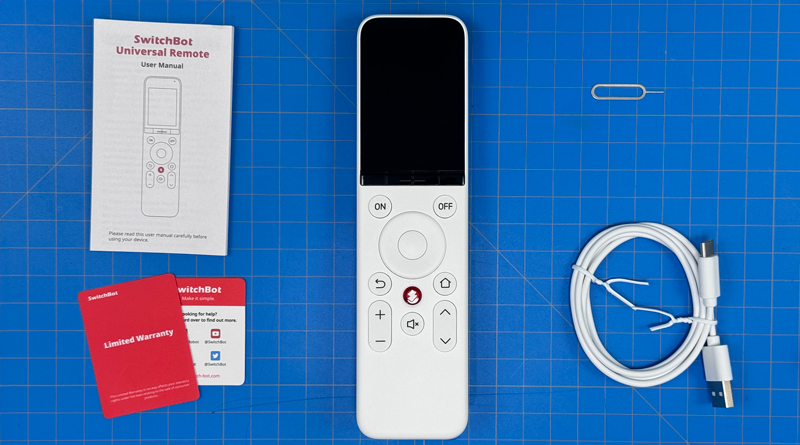
Aside from the admittedly lovely looking remote, you’re provided with a USB-A to USB-C cable for recharging the battery inside, a couple of warranty and social media cards, the instruction booklet, and a sim pin for resetting, as required.
Given that SwitchBot all are still clinging to Bluetooth, it comes as no real surprise that this remote would use that, even in the face of Thread’s increasing prominence. Ordinarily I’d deride such a choice, but given SwitchBot’s sizeable customer base, it doesn’t make sense to potentially abandon them for the sake of one device, so reluctantly, I can see why they opted to go down this route.
THE UNIVERSAL REMOTE
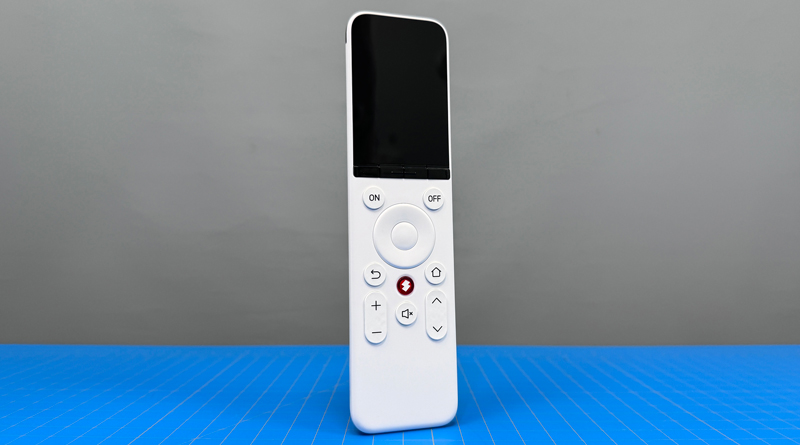
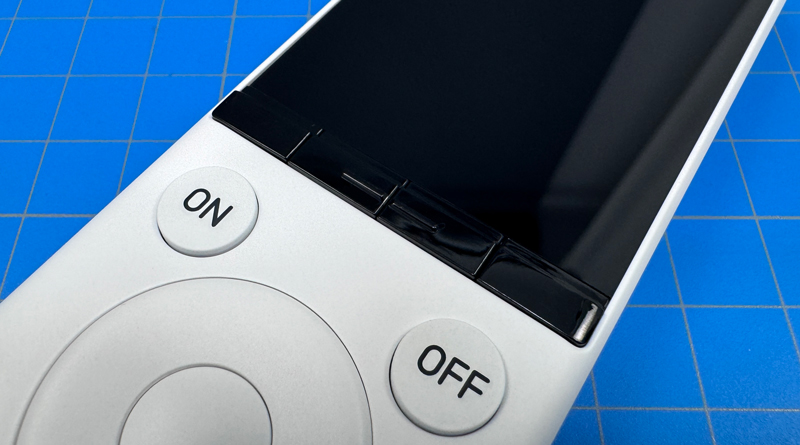
As a remote control, I personally like that it’s unencumbered with a ton of buttons, which is almost always the case with remotes for TVs, ACs, Blu-Ray players and the like. Of course, that could lead to some confusion for some, due to buttons taking on different functions depending on the device connected, but I found it generally intuitive. I’m not a pensioner (yet) though, so maybe my experience is a tad skewed. Still, the concept of a remote control is familiar to almost everyone I’d argue, and this should ‘slot in’ for most people.
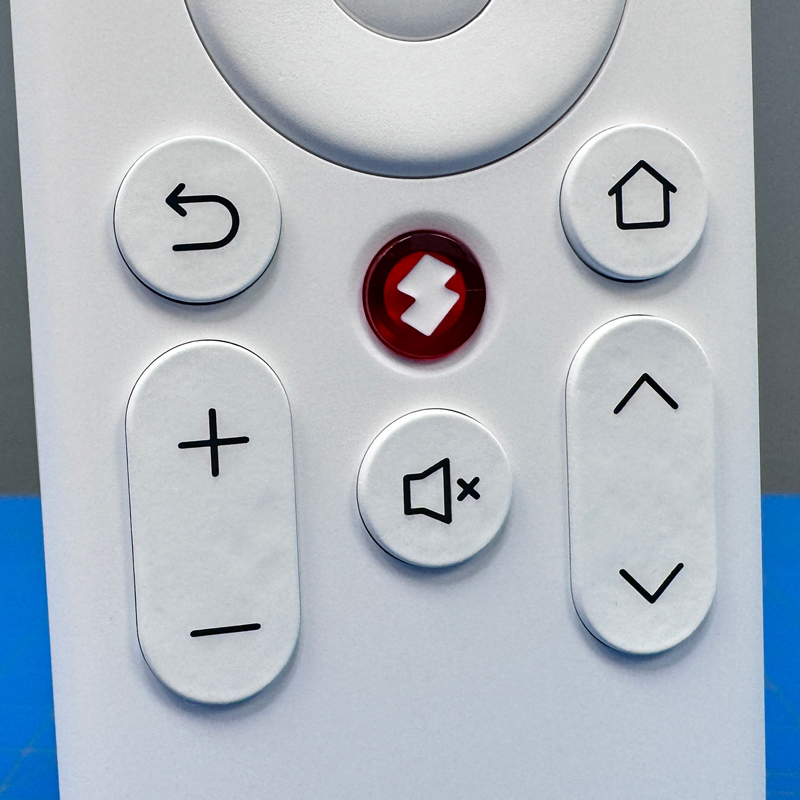
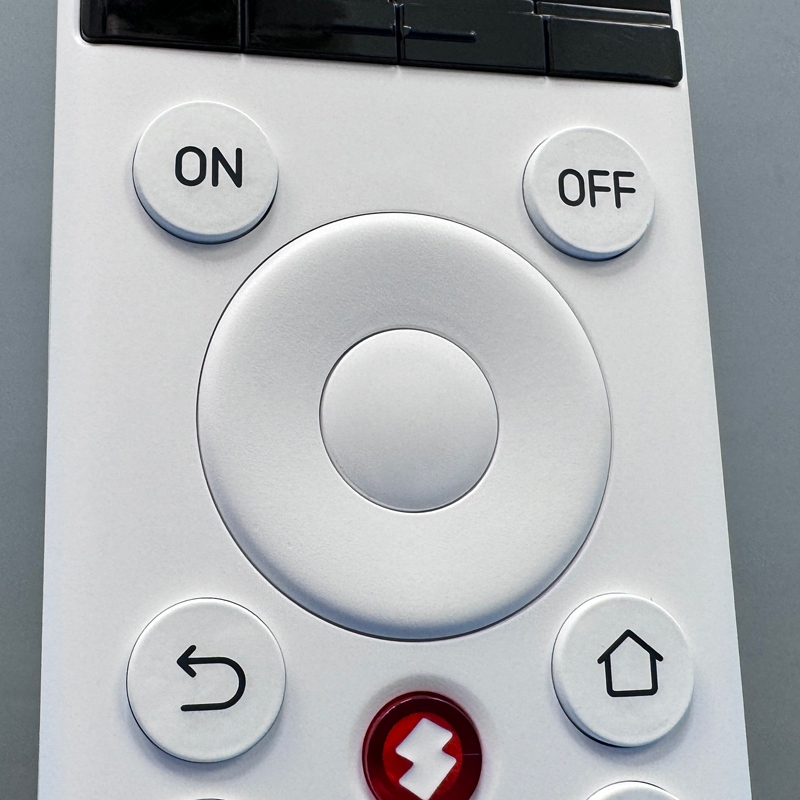
with almost half of the body being taken up with a screen, you’re left with a relatively small set of controls, but as already stated, the functionality of some of these change depending on what you’re controlling. When it comes to controlling a TV for example, you get the standard volume controls and mute button, as well as a channel button. There’s a ‘back’ button and a Home button, both of which have become more common on remotes. The one button that sticks out – literally – is the red button with a SwitchBot logo. This is for the remote only, and basically takes you back to the top menu of the remote, where all devices will be listed.
What’s less common for standard remotes is the jog wheel, which you’ll be more familiar with if you own an Apple TV, perhaps. This serves in the way you’d expect, but in certain circumstances, it also makes use of the typical up/down/left/right controls if you’re selecting something within a list or menu. There’s a ‘confirm’ or ‘select’ button in the centre, and above that are on and off buttons, that for a TV or AC, work as expected.
Above the array of standard buttons, but below the display, are four ‘shortcut’ buttons. These change what they offer based on what you’re controlling, which I’ll touch on in more details later.
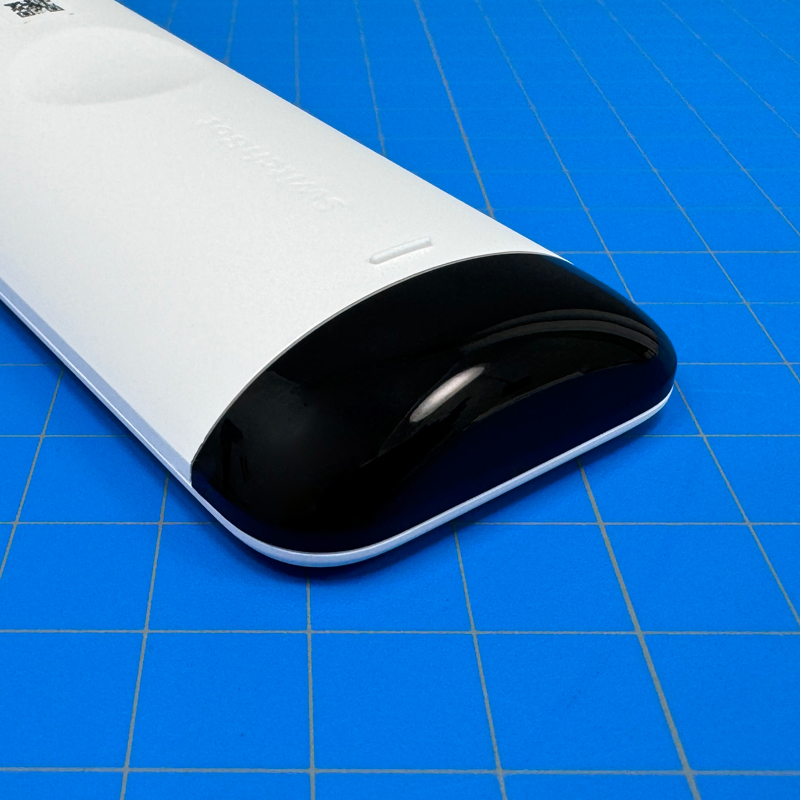
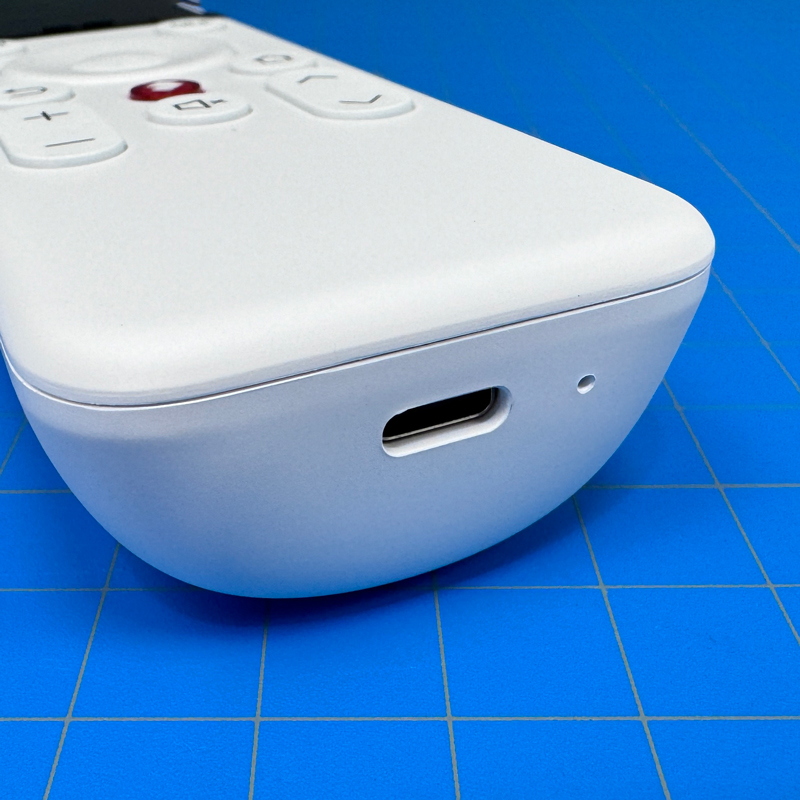
As the remote uses IR, you get the same transmitter window at the top/front of the device, so nothing different there. What is different to many other remotes, is the built-in lithium-ion battery, so you don’t use AA or AAA batteries like you would a normal remote. With this, you have a USB-C port for recharging the internal battery. Next to that is a pinhole to reset the device if necessary.
THE DISPLAY
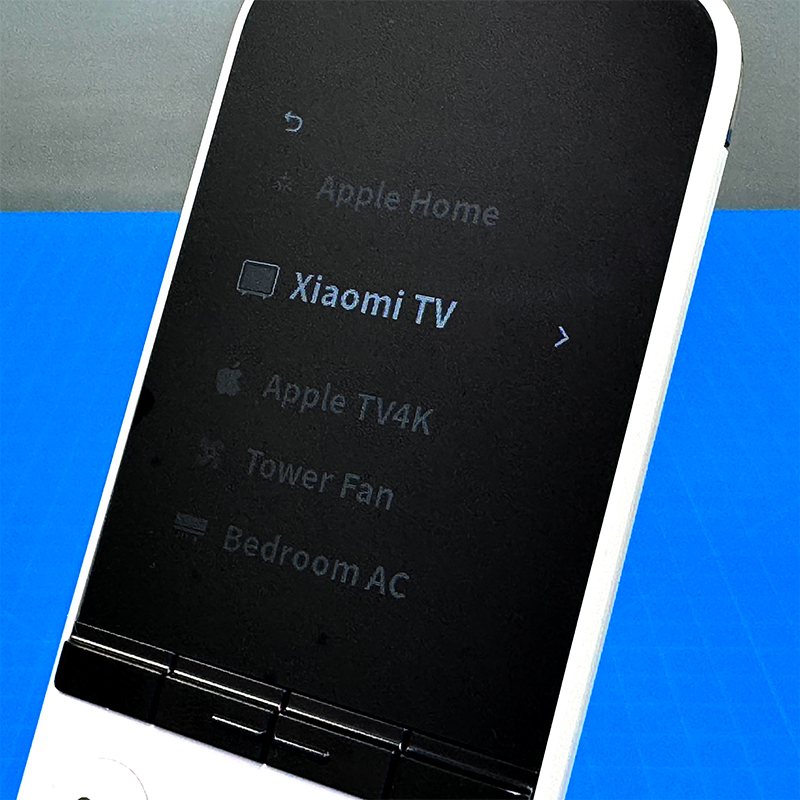
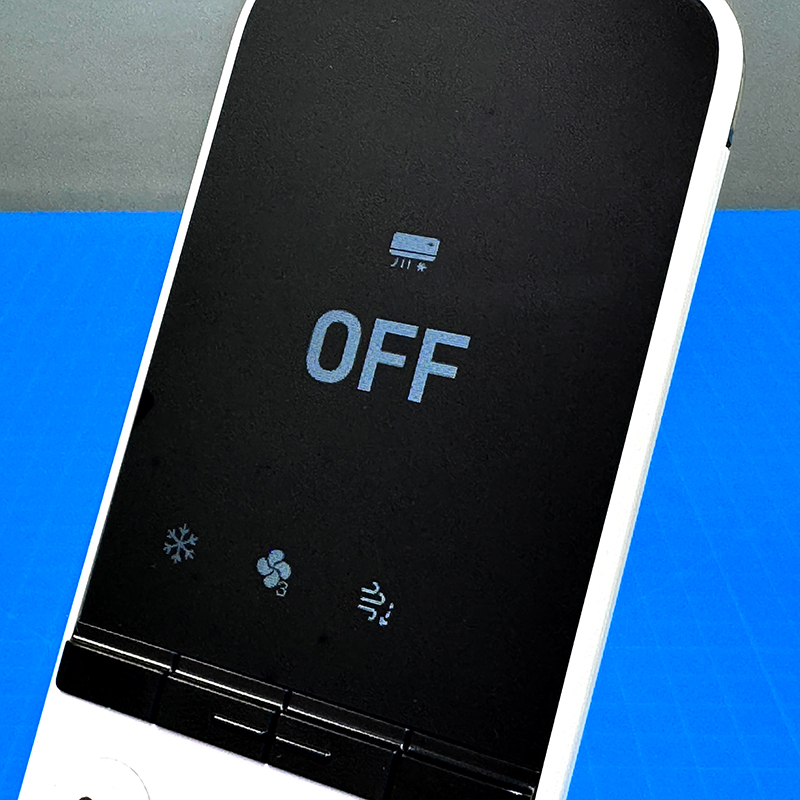
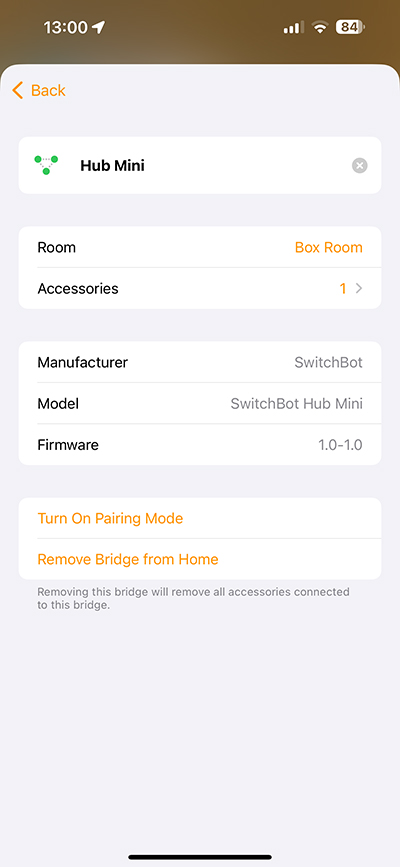
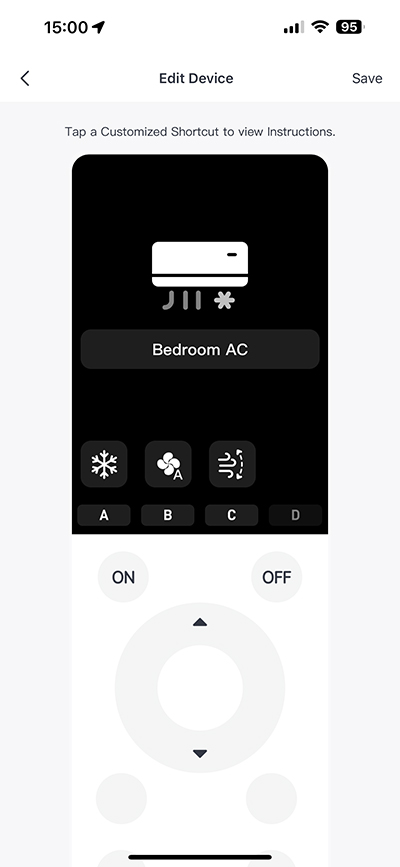
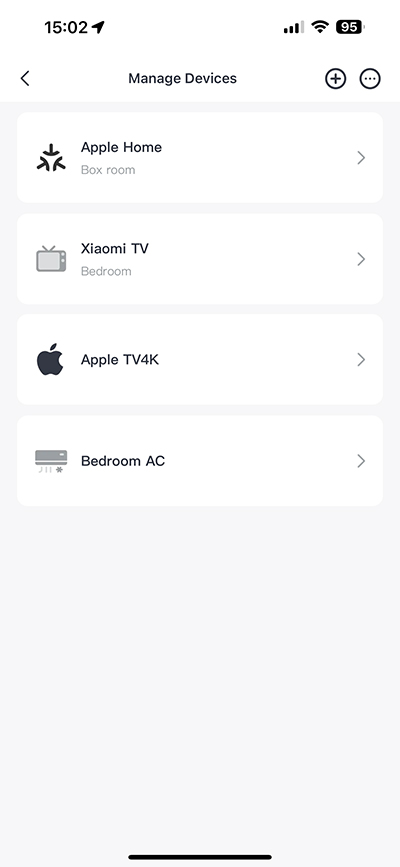
I’ve already added a few devices to the remote; my Xiaomi TV, an Apple TV4K, a Tower fan, and my bedroom AC. In addition, I’ve also added the remote to a SwitchBot hub Mini with Matter, and from there, exposed the remote to Apple Home, which then gives me the option to program four buttons, which I’ll go into later. Focusing on the AC control for now, and as you can see, there’s a large ‘OFF’ on the display, along with an AC icon. Below that, three of the four shortcut buttons have options assigned to them with the relevant icons. Pressing the main On or Off buttons on the remote will turn the AC on or off, so that’s pretty straightforward for most people to understand.
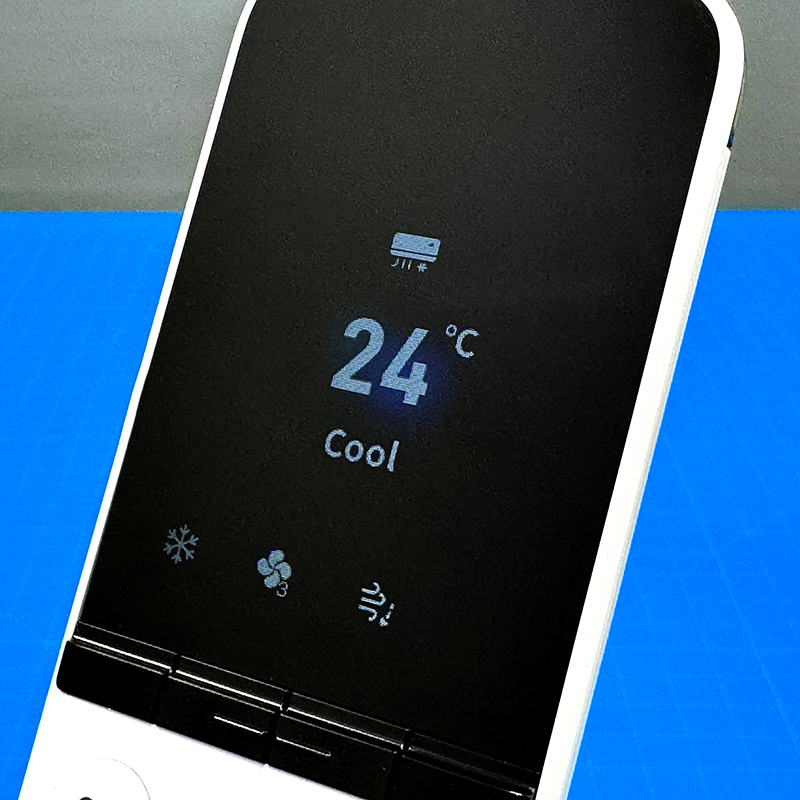
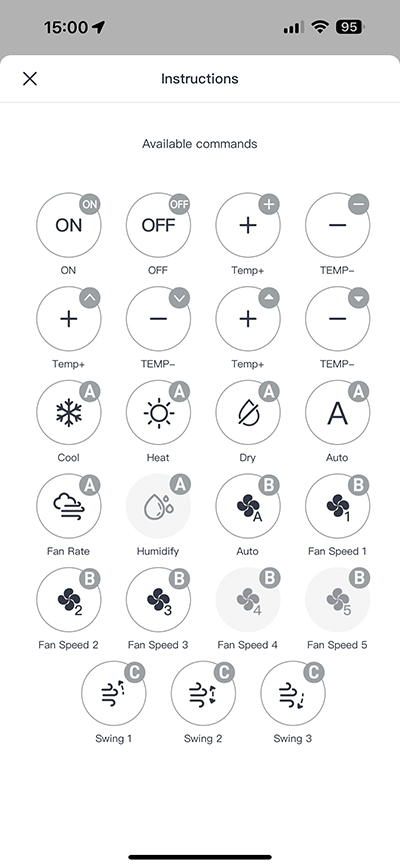
The first of the three shortcut button (the one with a snowflake icon) gives you access to the different AC modes – more in fact than you’d typically get in Apple Home. Home; Cool, Heat, Dry, Auto, Fan Rate.
The second button gives you access to the different fan speeds; Auto, Fan Speed 1, Fan Speed 2, Fan Speed 3.
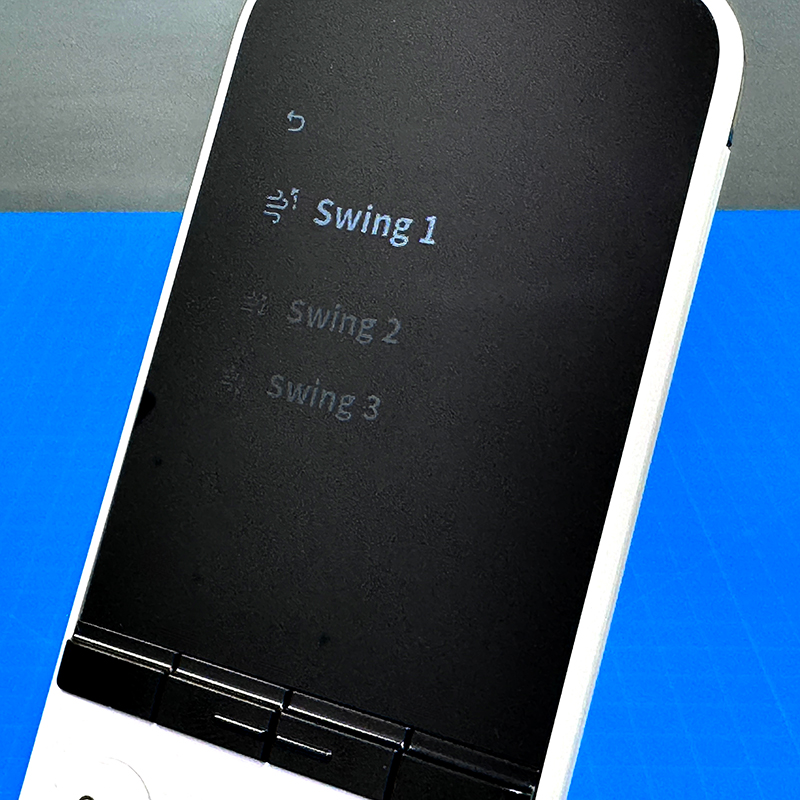
The third button allows control of the louver (not the famed Paris museum…), the blades that allow control of the directional flow of the cool/warm air from the AC.
It should be noted that the controls and options within each of these separate sections may well be different, depending on what type and model AC you have. Additionally, the sections assigned to the shortcut buttons are automatically set, and can’t be changed.
One rather important final note, and one that I’ve approached SwitchBot regarding, is that when you change any settings on the AC via the remote, they aren’t synced with the AC in either the SwitchBot app or Apple Home. This appears not to be an oversight, as SwitchBot told me AC control via the remote is entirely independent of any instance of the AC in other apps or ecosystems, and essentially works as intended. To me this is a major fail, as the one reason many people have smart AC controllers, ditching the existing remotes is for this very point – changes in the AC need to be reflected in your smart home when the changes are coming from a smart remote, or your smart home. I hope they reconsider this, as you may as well not use the remote for your AC if your smart home isn’t aware of the actual status of the AC.
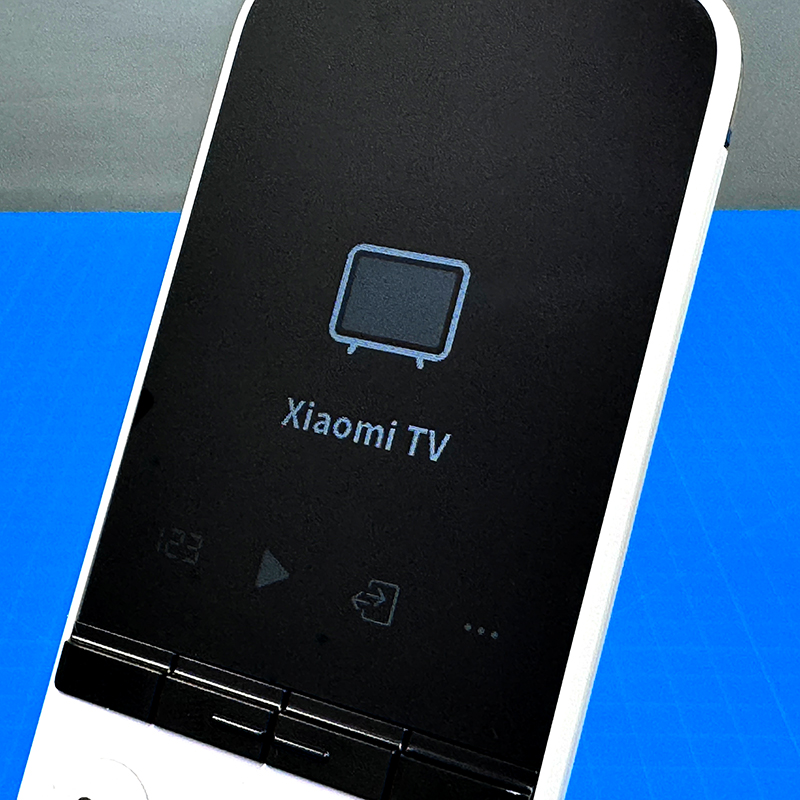
Quickly onto the TV control, and in my case things were a bit tricky for my Xiaomi TV, as the main remote it comes with actually uses Bluetooth. This meant that I couldn’t program the SwitchBot remote with the Xiaomi remote. However, the TV does receive IR controls, and so I was able to program some basic instructions, but in a really circuitous way, as I’ll describe on the off chance that someone else might have a similar issue.
I have many Aqara hubs, one of which is the P3 AC companion. For whatever reason, I was able to create a remote within the Aqara app using the P3 as the remote for my Xiaomi TV. I then had to teach the remote’s basic instructions to the SwitchBot Hub Mini with Matter. This involved having the Hub Mini receive IR signals from my P3 in order to learn them. I then transferred the set of Xiaomi remote controls from the Hub Mini to the Switchbot remote, which thankfully was easy enough, and done all via the Switchbot app.
Incidentally, the screen is capable of colour, but it’s used quite sparingly for some reason.
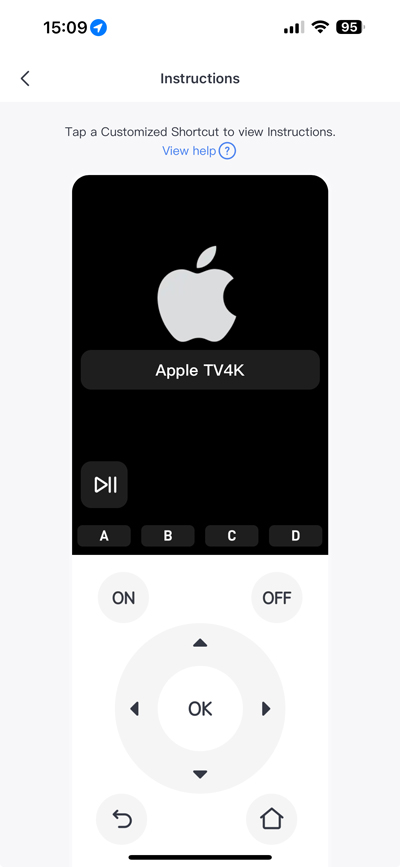
Regarding Apple TV control, you simply have to go into the settings for your Apple TV, and add the Switchbot remote as a third-party remote control, which is something Apple TV has offered for a while now, so in this respect it’s nothing new. Having said that, controlling your Apple TV from the remote is via Bluetooth, not IR, so there are some differences at play here. What you’re missing that exists on the standard Apple TV remote is the option to invoke Siri. That option isn’t going to be coming to this remote any time soon, even if it had a built-in mic, which it does not.
All the controls work in much the same way they do on the original Apple TV remote, so it should immediately be familiar, even if the buttons are in slightly different places.
IN APPLE HOME
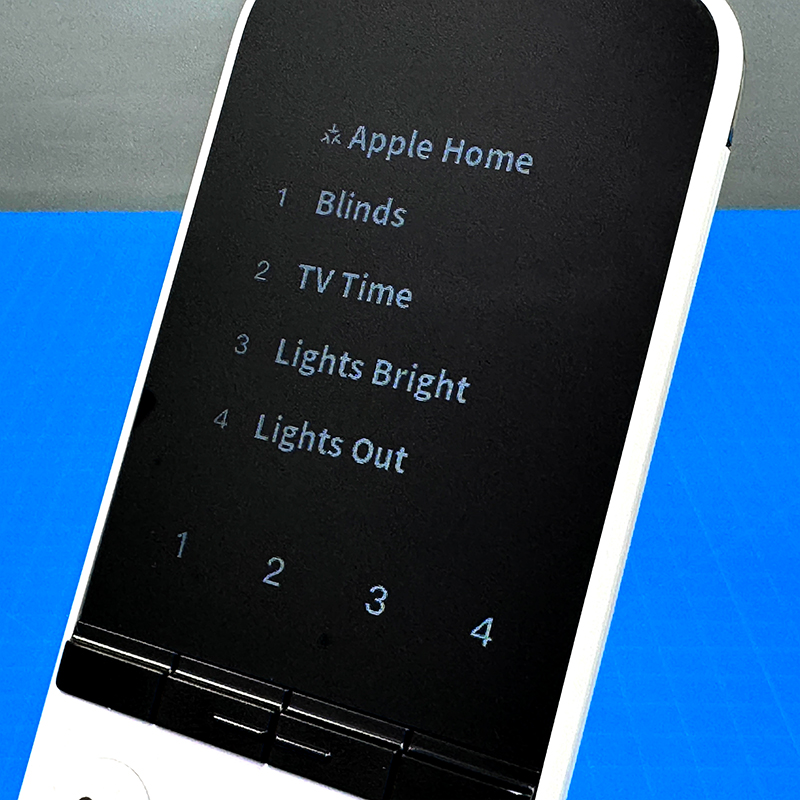
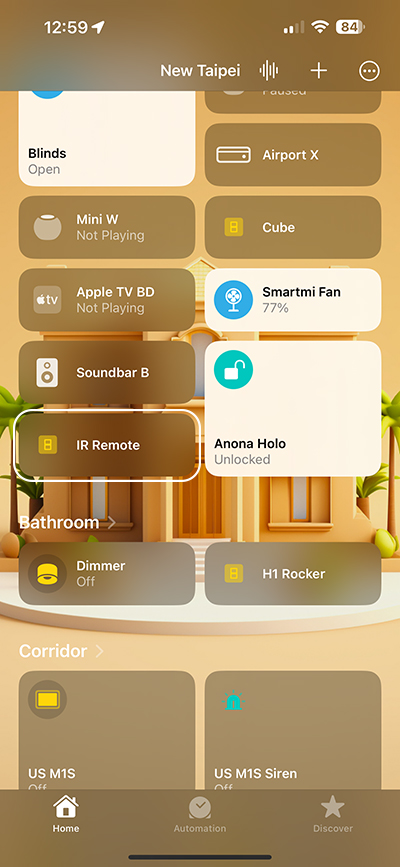
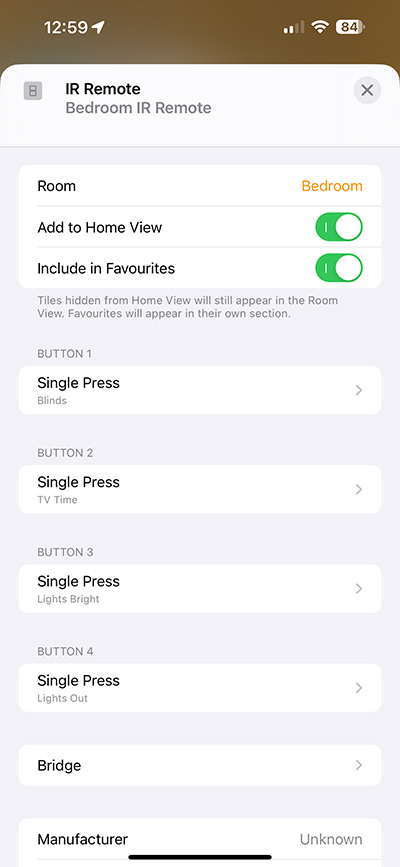
If you want to use the four shortcut buttons on the remote to control scenes or devices in Apple Home, you will need to connect the hub to one their Matter bridges. Once that’s done, you’ll be presented with a single tile (shown as a button). Tapping on it reveals four programmable buttons, much like any smart button in HomeKit. However, unlike most smart buttons, you’re only getting a single press action out of each one. Regardless of this, as I mentioned in my video for this product, as for the Apple Home/Matter integration, it makes the remote a glorified smart button, to an extent. That could be seen as a little unfair, as smart buttons can’t do the things the remote can do, all in one package, but if you were purely looking at this to control scenes in Apple Home, that’s pretty much what it is. For buttons #2, #3, and #4, I’ve simply used previously created scenes, but for button #1, I decided to try something slightly more useful.
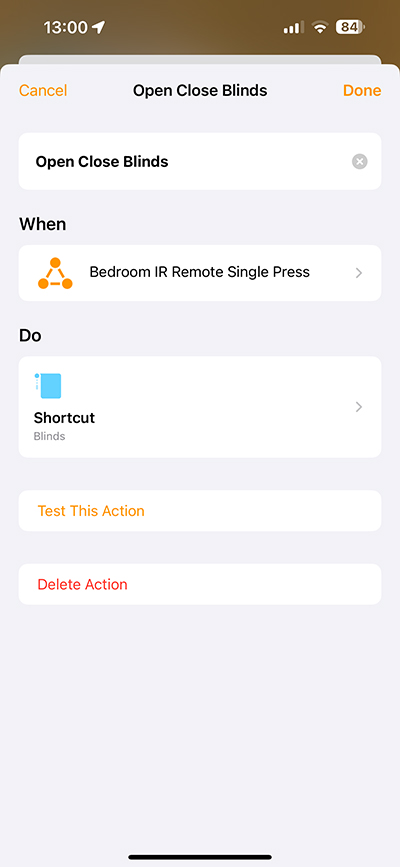
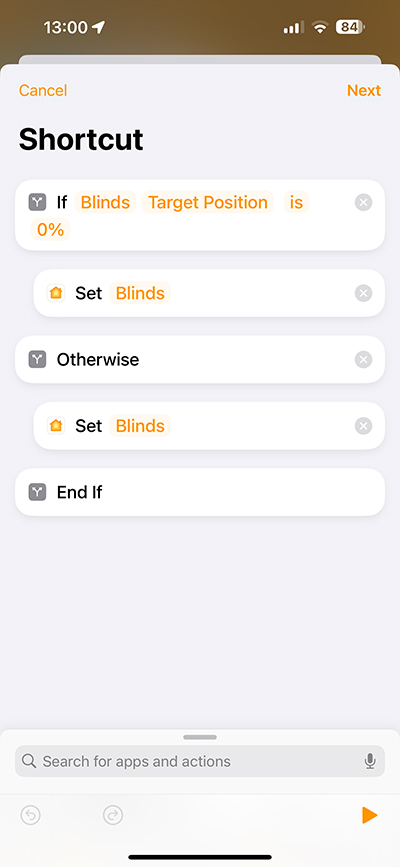
I wanted to be able to control my blinds with the one button, and so I used the ‘Convert to Shortcut’ option that allowed me to press button #1 to close or open the blinds. It’s very simple, so all I’m doing is when the button on the remote is pressed, it checks to see if the target position is 0% (or closed), and if so, it’ll set the blinds to be fully open, otherwise set the blinds to fully closed. Of course programming the button for different open/closed percentages isn’t possible without a lot more trickery, but it does what I need, all within one button press.
THE SWITCHBOT APP
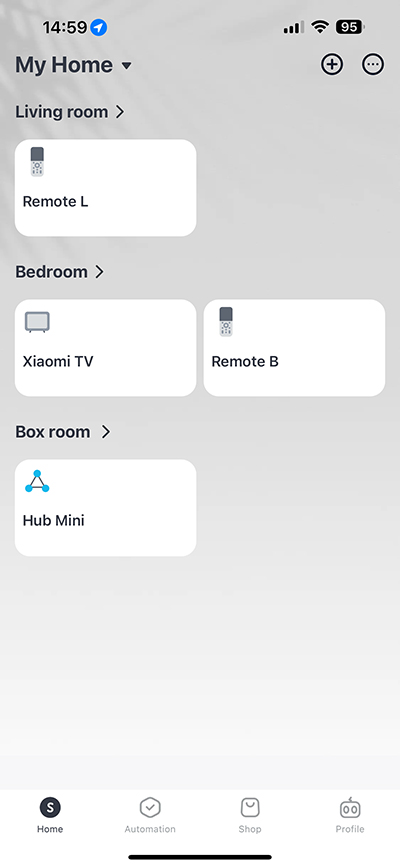
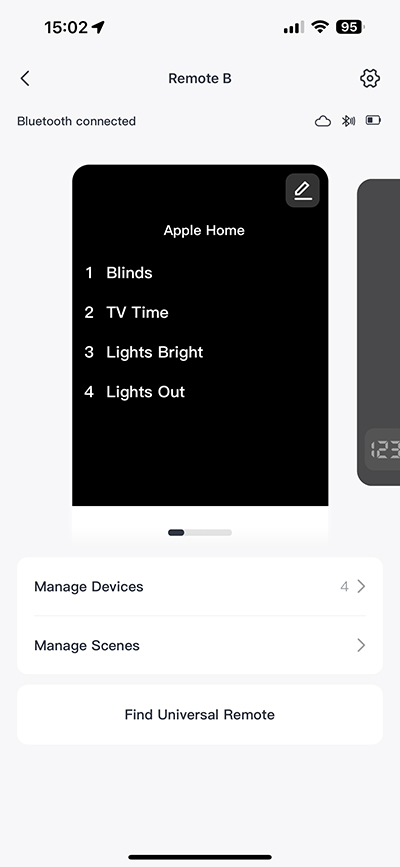
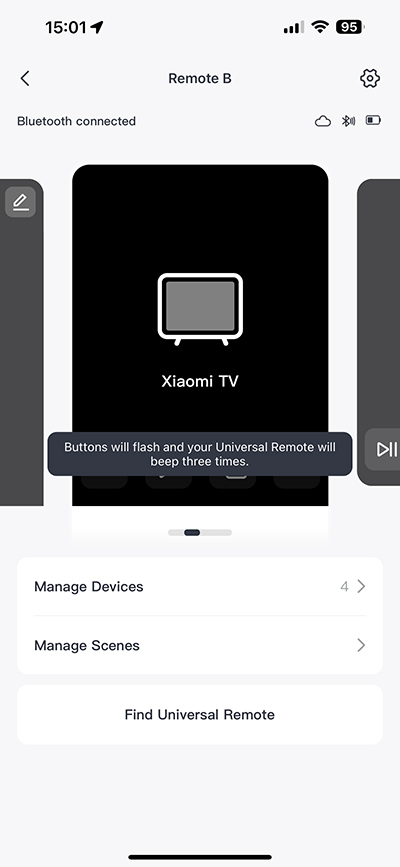
In the SwitchBot app, you can see I have two remotes, although only one is really in use at present. Tapping on the tile for ‘Remote B’ brings up individual panels, each representing a device the remote is able to control. If I tap on one of these, it’ll open up a screen that’s essentially a replication of the remote itself. This allows you to tap on any of the buttons, and see what options are tied to those buttons. In most cases these can’t be changed, however, but it does give you an idea of how these buttons and the controls their assigned to actually work.
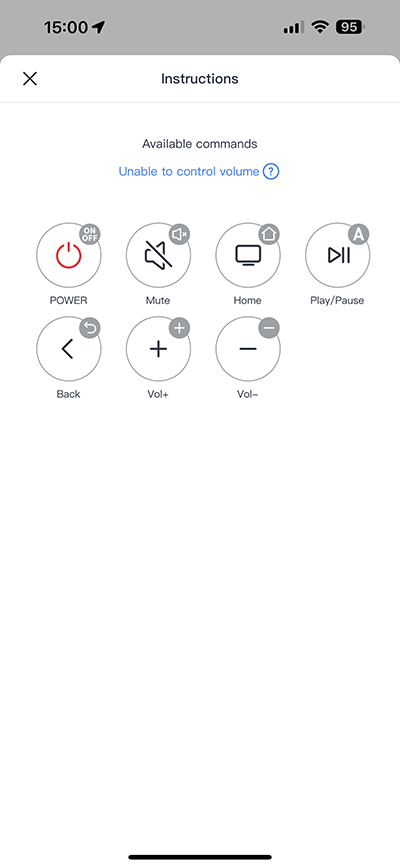
When it comes to Apple TV, you don’t get a lot of options, and in fact, volume control isn’t available here. This is usually because the original Apple remote takes on the role of controlling the volume on your TV whilst setting it up. In my case, I have a soundbar that is both capable of AirPlay, but is also directly connected to my TV, so I’d have to separately set up the soundbar in the remote, which is less than ideal.
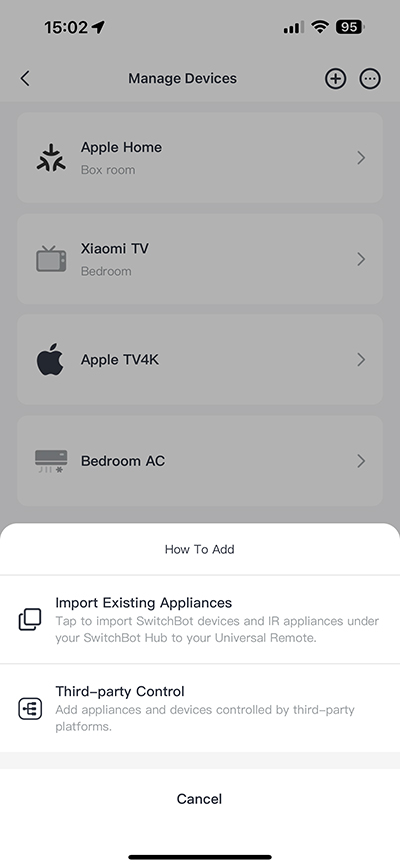
Device management has changed a bit since I did my video review for this product. In fact, it has changed twice! Originally, the ‘How to Add’ section had three options – Import Existing Appliances, Manually Add, and Third-party Control. Now as you can see, that’s currently down to two for some reason, so currently, you can only add a device that has first been set up via one of their hubs. This is not good, as originally the missing option allowed you to add a device without the need for a hub (although you wouldn’t get Matter integration). Between the first update that I featured in the video, and the current update, they did expand on the amount of categories you could add directly to the remote, although I can no longer show you that, until they presumably add it in a future update.
One final feature to mention is ‘Find Universal Remote’, which once pressed, gets the remote to play a beep sound for a couple of seconds, allowing you to dig it up from the back of your sofa, for example. The buttons and display also flash briefly. You can achieve something similar with the Apple TV remote, but it would require the use of an Apple AirTag, and a specially designed case to hold both the remote and the AirTag, so not quite as good I guess.
IN DAY-TO-DAY USE
I was initially quite excited about this, and it probably shows that in the video. Having since lived with it for a couple of months, it hasn’t lost any of its sheen in many ways, but the limitations have slowly surfaced, meaning there is a lot of room for improvement. I think the design and simplicity of the remote is great, and it really does well with the minimal amount of buttons compared to a standard remote in most cases too. Where it falls down is with the previously mentioned lack of syncing the AC state with the app and/or Apple Home. I like the idea of the four shortcut buttons that are exposed to Apple Home, and even though they’re single press, I’m not sure what else could be achieved in this sense. It’s also fair to say that whilst you can compare it to 4-button smart control device, those devices can’t also control your TV, fan, AC and more, so it is a bit more than that.
I just wish SwitchBot would bite the bullet and move to Thread. It’s well overdue in my opinion, and if this were to use Matter over Thread (if that’s actually possible), this could be a real killer device. As it stands at the time of writing, the latest update has fixed some issues I encountered early on; no Apple TV control at launch, with the second update, introducing several bugs, one of which was the inability to rename the shortcut buttons. Now with the latest update – V2.6 – there seems to be no option to add devices directly to the remote, which is insane really. Hopefully that will be fixed soon, but I do see some people being less than happy with some of the limitations. For me, being a constantly curious smart home enthusiast, I just muddle on and make the best of it!
The post SwitchBot Universal Remote (review) appeared first on Homekit News and Reviews.