
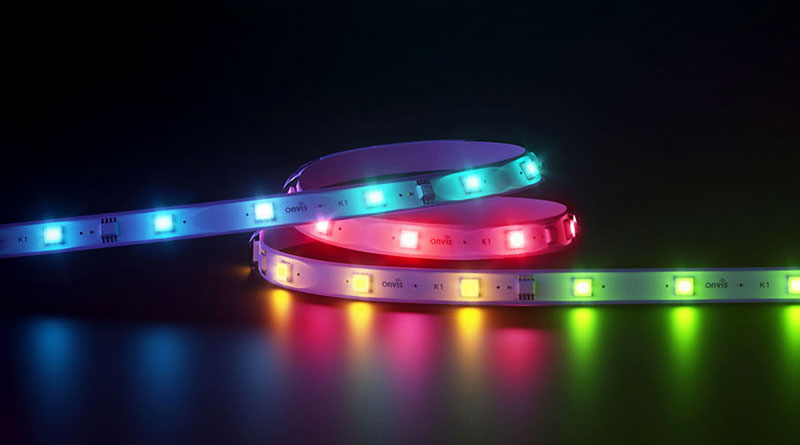
There’s one thing that has been a constant with Light strips, to an almost universal extent, which is generally that whilst they’re capable of up to the ubiquitous number of 16 million colours, they only do one colour at a time. There are two examples where this is not the case, one being the LiFX Z Strip, and the other, LifeSmart’s Cololight Strip, although both have some limitations. Joining these rarified ranks is the Onvis Kameleon Light Strip (K1), which does the same as the other two, but just might be a better bang for your buck, as well as adding a few extras into the bargain. If this is something that interests you, read on.
PACKAGING
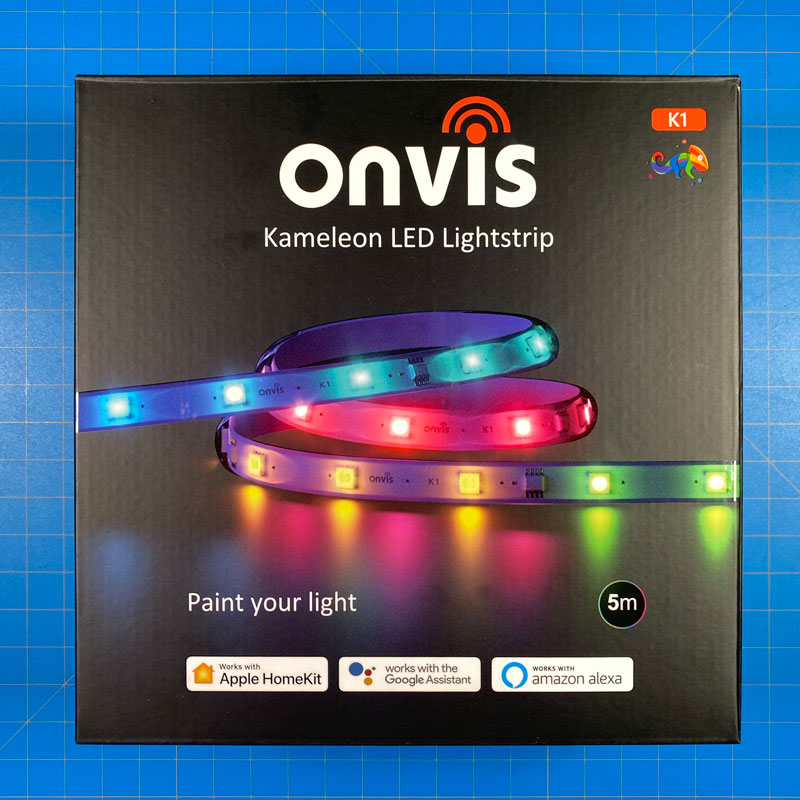

Much of the time you see the packaging for light strips showing a multitude of colours on one strip, which is far from the reality of most of what they’re able to achieve. Not so with what you see on the packaging here, which is WYSIWYG* for once. There’s nothing else to talk about in terms of the front other than the fact it reveals its compatibility options (Apple HomeKit, Google Assistant, and Amazon Alexa), although the slogan ‘Paint your light’ gives you further clues as to the strip’s multicolour capabilities. Both the 2m and 5m version of the strip is basically the same, save for a couple of details relating to the relevant strip lengths and the power they consume.
*What You See is What You Get
Specifications (2m/5m):
- Model: K1
- LED: 5050 RGB, total 60 pcs/150 pcs (individual LEDs)
- Lighting unit: 20/50 units
- Beam angle: 120º
- Length of light strip: 2m/5m
- Life cycle: 20,000 hrs
- Adaptor input: 110~240v AC, Max 1.2A, 50-60Hz
- Adaptor output: 12v 1A/2A
- Water resistance: IP65 (light strip ONLY)
- WiFi: 802.11 b/g/n, 2.4GHz
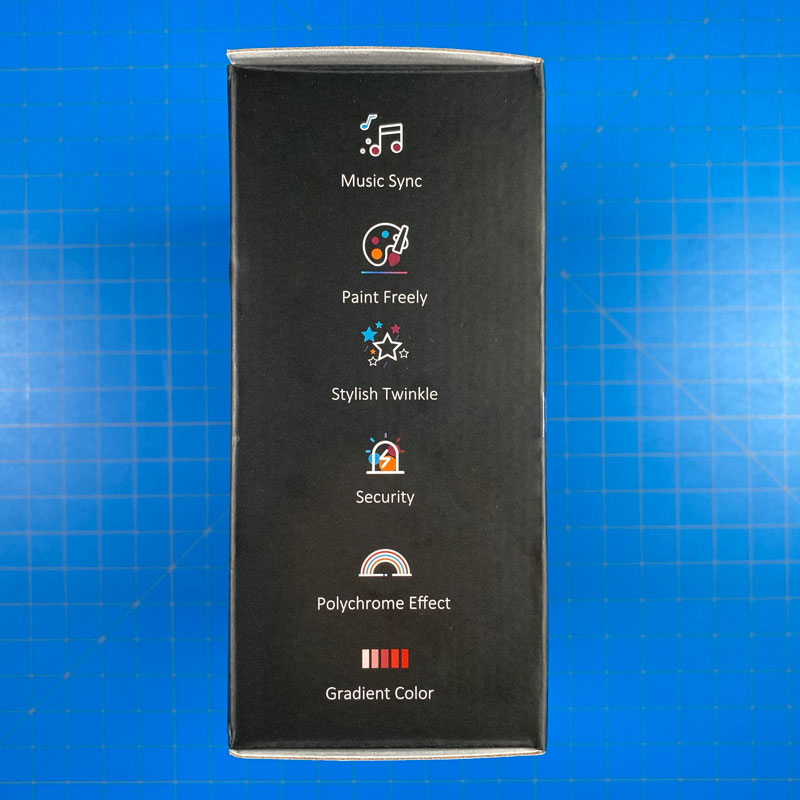
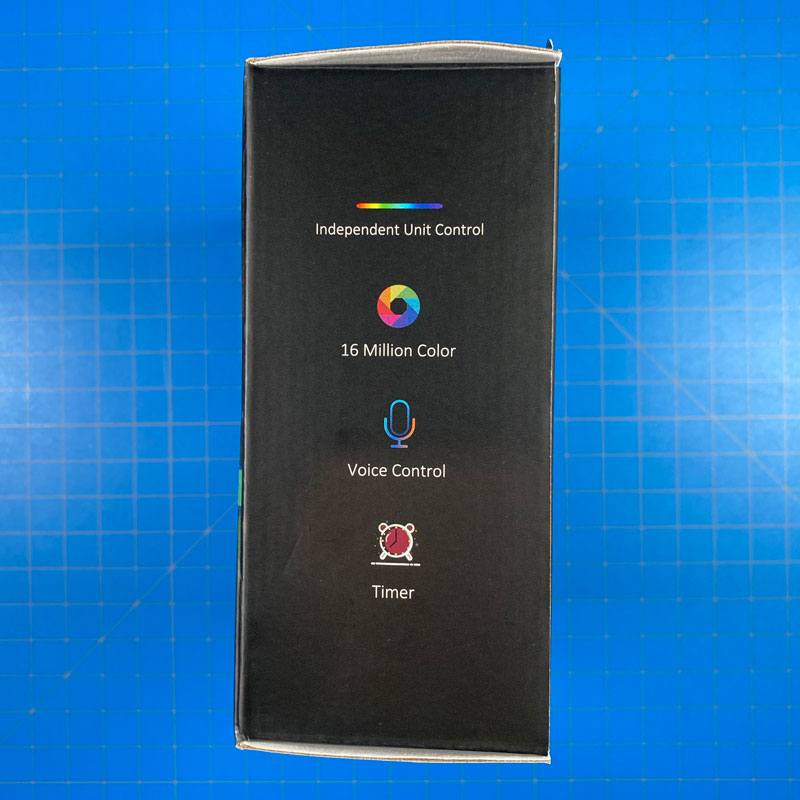
If you were in any doubt about its aforementioned capabilities, then the sides of the box spell it out, with phrases like ‘Polychrome effect’, ‘paint freely’, and ‘independent unit control’ listed alongside the usual suspects. We’ll get into these details later.
CONTENTS

We’re focussing on the 2m version in this review, but aside from the length of the two options, there’s nothing to distinguish the two in terms of usage.
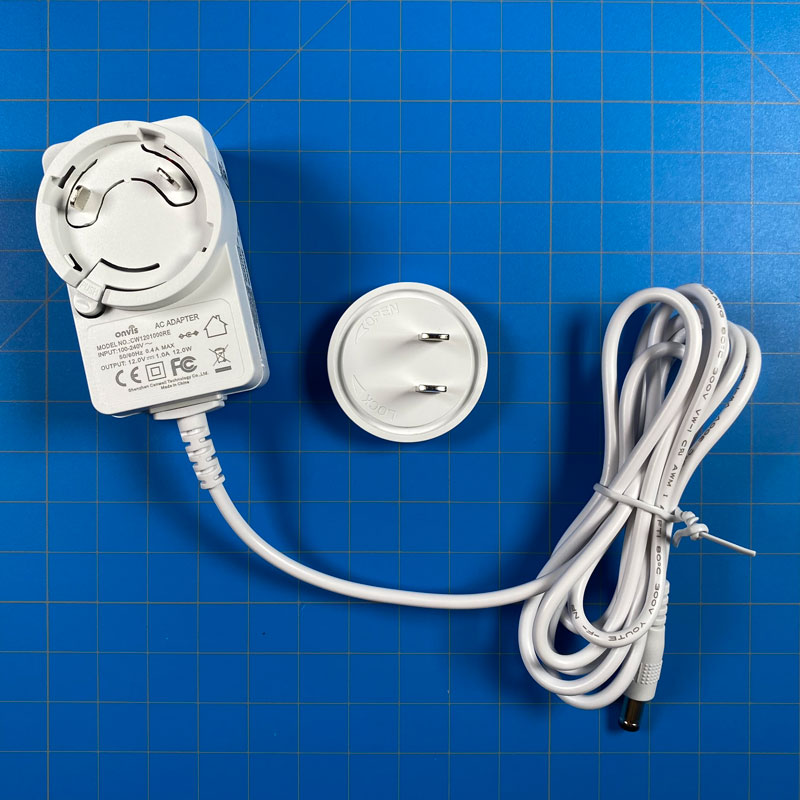
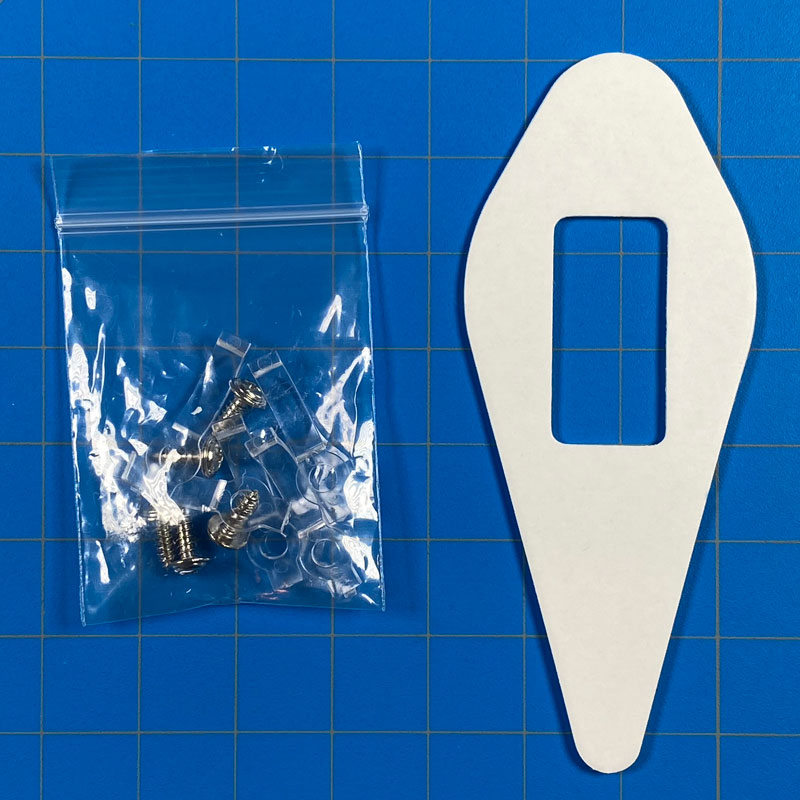
In the box, you get the all-important power supply, with a ‘clip-in’ adaptor for your region, a spare double-sided adhesive patch for the controller, which already comes with an adhesive patch anyway, five clips and screws to affix the strip, although it already comes with standard adhesive backing, and finally the manual in a few different languages, as well as an instance of the HomeKit code.


The connector on the strip is a 3 pin affair, that connects to the corresponding connector on the power supply, which once connected to each other a securely held in place by screwing them together via a ‘gasket’.
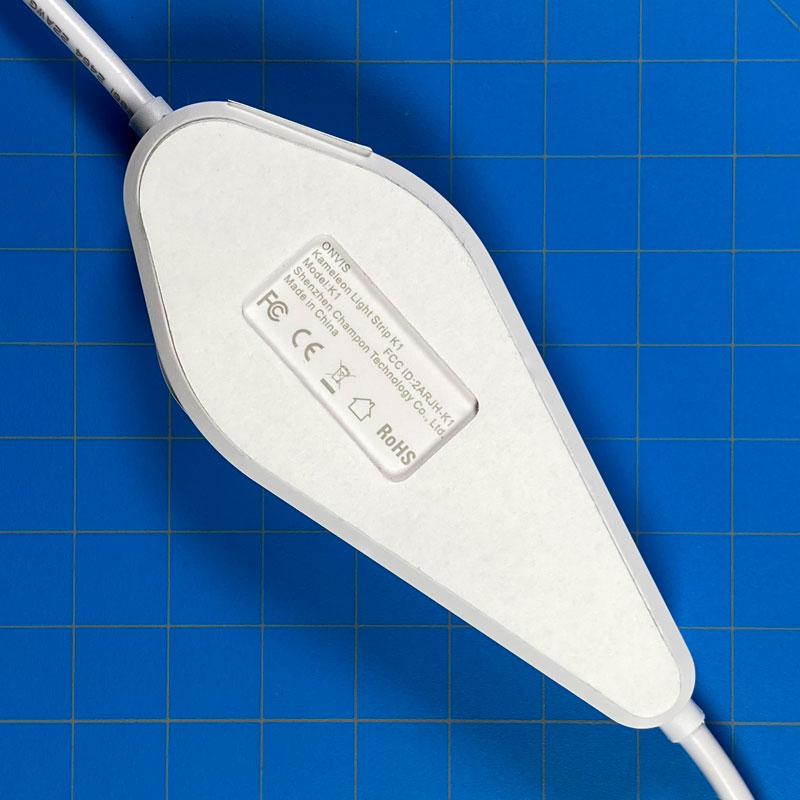
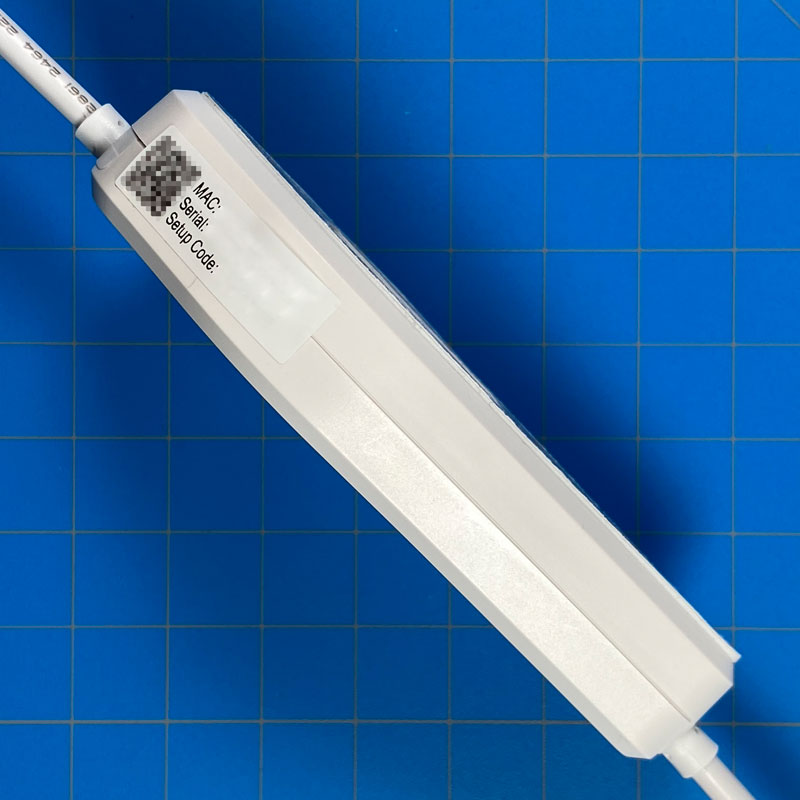
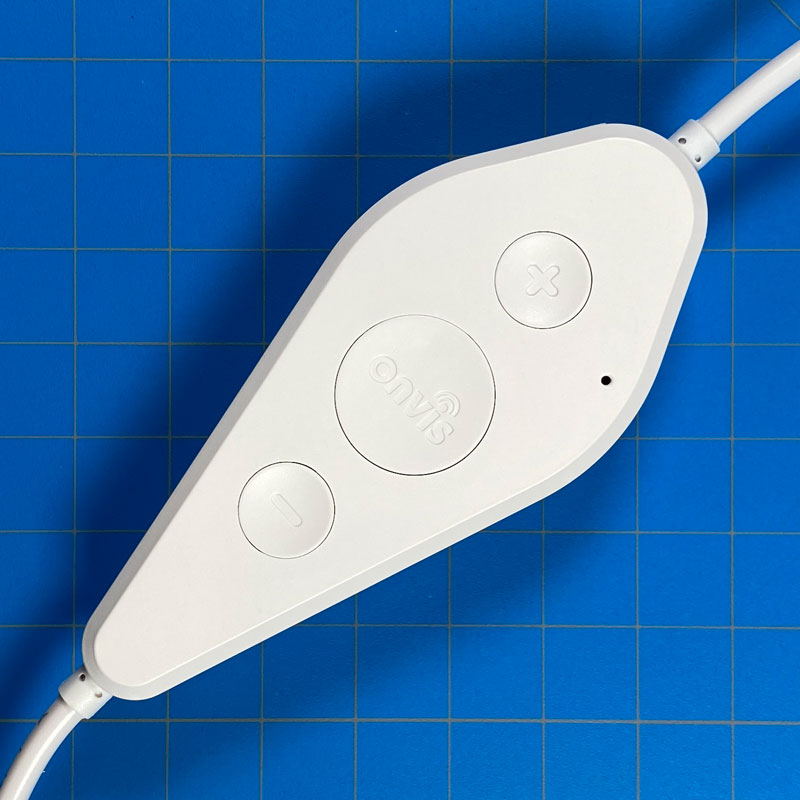
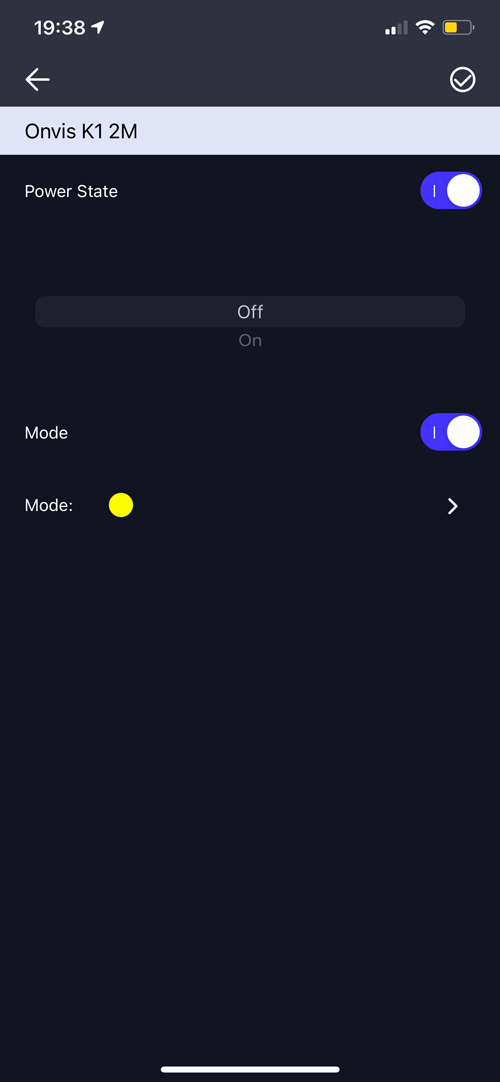
The controller, which comes in a weird sort of lozenge or ‘coffin’ type shape, has, as already mentioned, an adhesive backing, and nothing more. The side of the controller also features an instance of the HomeKit code. The front of the remote features three buttons, as well as a small home that houses a tiny microphone used for the ‘Music’ mode, which we’ll talk about later.
Ostensibly, the buttons on the remote simply act as power supply (middle) with the plus and minus buttons used to control the brightness of the strip, however, there’s a lot more to these buttons than you’d think. More on that later too.
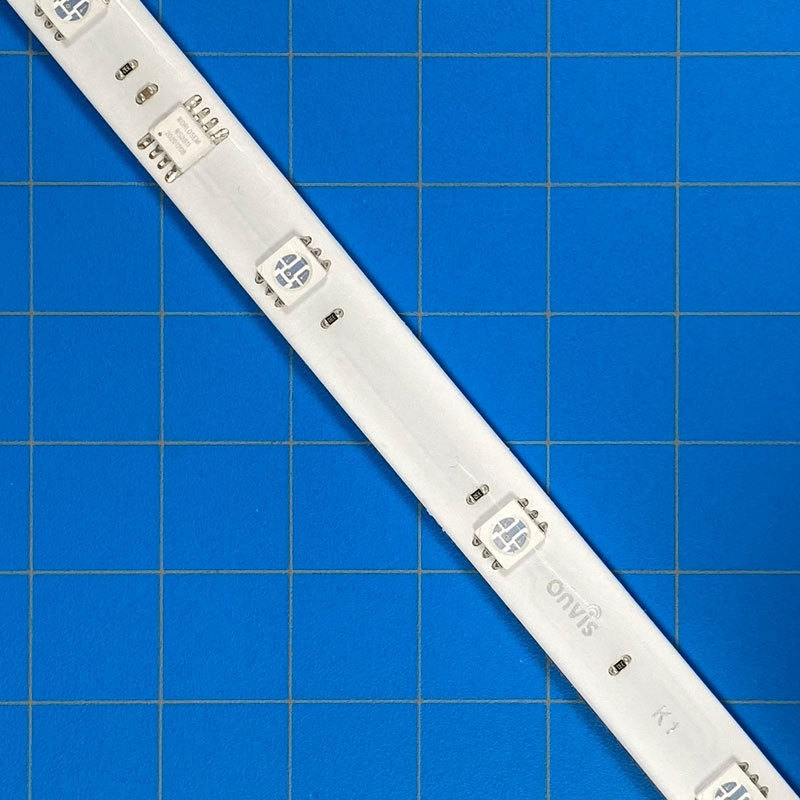
The strip seems fairly standard at first glance, although for every three LEDs you also get a separate chip that performs all the multicolour magic that the K1 is capable of.
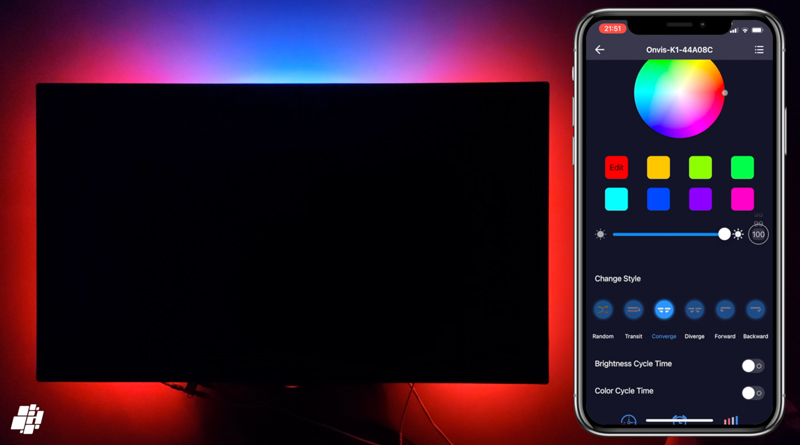
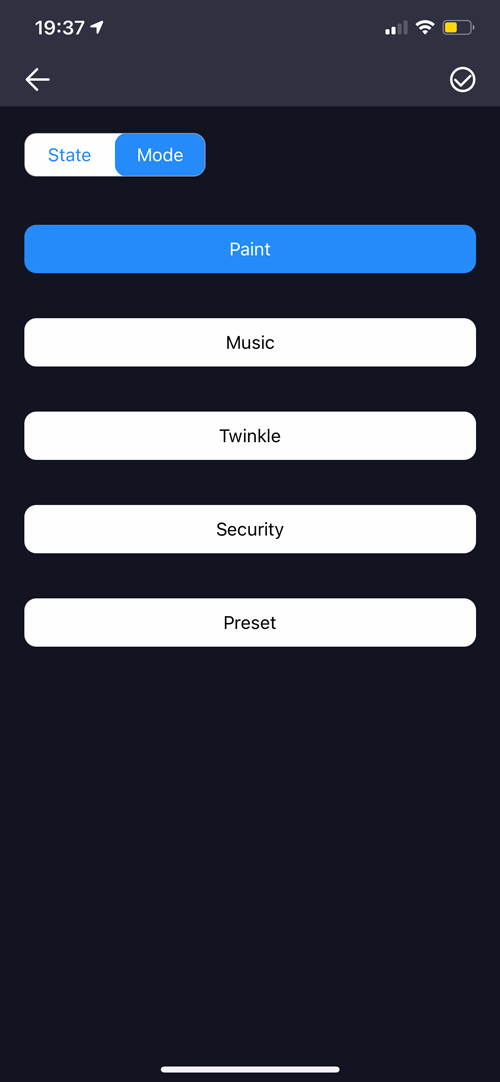
THE STRIP’S CAPABILITIES – BASIC MODE
At its heart, this can be a standard strip capable of single solid colours for the whole strip, but even then, Onvis has managed to make even this staple a bit more interesting.
![]()
![]()
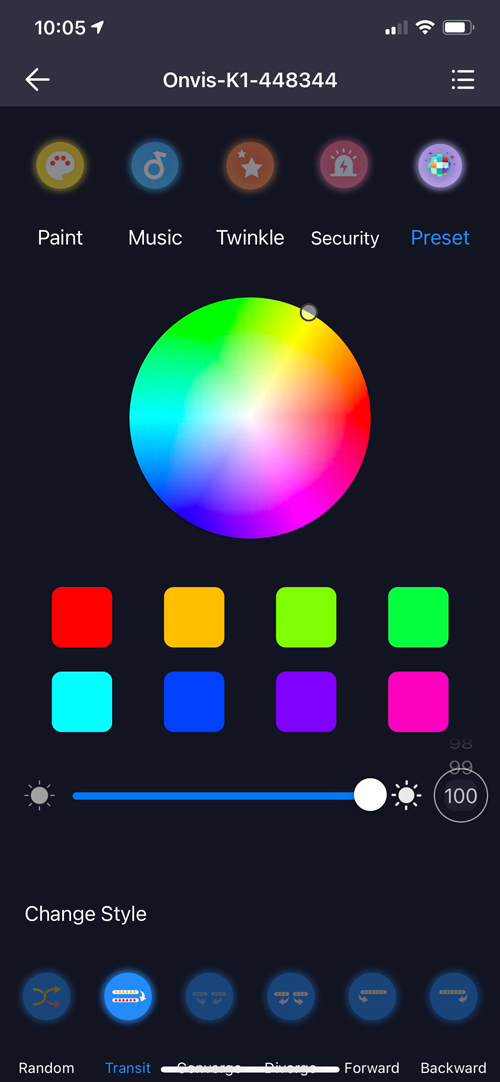
In the basic colour mode, you can set the way the strip transitions from one colour to the next, with five different options, plus a Random option that uses a mixture of the five aforementioned transitions. The transitions start off with…
- Transit – which simple smoothly blending from one colour to the other.
- Converge – which brings the change of colour from both edges of the light strip to the centre
- Diverge – does the same as Converge but goes in the opposite direction, from the centre to the ends of the strip
- Foward – starts from one end of the strip, transitioning to the other end of the strip in one linear direction
- Backward – does the same as forward, but in the opposite direction
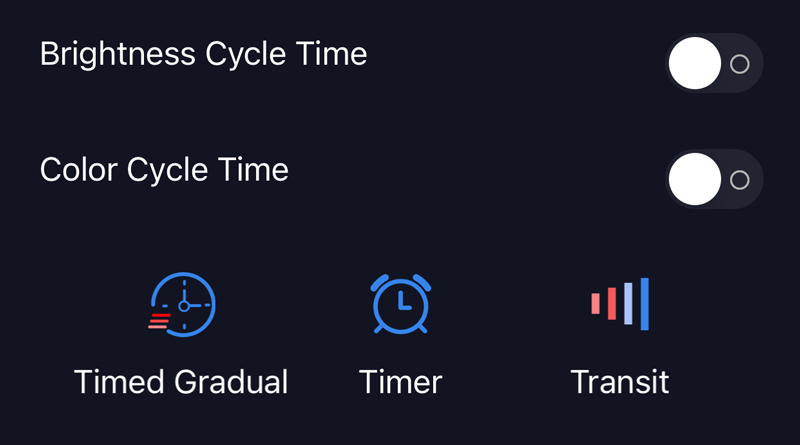
Also in this main section, you have a few options to further control transitions.
- Brightness Cycle Time allows for the strip to go from zero to 100% brightness in a loop at speeds from 1 to 12, with 12 being the slowest transition.
- Colour Cycle Time allows for transitioning between the eight set colours (which you can change), and allow the adjustment of speed of the transition between colours.

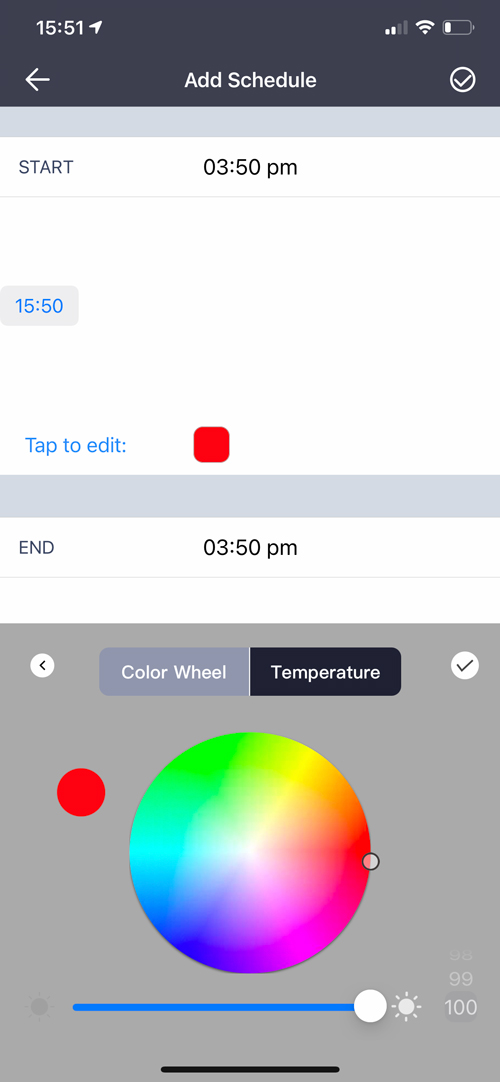
- Timed Gradual Allow you to set a time for the strip to come on, at a specific colour, and transition to another colour or colour temperature, based on a target time. So, you can have the strip turn on a 7.30am set to orange at 10% brightness, and have it transition to natural white at 100% by the time it gets to 8.30am.

- Timer allows the user to set an on and off time for the strip, either in a static colour state, or any one of the special modes that are available.
![]()
![]()
- Transit is in some ways like Timed Gradual, although in the case of Transit, you set a period of time for a given transition, as opposed to the time of day. In this way, it acts as a countdown timer, in effect.
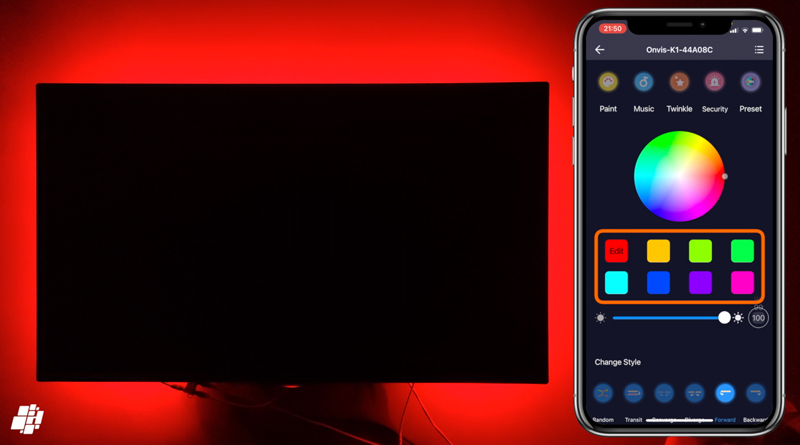
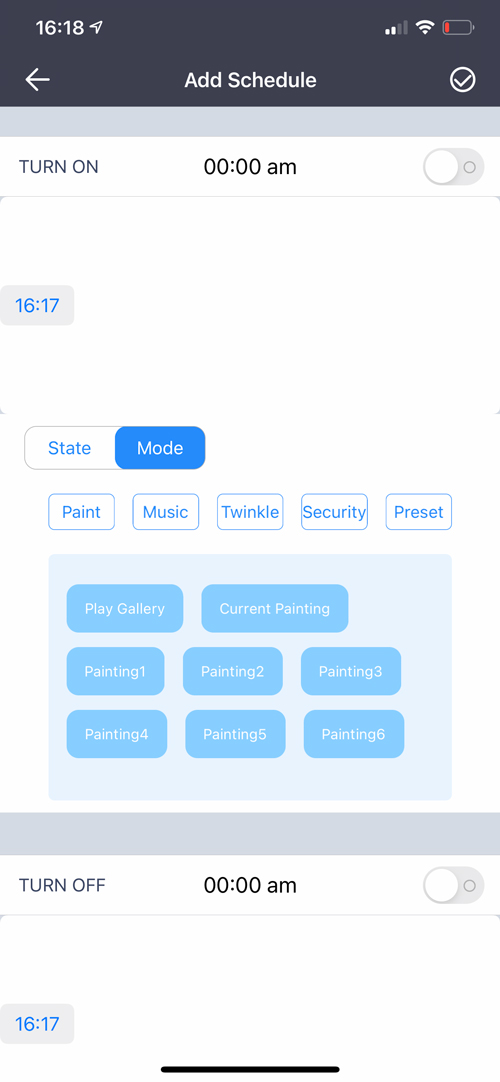
PAINT MODE
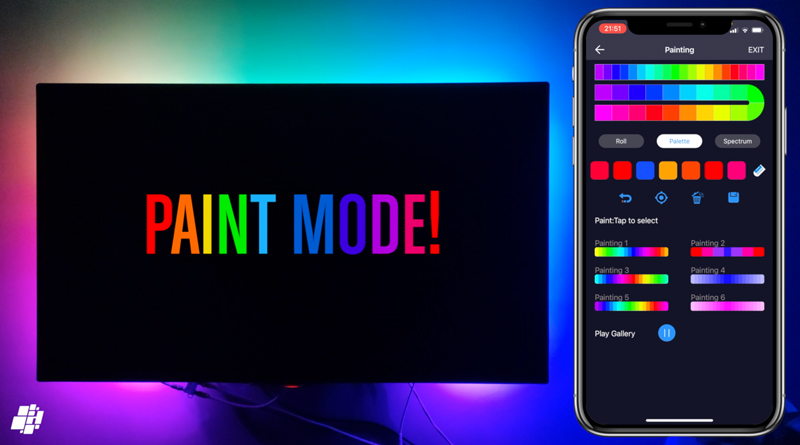
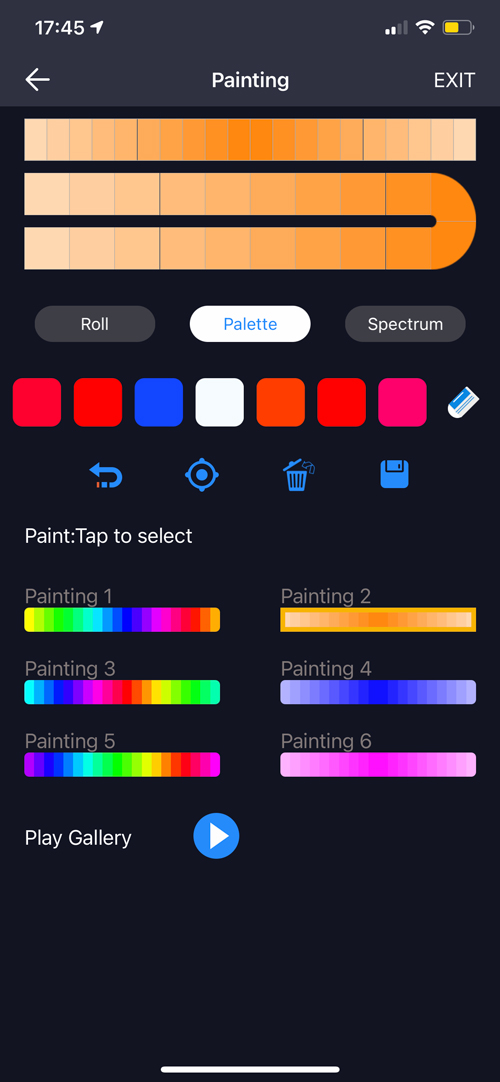

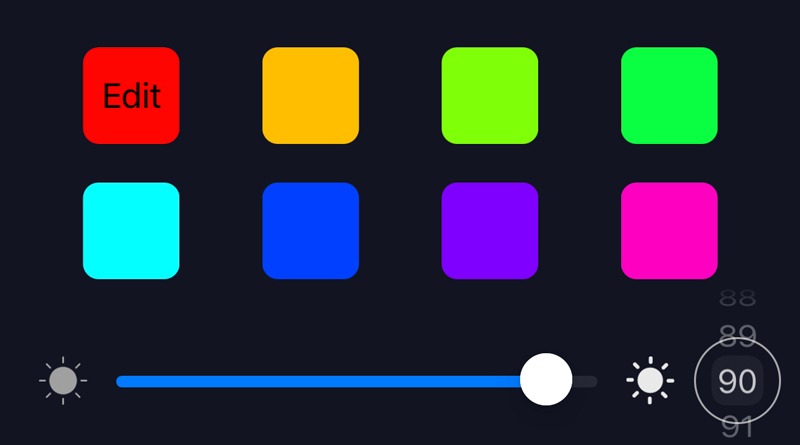
Paint mode is the star of the show for me, with the ability to ‘paint’ various colours onto the strip. As you can see in the first screenshot, the strip is represented in two ways at the top of the screen, with an overview of the strip first, and then a longer doubled up version that allows for easier selection of ‘units’. You can also see in the third screenshot that the second representation of the strip is longer, as it’s the 5m version.
- On the subject of Units, it should be noted that in the case of the 2m strip, it contains 60 individual LEDs, and each unit contains three LEDs. each ‘unit’ is capable of being a different colour, so doing the math, with a 2m strip, you get 20 units, hence 20 separate colours to use on one strip. for the 5m strip, that increases to 50 units, and 50 separate sections of colour.
To colour the strip, you select one of the colour boxes below the strip, and begin painting the sections with your finger, by simply tapping or sliding your finger along the strip overview. if you tap on one of the seven boxes when it’s already selected, you go into edit mode, so you can change the colour to something you prefer. The app allows for a total of six presets which you can overwrite with your own ‘creations’, although if you want to revert to the six presets that come with the app, that’s easy enough to do.
- Play Gallery allows you to cycle through all six of the presets, although I’m told whilst at present it only allows you to cycle through all six, a later update will allow you to choose which of these six you can cycle through as well.
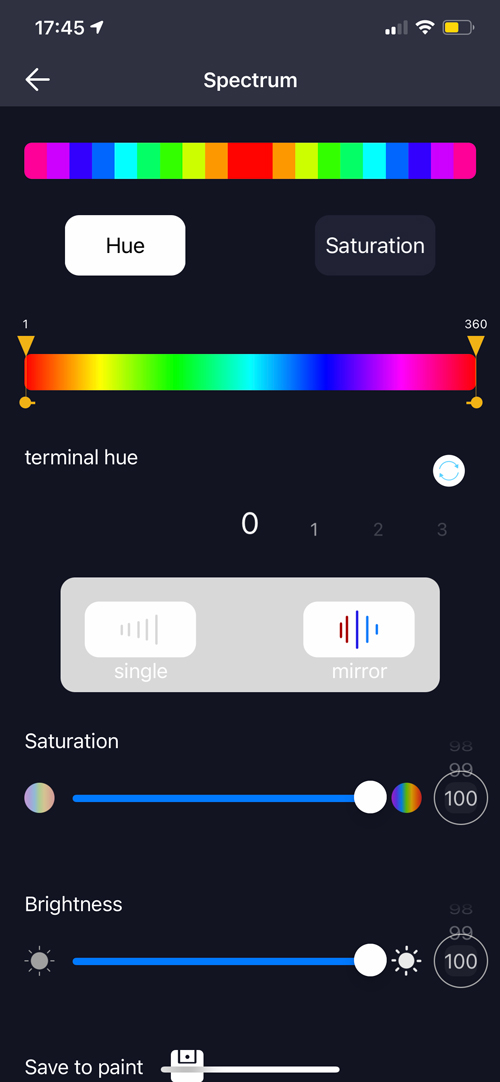
- Spectrum gives you the option to create a colour spectrum preset, but customised to your brightness levels, as well as restrict the colour spectrum. So if you want to just have a spectrum that covers green through to dark blue, you can select the markers to restrict the spectrum this way. You can also either have the colour spectrum run from one end of the strip to the other, or, have the spectrum mirrored going from the centre outwards, or even from the edges inward. You even have the option to set your own brightness and saturation levels, which is pretty fantastic in terms of granular control.
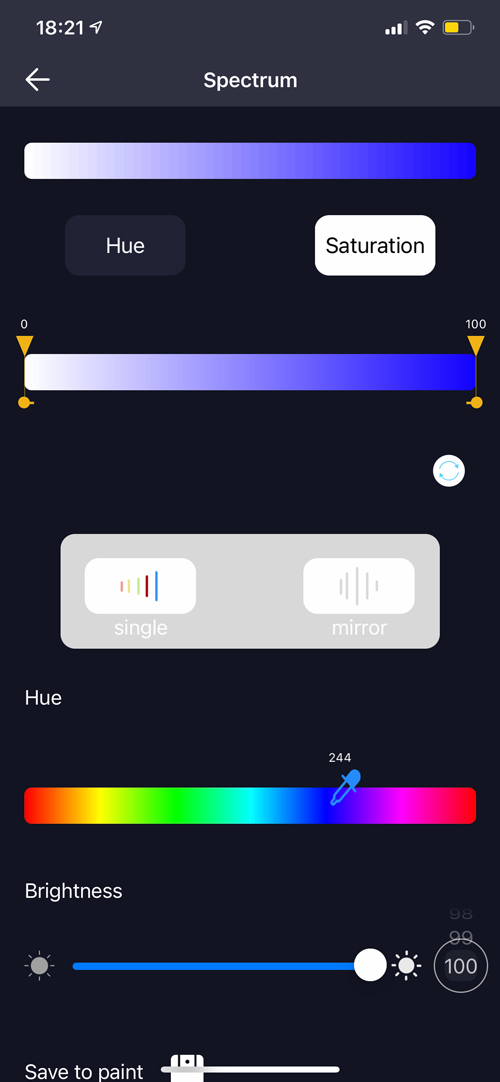
- Saturation is in many ways the same as Spectrum, but it deals specifically with one selected colour and makes the strip into a gradient, that goes from anywhere between zero to 100% brightness and saturation. Like the Spectrum option, you can have the gradient linear or mirrored, with the saturation gradient going from the edges inward from the centre outward.
When it comes to colour, the strip does a decent representation of the different shades, although, whilst we don’t have official numbers for the maximum amount of lumens, in my own opinion, strips are for accent lighting in the main, and so brightness is of secondary concern generally. What is impressive is that while the strip is only RGB, it still does a decent job of both cool and warm white. The warm white is impressive as it’s doesn’t go overboard with orange, like a lot of colour temperature lighting can do.
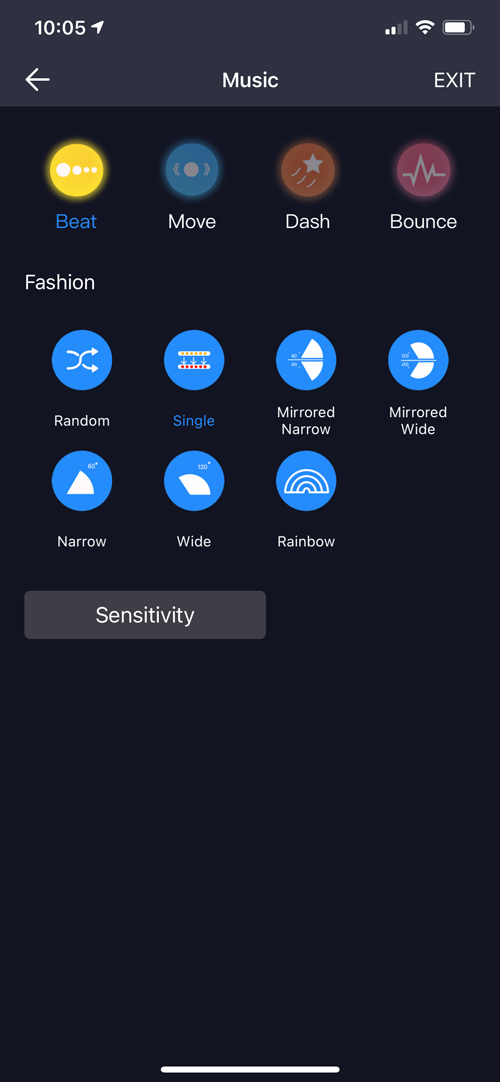
MUSIC MODE
I’ll be honest and say that aside from Paint mode, the other modes are of less interest to me, and that especially goes for Music mode, as I’m not really interested in turning my living room into a dancefloor… That’s not to say it isn’t impressive, and if you were to use this for a house party, it would be an excellent addition to the range of functions the strip can do, which ‘outstrips’ its competitors with ease (pun intended).
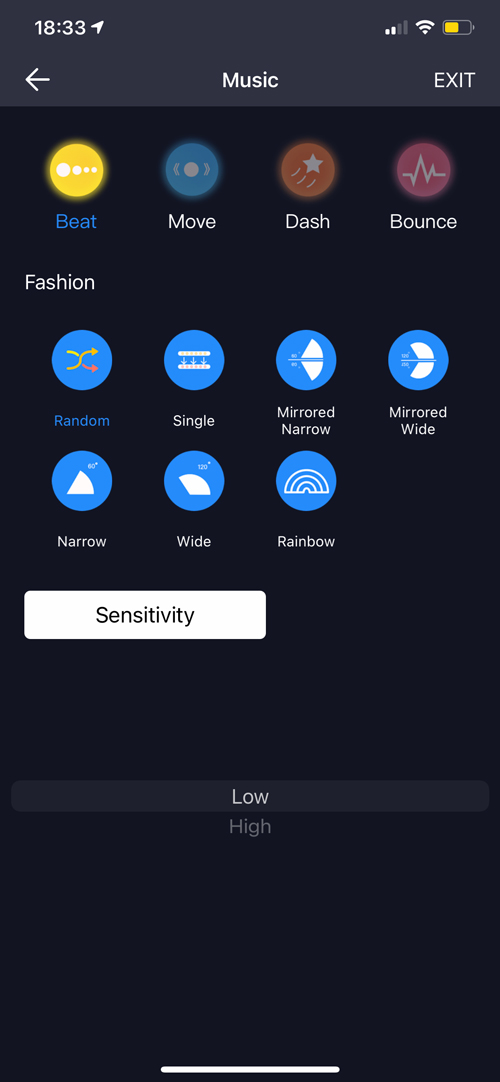
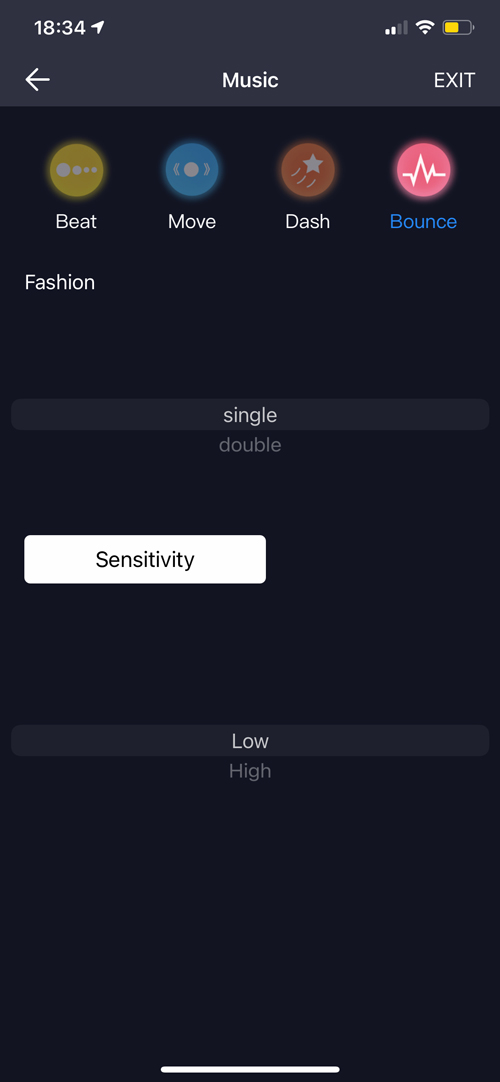
So, with that said, I’ll skate over the many options in this mode, of which there are many. You have four basic modes – Beat, Move, Dash, and Bounce, which determine the style in which the lights react to sound, be that something as mundane as the slamming of a door, or a full-on EDM track. On top of that are six ‘Fashion’ sub-options, with a seventh being random, which chooses from the six options…randomly. On top of that, you have a sensitivity option, which simply gives you low or high as choices for how much it reacts to sound. The only mode that slightly deviates is the Bounce mode, which has a separate ‘single’ or ‘double’ option.
TWINKLE MODE
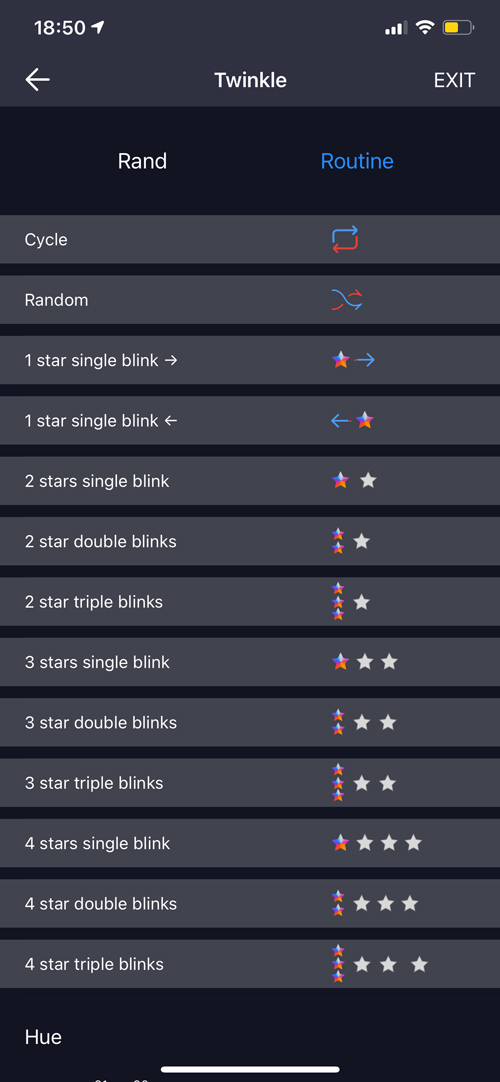
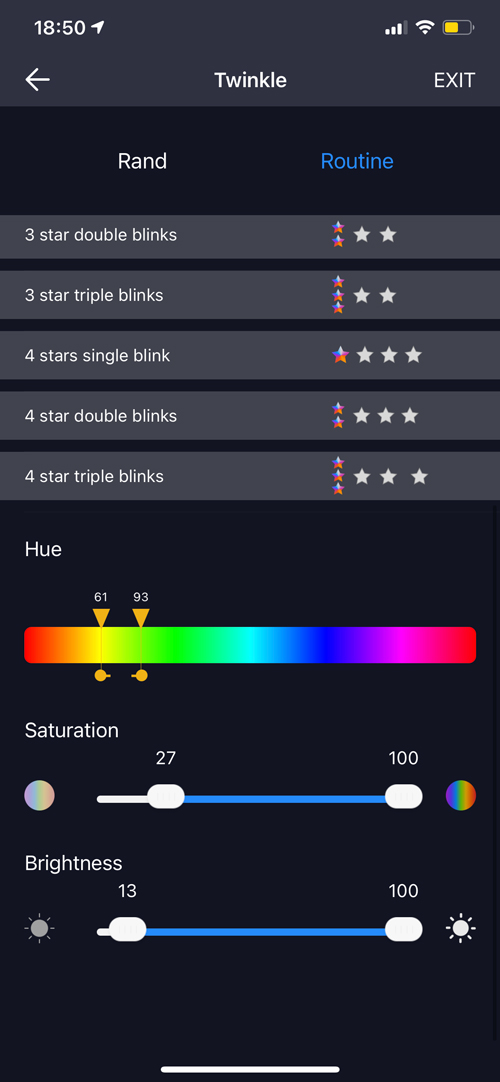

As with Music mode, Twinkle is something I’ve not really delved into so much and compared to the Music option, the number of choices is legion! Twinkle, as the name would imply, is designed to replicate the kind of Christmas lighting you might haul out of the loft once a year, with lights that blink on and off, and give off the appearance of moving along the line of lights. Twinkle mode does this with a swathe of preset options. These options also include the ability to choose both the range of the colour spectrum used but also set a minimum and maximum for both brightness and saturation. Hopefully, you can see why I’ve not had time to explore all the variables! There are separate tabs labelled ‘Rand’ (random), and Routine. Go explore nearer to Christmas, or Eid, Diwali etc. and tell me how you get on.
SECURITY MODE

As the name would imply, this is designed to work as a sort of an add-on for any security automations you might already have. It’s very basic and doesn’t even have its own screen to make any adjustments as such, so it only does one thing. This ‘thing’ is basically a series of animated light sequences using blue, red, and white lights, that are meant to replicate the kinds of flashing lights you might see on a police car. In tandem with an alarm automation and siren, this could be quite effective, although it is sort of a gimmick. Still, flashing lights and a siren can do wonders at deterring most opportunist burglars – or so I’m told!
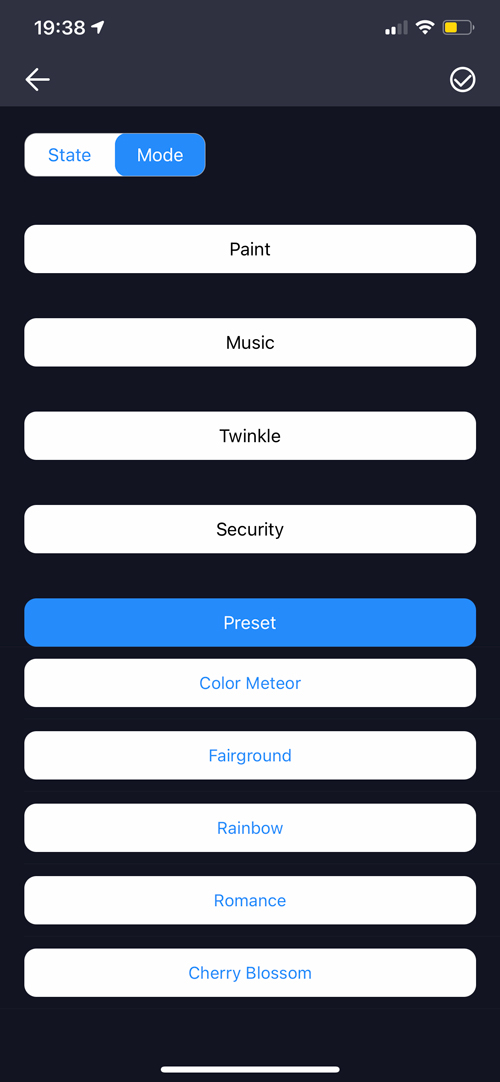
PRESET MODE
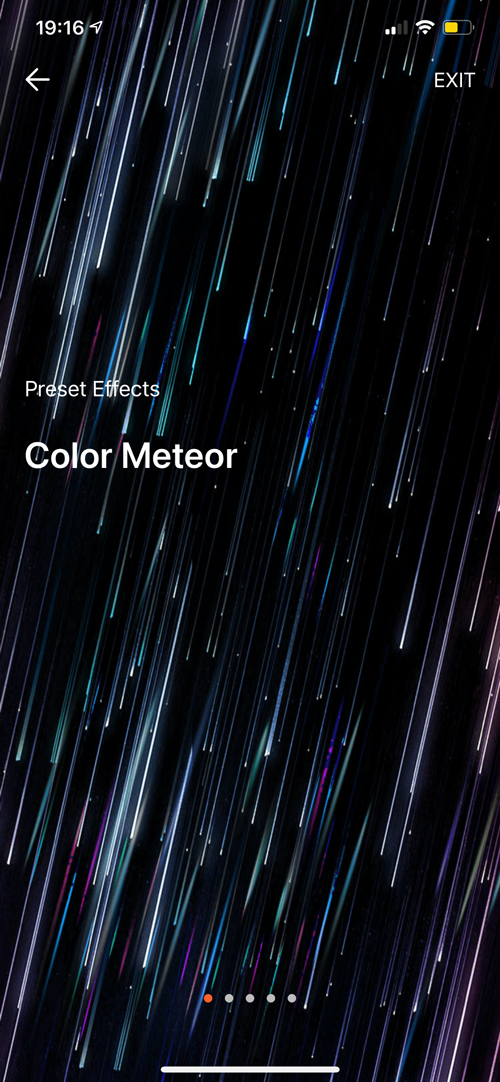

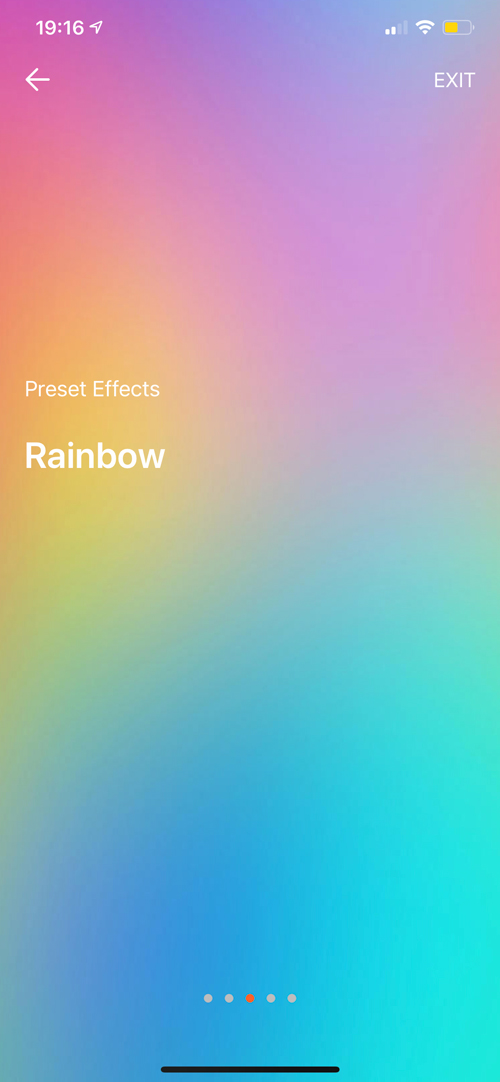
Preset mode is exactly that, it has a series of preset lighting effects – five to be exact, with hopefully more coming as time goes on. Like the Security mode, these are not customisable, so you either love them or loathe them.
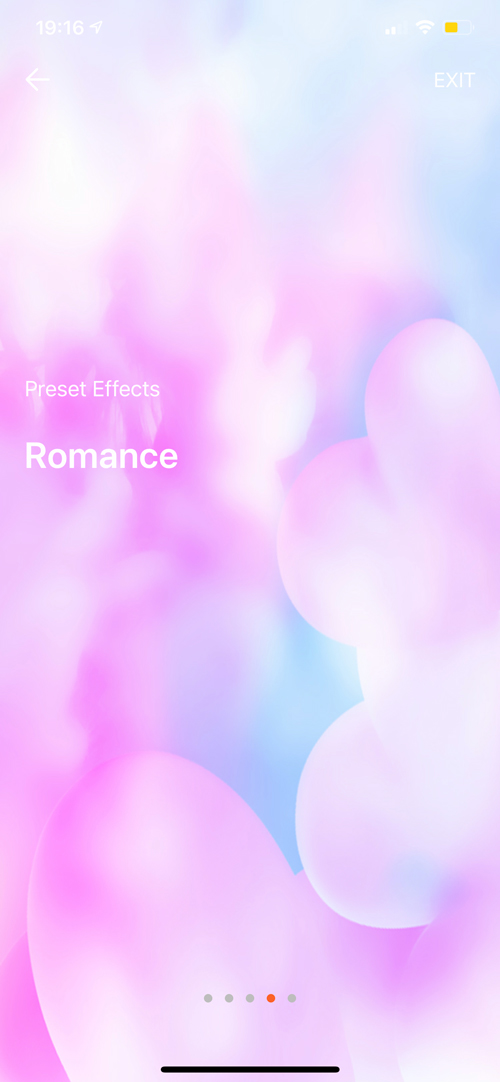

Personally, the ones I like are those with more subtle animations, which are Cherry Blossom, Romance and Rainbow, the latter of which looks great as an animated sequence, especially so on the 5m strip. I also like Meteor, which shows a sliver of coloured LEDs dash across the length of the strip at random times. I guess that means the only one I really don’t like is Fairground, with its rapidly blinking lights. The kind of lighting that could quite possibly irritate or even make one nauseous after a while.
MODES IN HOMEKIT
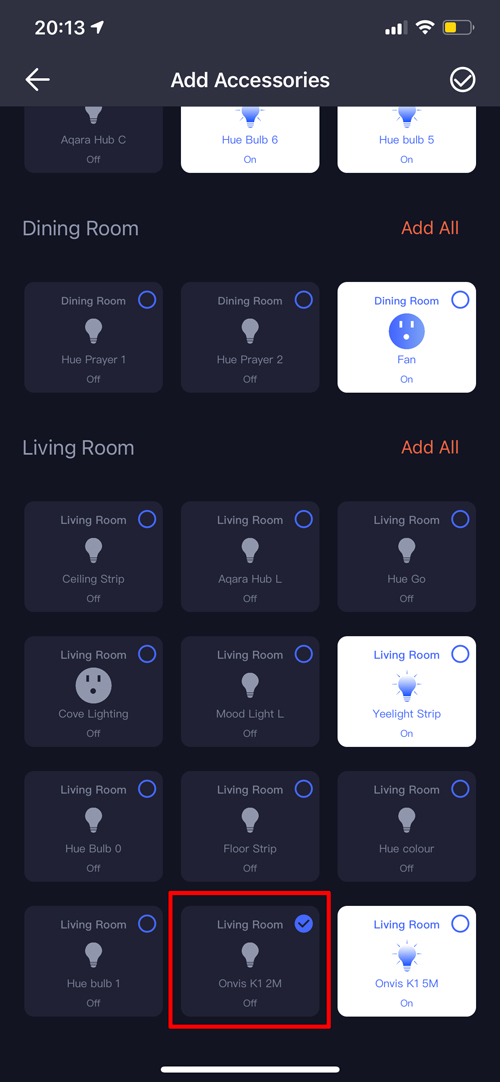
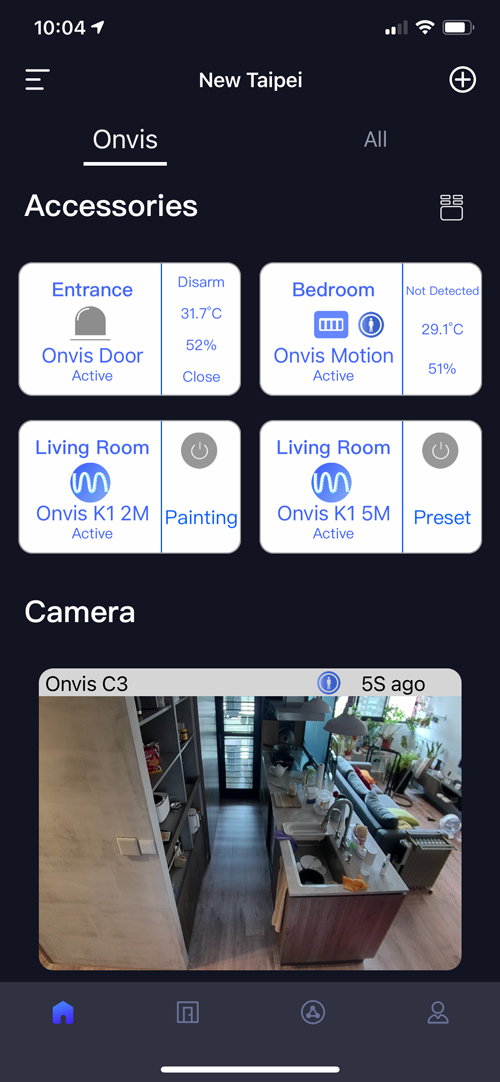
You’re probably thinking, this is all well and good, but how can I get these modes – especially the multicolour ones – into the Home app?? Well, the good news is, quite easily. It simply involves taking either one of the presets you’ve created in the Onvis app, and saving it as a Scene. That Scene will then appear in the Home app! You can do this with any of the modes, with each sub-mode having the ability to be added to a scene as well.
CAN I CUT IT – YES YOU CAN!

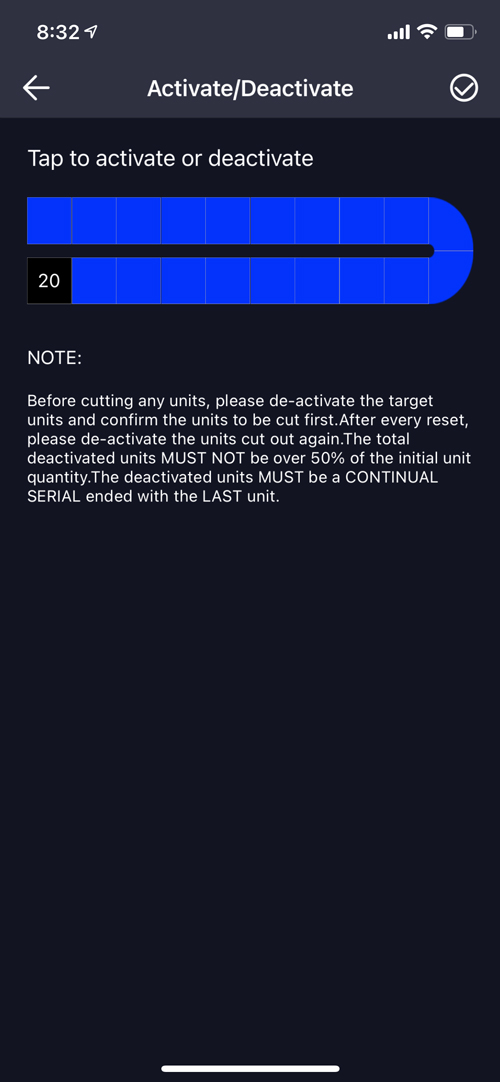
Despite what was previously reported (including by ourselves), the light strip can be cut, although the process for making this work correctly is still being worked on. The update for the app and a firmware update for the strips will be available next month. These updates will allow you to deactivate individual units, although only in sequence starting from the end of the strip. Once zones are deactivated in the app, you can then go ahead and cut these units from the strip. The good news is that you can still deactivate these zones without having to actually cut the strip, in case you find a use for the full length of the strip at a later point.
It should be noted, that if you do decide to deactivate one or more units (up to 50% of the available units can be deactivated), then the six presets in the Paint mode won’t completely match; for the first of the three rainbow coloured presets on a 2m strip, the first three colours are dark pink, purple, and blue, so if you deactivate the first three units on the strip, the rainbow coloured preset won’t readjust, meaning those first three colours will simply be missing. This just means that you’d have to readjust the preset or create a new one that fits in all the relevant colours. Likewise, if you have an effect that relies on a specific colour being in the centre of the strip, after deactivating a few units, it’ll no longer ‘appear’ to be centred. It’s not a massive deal if you’re creating your own colour presets that don’t rely on some form of symmetry, but it’s something to be aware of with some presets.
THE ONVIS APP
As the Kameleon light strips are so special, in that they have the ability to be customised in so many ways, inevitably, you’re going to have to use the company’s own app, which is not uncommon for many products when they have specific functions or options not exposed to the Home app framework.
I’ve never been a massive fan of the Onvis app, or any other app for that matter when it comes to day-to-day use, but for the purposes of the light strip, it does the job well enough. I don’t plan to spend too much time changing the strip presets, so I can live with some of the design choices used in the app, even though the graphic designer in me would love to overhaul the look of it.
That said, the Onvis app has on occasion been known in the past, to crash or freeze. The company seemed to have fixed these issues, but freezes when using the light strip seem to have returned, and so during the course of testing out the light strips, I’ve come across a few occasions where I’ve had to force quit the app and relaunch it. This is less than ideal, regardless of whether you’re trying to do a review and test all the aspects, or are just a regular consumer, so I do hope the freezes is addressed asap.
Aside from that, I find it for the most part, easy enough to follow, which is also in no small part thanks to one of their beta testers I know, who has been pushing for all sorts of changes, that have led to a lot of improvements, not only in the way the app UI is presented but the additional functions that were simply not there when the product was first in beta testing.
DAY-TO-DAY USE/FINAL THOUGHTS
I’ve been using this long enough now to get a measure of what it’s capable of and how stable it is in terms of functionality and connectivity. Regarding the former, there have been no issues, other than the aforementioned app freezes, so the light strip has performed excellently in every mode and does exactly what I’d hoped it could do.
As for connectivity, obviously, your experience is almost certainly largely dependent on your own network, but both the 2m and 5m strips I’ve had for the last few weeks have shown no sign of issues when it comes to dropping off the network, which is something we all dread. I’d say ‘rock solid’ would be the appropriate term in this situation.
Am I happy with the Kameleon? Hell yes! Ever since I heard about its existence, I’ve been anxiously awaiting its arrival in order to try out the multicolour options it is capable of. Of course, I’m well aware of the LiFX Z-Strip, and how it can do much the same in terms of multiple colours, but at the price point the Kameleon is set at, along with the plethora of options available, it’s hard to deny that Onvis have done a great job of pushing as much customisation as possible into this product, and in that respect, they get my vote. As hardware, it has been flawless, and is only occasionally let down by issues with the app. The fact that my multicolour scenes can also be exposed to HomeKit is the big bonus many I’ve spoken to have been waiting for, as for some it would have been a dealbreaker.
Some may compare this to the capabilities of the Hue Play Gradient Strip, which would be massively unfair on many counts – not least due to the enormous cost outlay to get this strip to work with your TV. If a strip matching what’s on your TV is important to you, then the Hue Play, along with the Hue Sync box, and Hue Bridge, is what you need. The Kameleon can’t do that, and never will, but what it does do, is great in my opinion, especially for the price. Highly recommended.