
Relatively speaking, it wasn’t that long ago, before the introduction of HomeKit Secure video, that HomeKit users struggled to find many choices when it came to smart cameras. How things have changed! now we have around thirty cameras to choose from, some of which do more than just the basics. This brings us to the latest camera to enter the fray, the Homam 64GB by Zorachka. A name totally new to the smart home market, let alone HomeKit. What you might find equally attractive or horrified by is the price point, with the camera currently listed at US$399. Putting the price to one side, for now, let’s go through what the camera is capable of so we can decide for ourselves if it’s worth the considerable extra cost…
PACKAGING AND CONTENTS
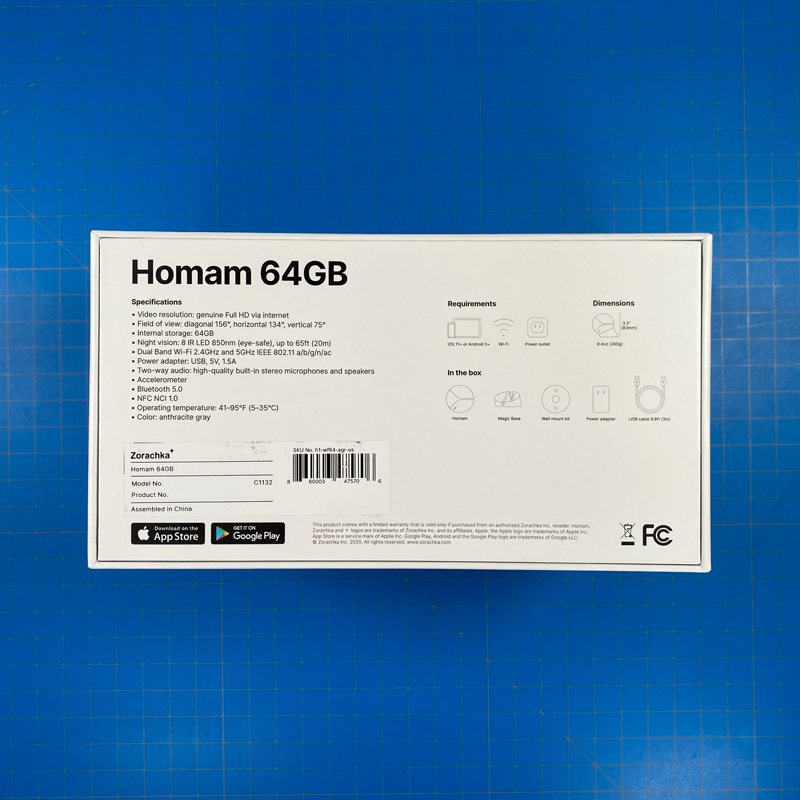
If you’re going to spend a ton of money on a product, you tend to expect it to be beautifully presented, and this is exactly the case with the packaging – a large sturdy, but understated carton, with merely the logo on the top, the camera name Homam and 64GB on the sides, with specs on the base. There’s no HomeKit logo as such, which is a bit odd, but I can assure you this is a fully HomeKit certified product.
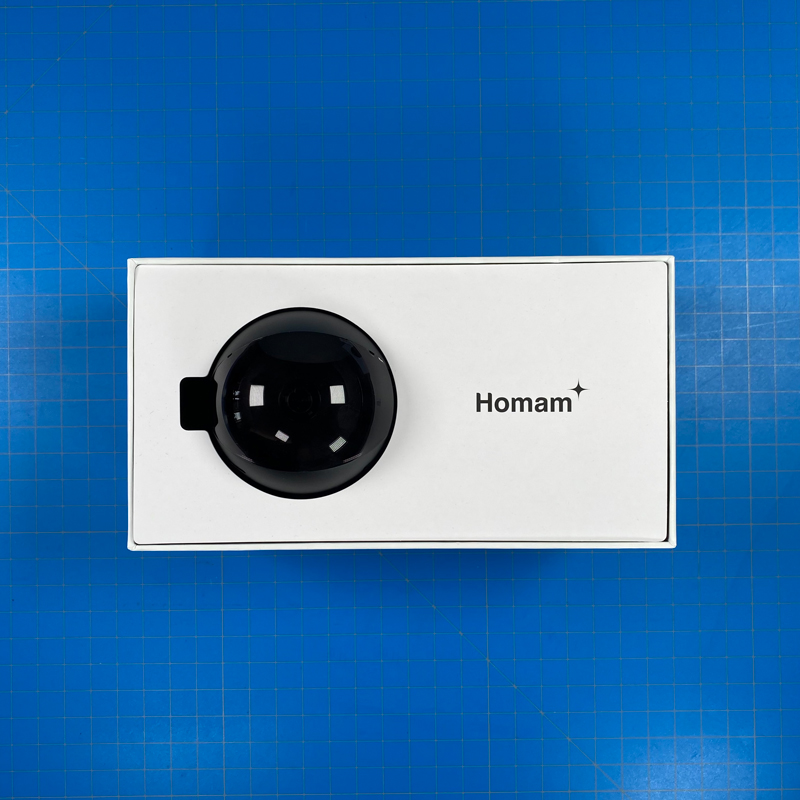
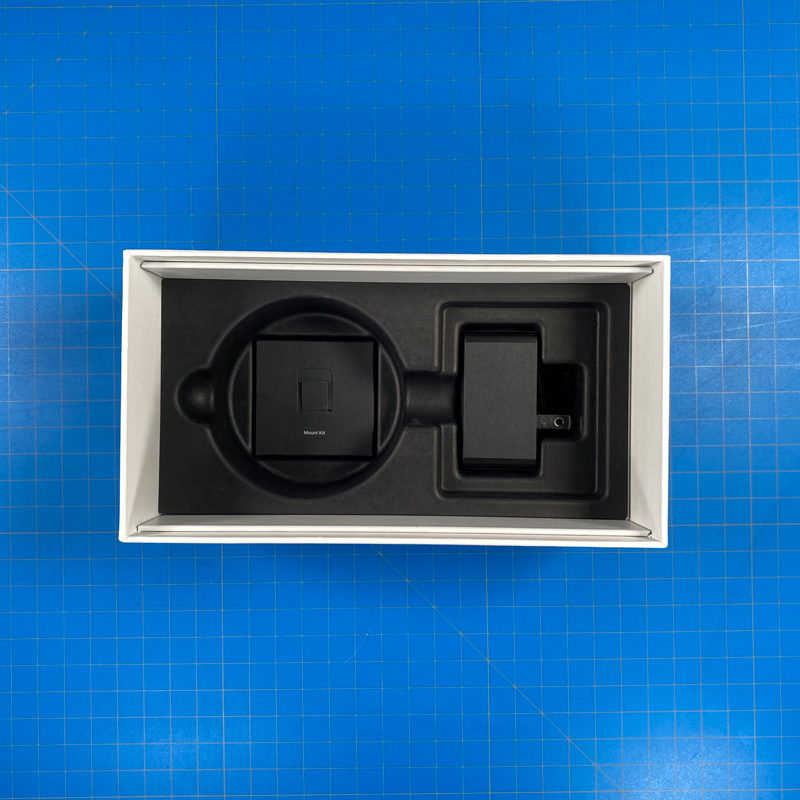
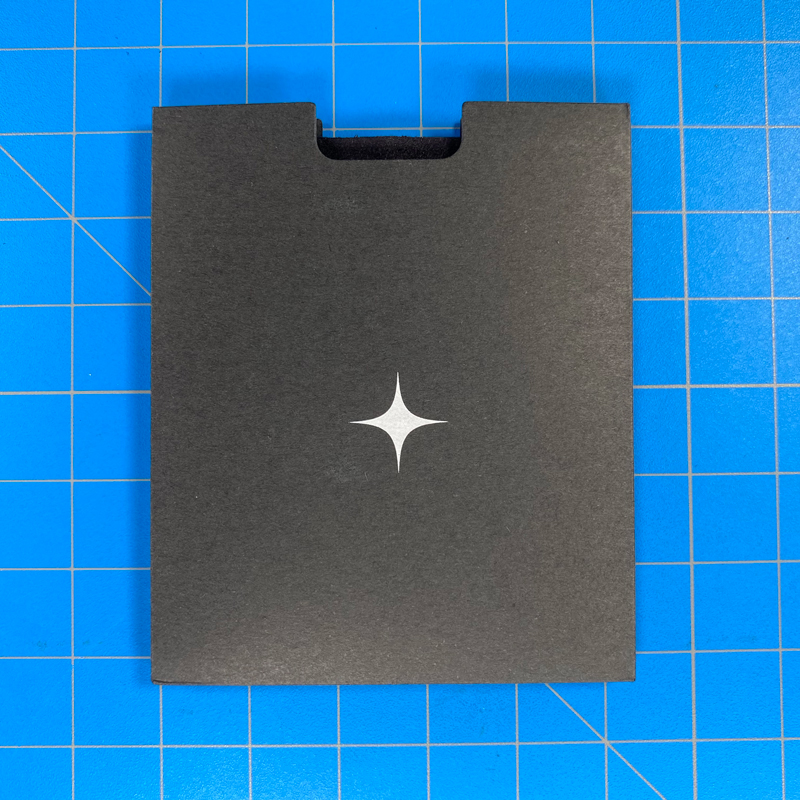
Upon opening the box, you see the camera itself, which we’ll come back to in a bit, surrounded by a card, which features a QR code on the back allowing you fast access to the Homam app, which isn’t required, if you want it purely for HomeKit use, but is highly recommended for several reasons, as I’ll outline later.
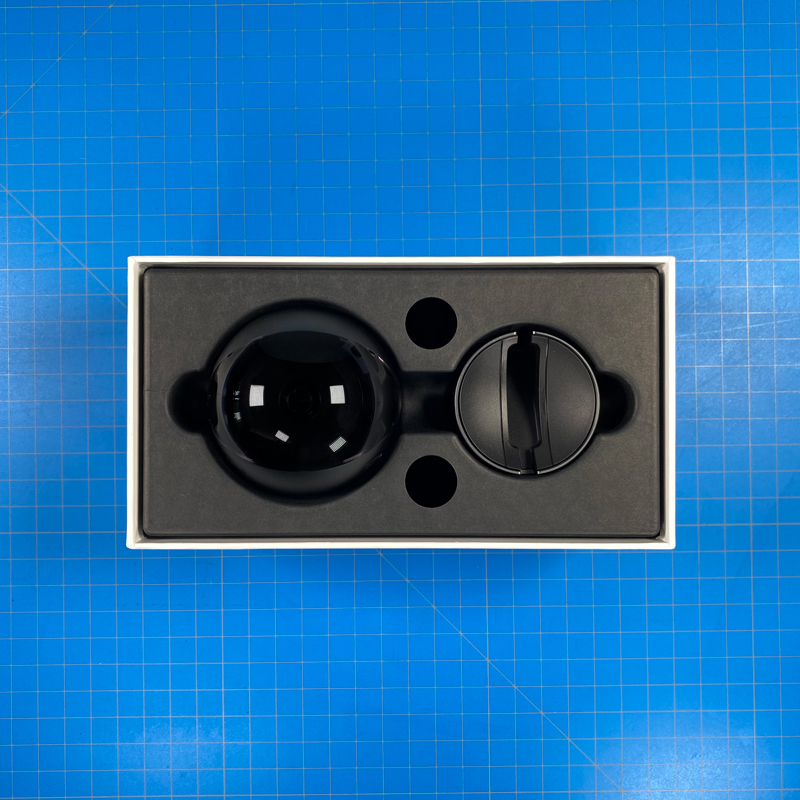
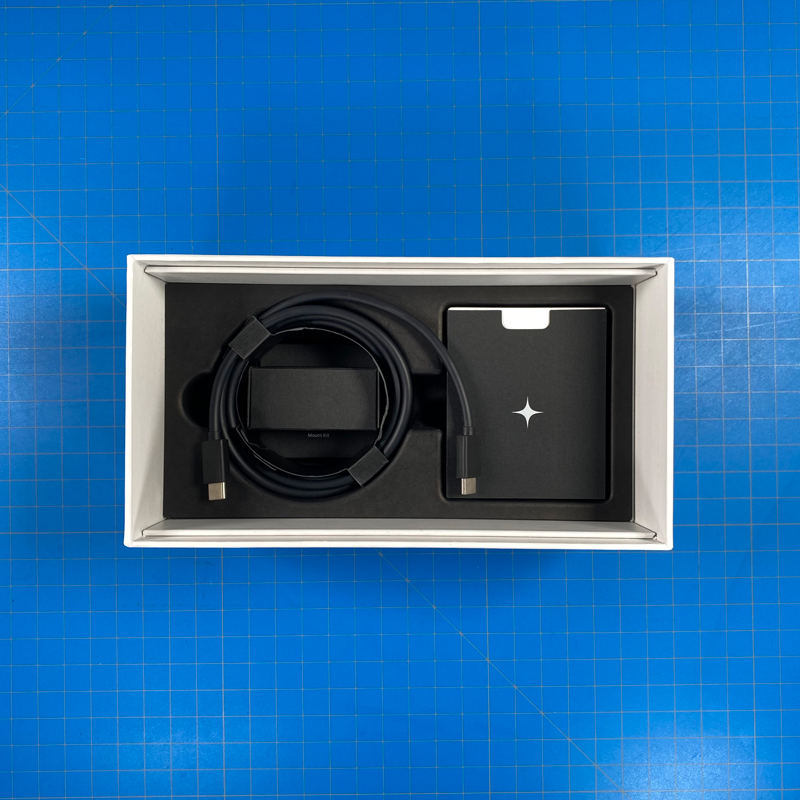
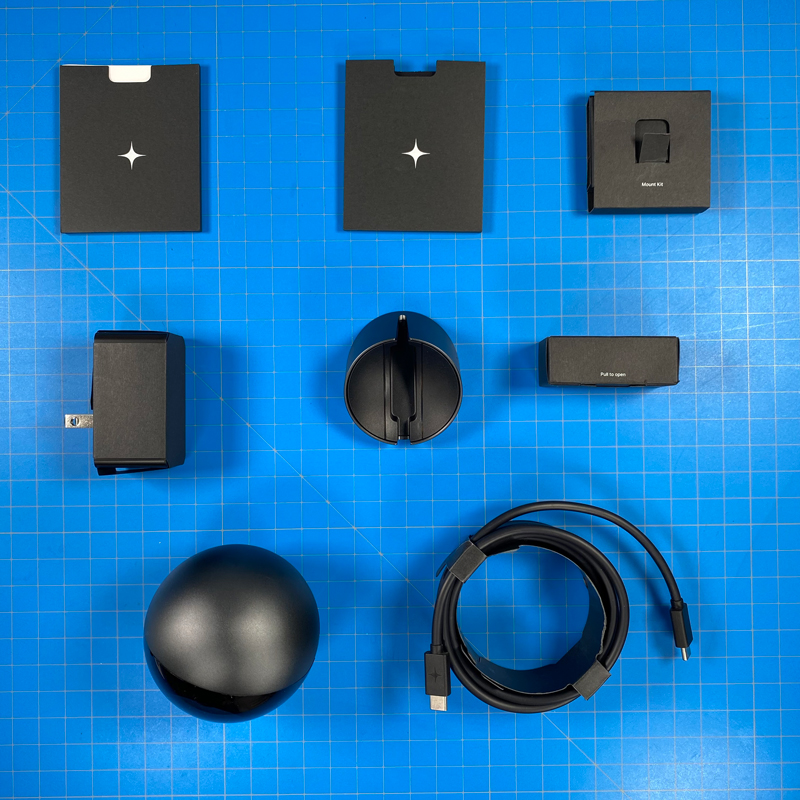
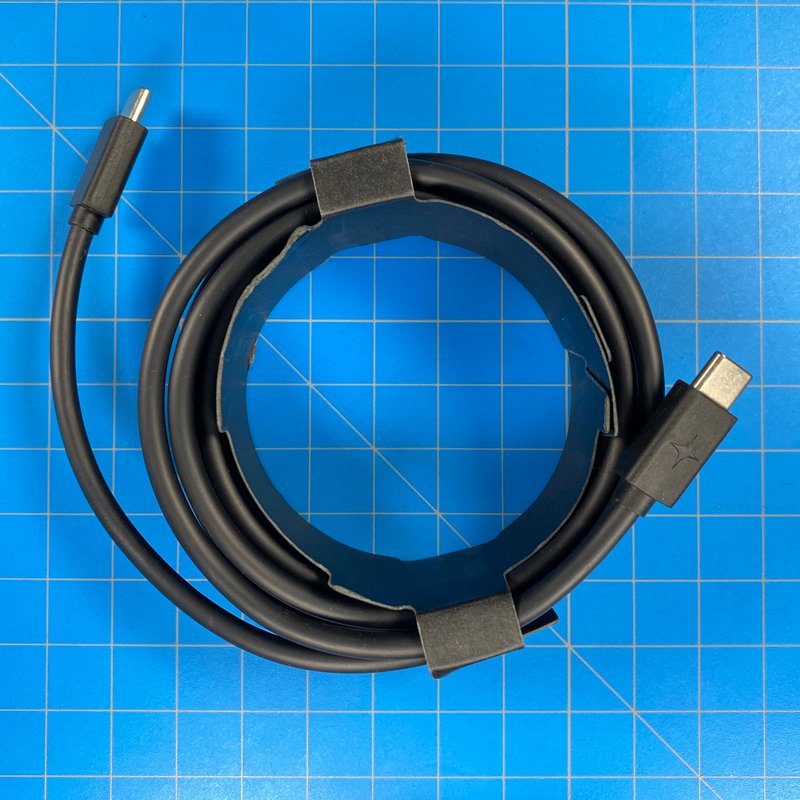
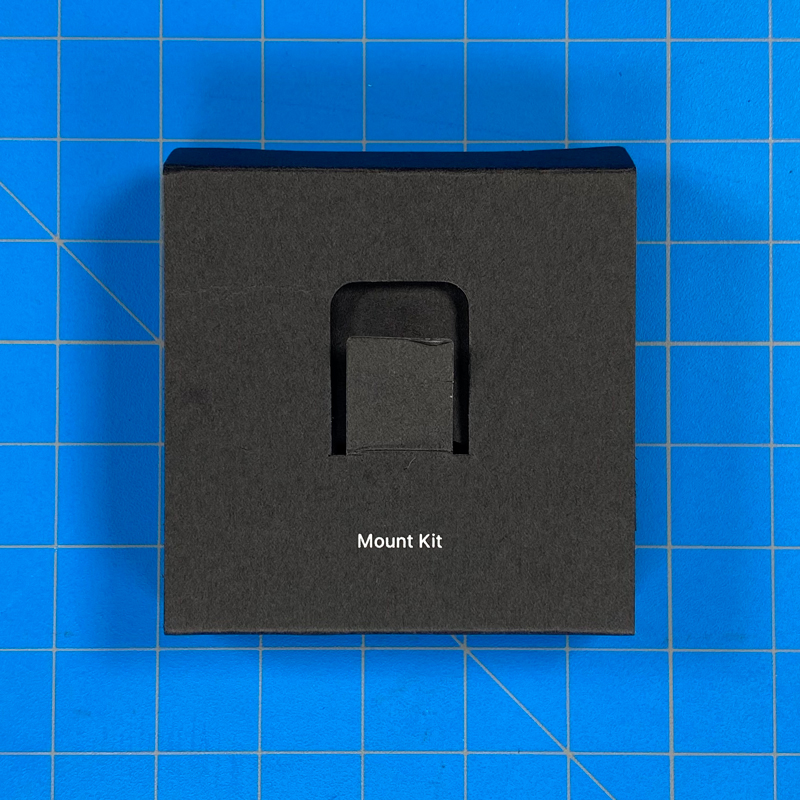
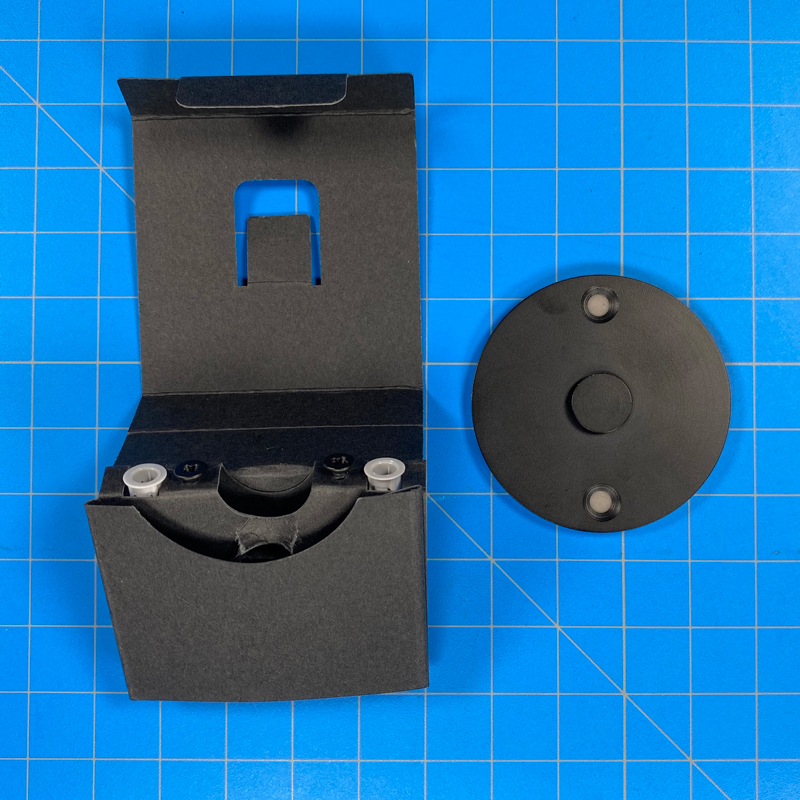
With the card removed, we see the first of two layers – the camera (again) and a magnetic stand. Removing this layer reveals a USB-C cable (3m / 9.8ft in length) as well as a small envelope with some paperwork. There’s also a small box containing some TDK branded ferrite rings, and below these are another wallet containing the parts required for wall mounting the camera, along with a power adaptor.
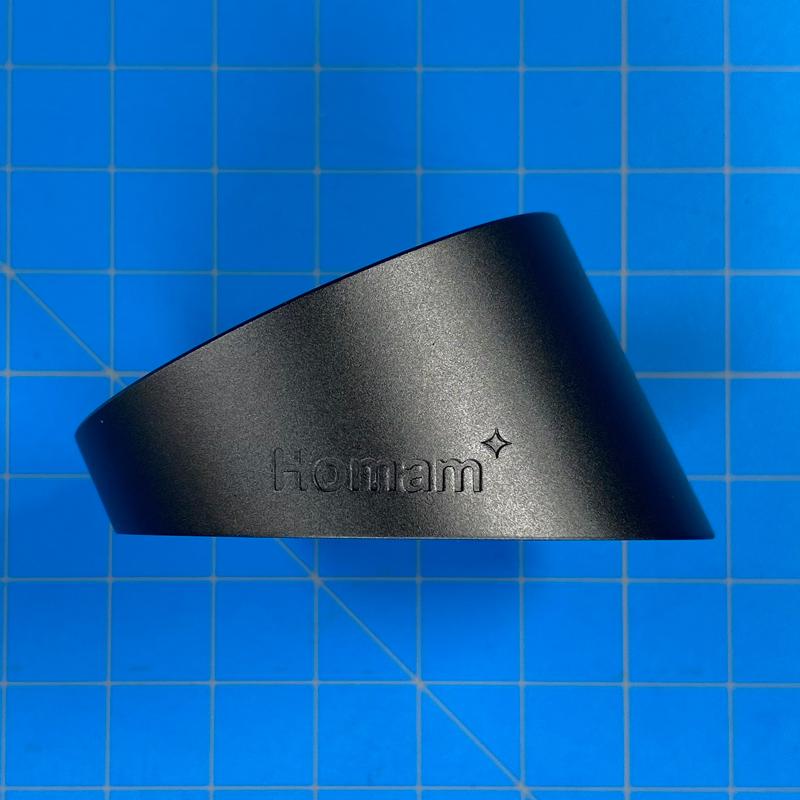
As with the packaging, each piece of this ensemble comes across as very well made, with the camera and base made with anodised aluminium, and pretty much everything else slickly branded and all in black.
THE PARTS
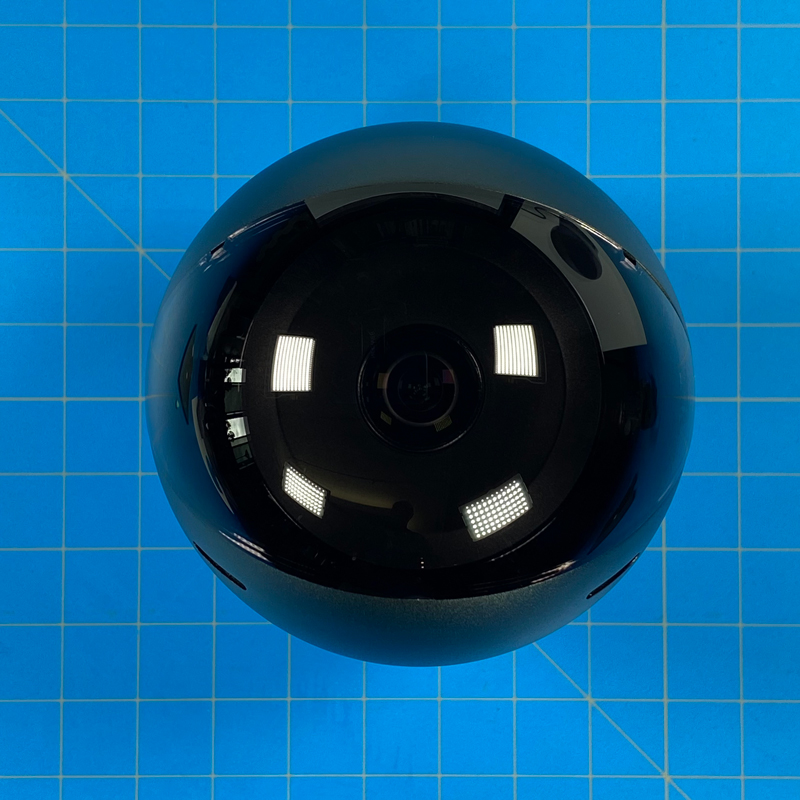
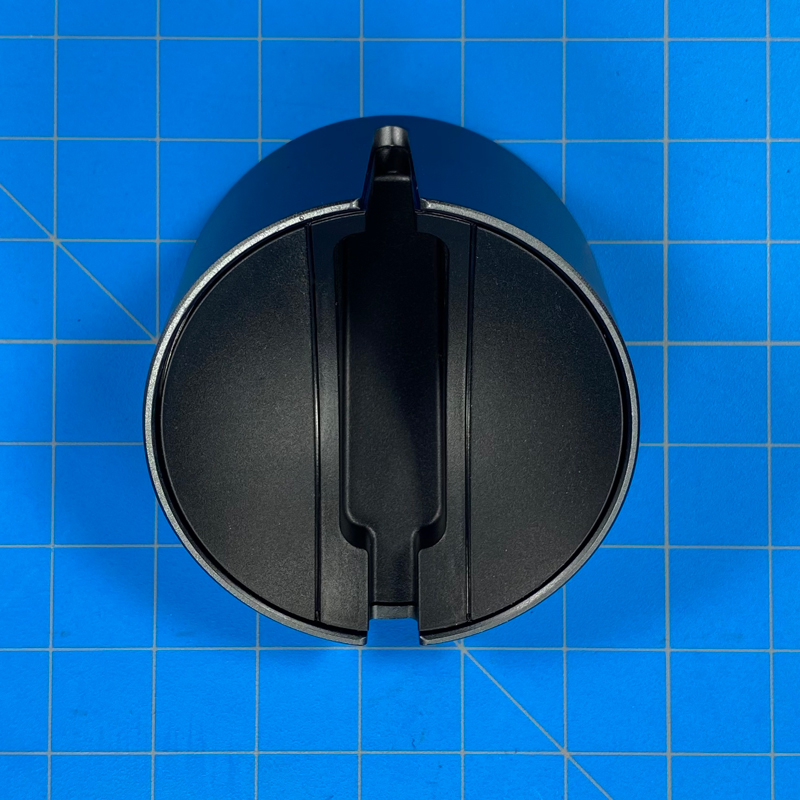
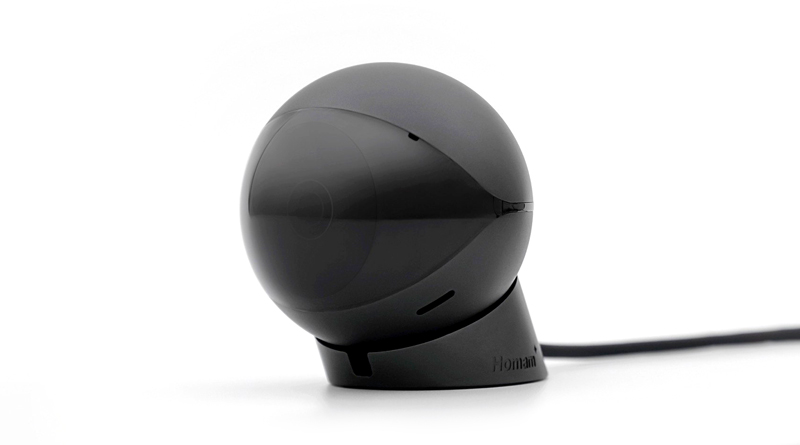
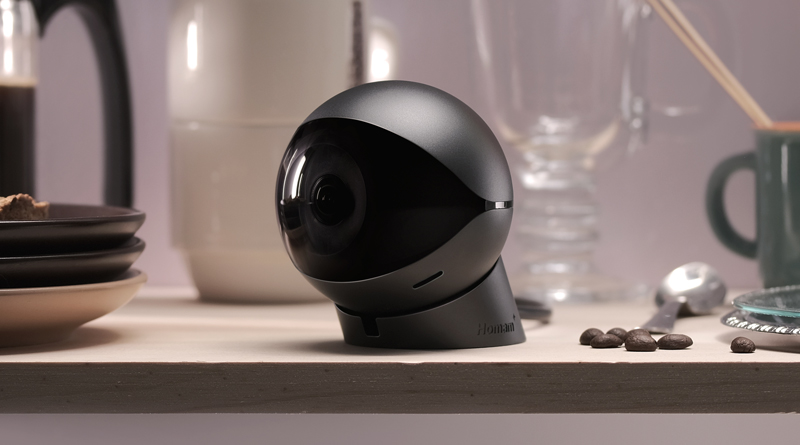
Starting with the camera itself, you tend to forget how cheap and potentially fragile many of the mainly plastic cameras feel until you get your hands on something more durably, in this case, using anodised aluminium. It really feels like you could lob this at a professional baseball player and not worry about any damage to the camera (please, don’t try this…). If you’re used to the millimetre-precision design of an iMac for example, this will feel very familiar. I personally think this is one of the most beautifully designed cameras I’ve seen so far, and I’ve seen a few. The large ‘eye’ which takes up roughly 25% of the ‘ball’ uses tinted glass (actually plastic), so it’s not easy to see the lens, and in fact, in my tests, you can’t even detect the eight IR LEDs used for night vision.
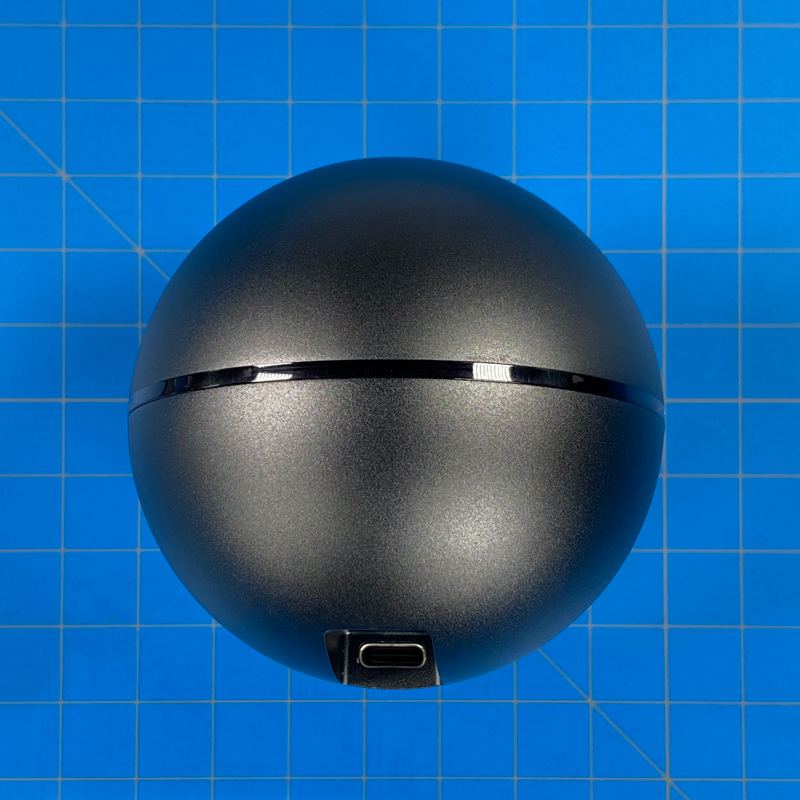
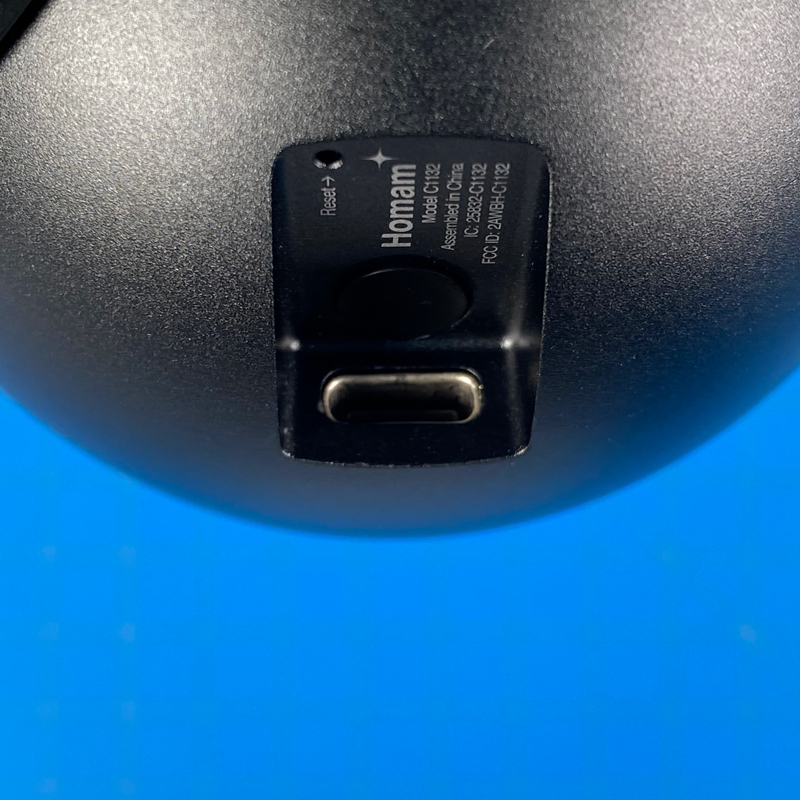
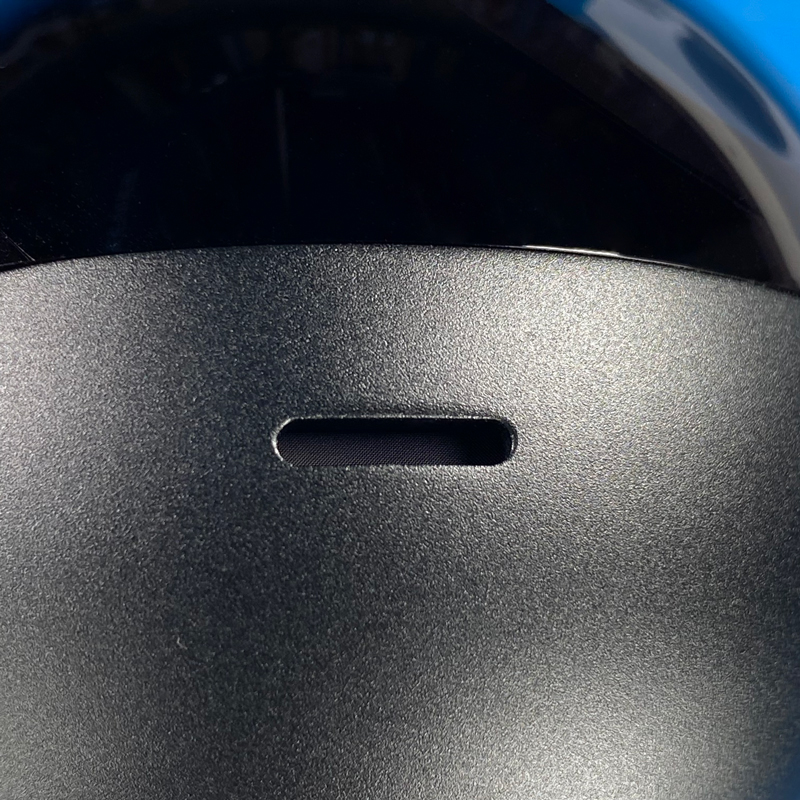
The tinted cover is reduced to a band that stylishly encircles the rest of the camera. Other than the lens portion, the front is home to two pill-shaped speakers that are designed to work in stereo. Around the back, you get a cutaway section that is home to a reset hole and the USB-C port for powering the camera.
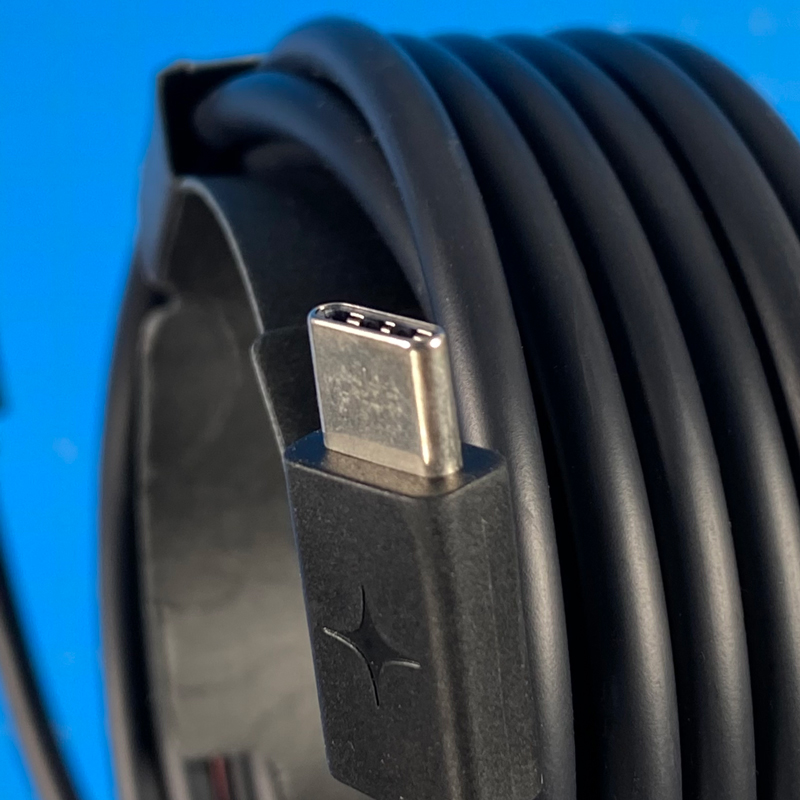
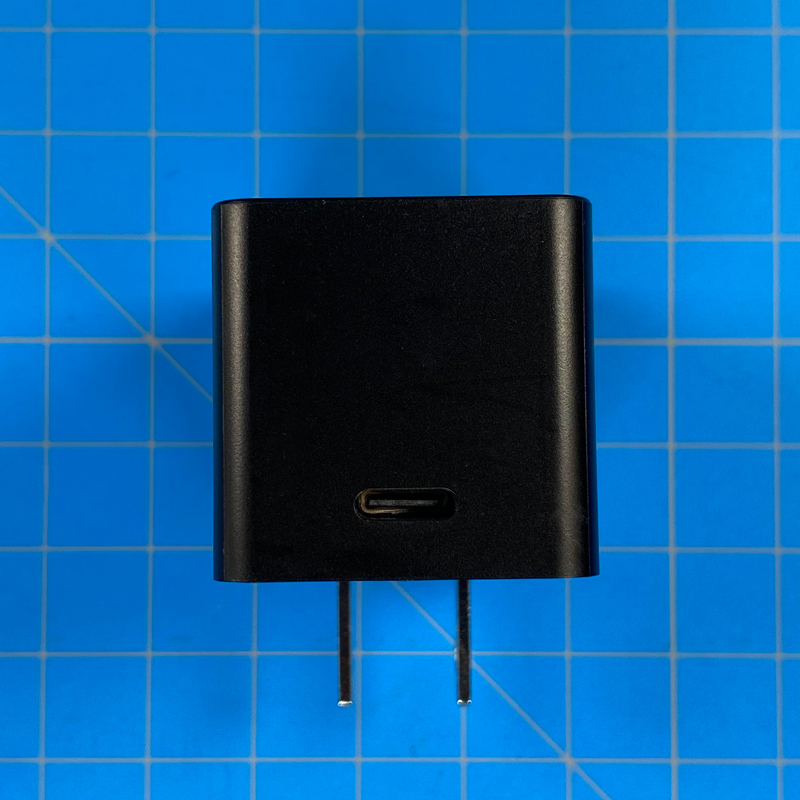
Speaking of USB, I would really quite shocked to see a Micro-USB port on such a beautiful device, and I’m not disappointed to see that not only does the camera have USB-C port, but so does the power supply that comes with it, hence the USB-C cable coming with USB-C plugs on both ends. The cable itself feels premium and is longer than the typical 2m cable length you tend to get.
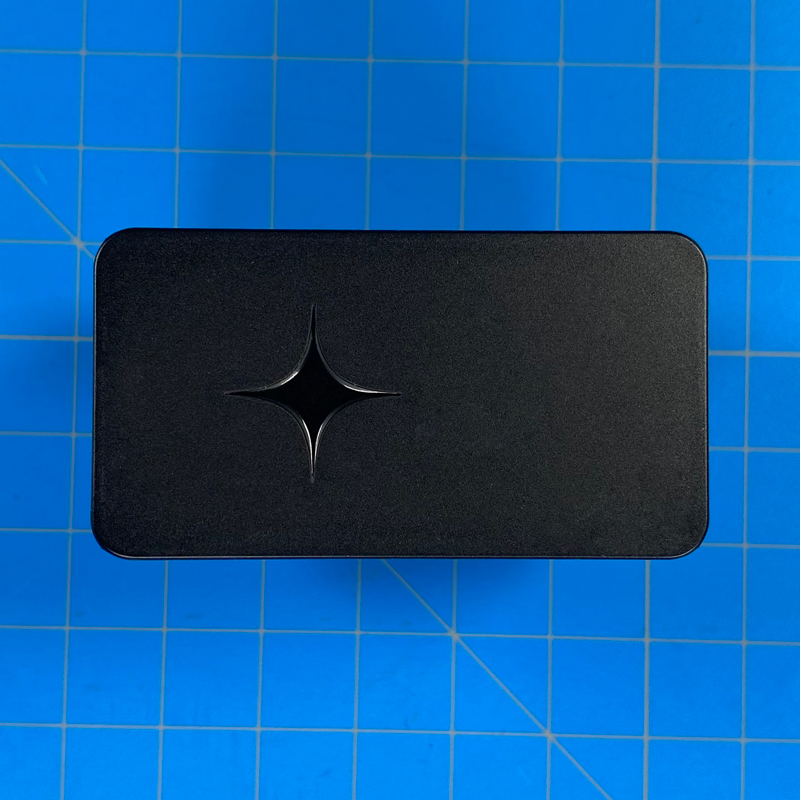
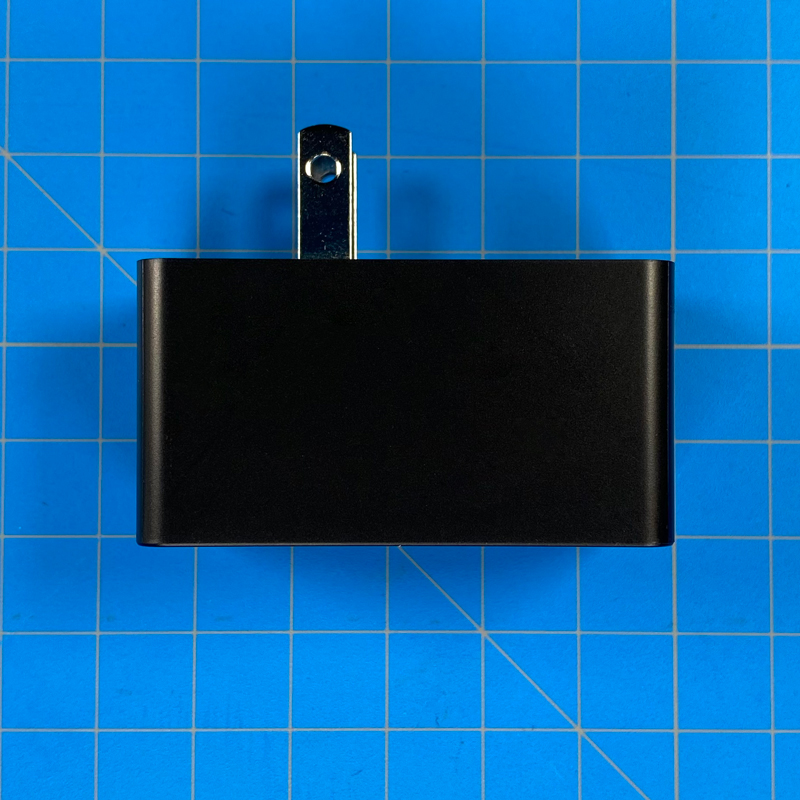
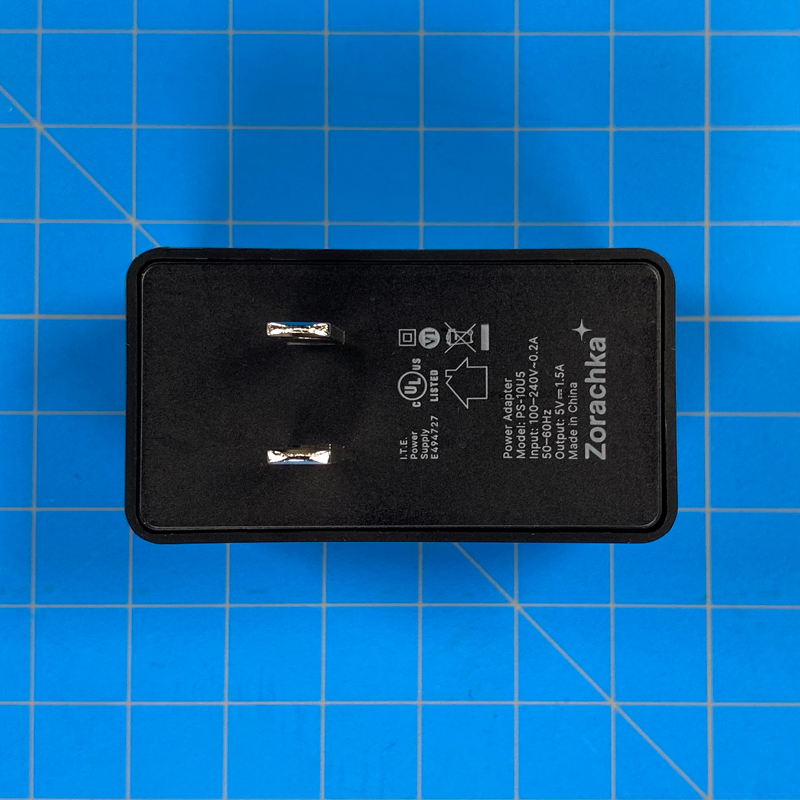
The plug itself looks stylish but other than the branding, is really just a USB plug, albeit with a USB-C port. As this is primarily sold in North America at present, the plug is the standard two-pin Type A variety.
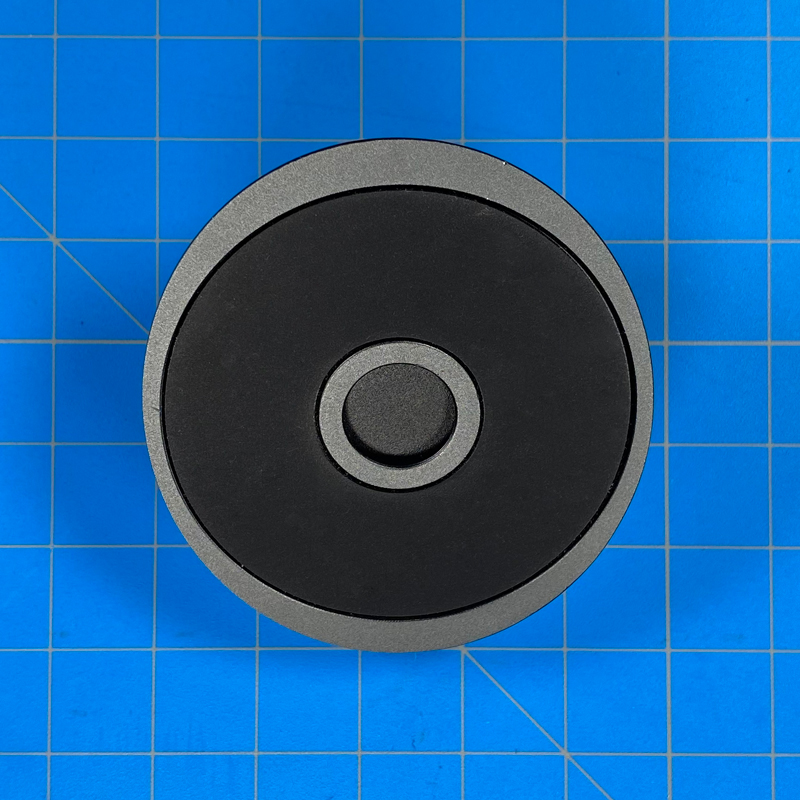
As the camera is capable of being placed just about anywhere indoors, it comes with a matching stand. it’s angled for use if the camera needs to point forward or down, and is magnetic, although I’m informed they use neodymium magnets, which are some of the strongest and longest-lasting of magnets apparently. the camera clamps onto the base with enough force that you’re left with no doubt that this camera will stay put without any trouble. The centre of the stand is designed to allow the USB-C cable to pass underneath the camera itself, depending on how it’s placed. The underside has a small rubberised section so that when it’s placed on a flat surface it gives a little grip as well as avoids any potential scratches to the surface it’s placed on. In the centre of the base is a recess to allow the camera to line up with the mounting plate.
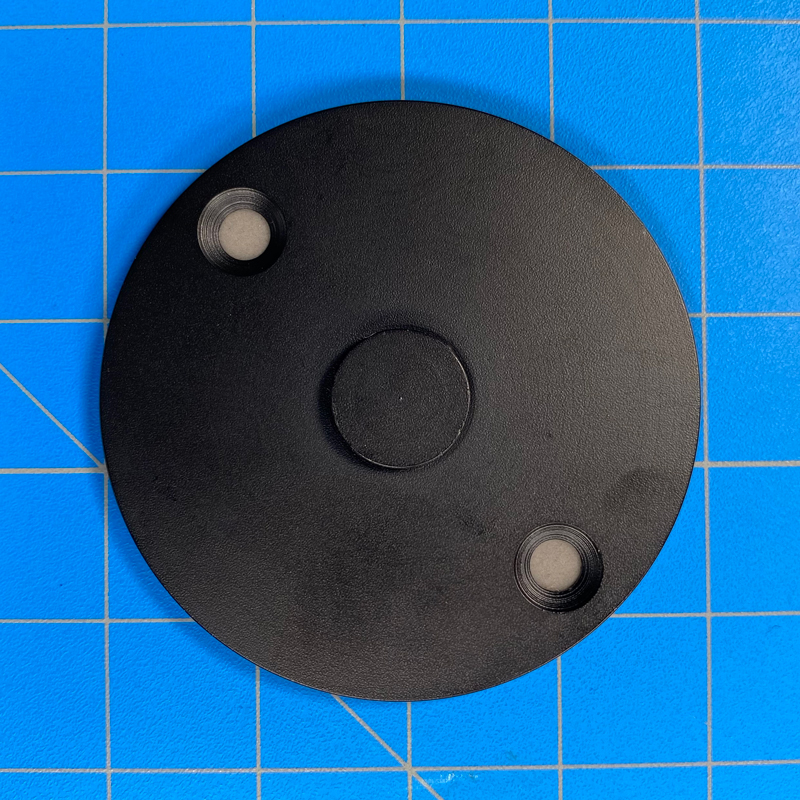
The mounting comprises a circular plate that has a raised ‘nub’ that lines up with the aforementioned recess of the base of the camera stand and can be screwed into place using the two screws and rawl plugs provided, or by using the double-sided adhesive on the back of the plate. This plate once again matches the camera and the base and is magnetic.
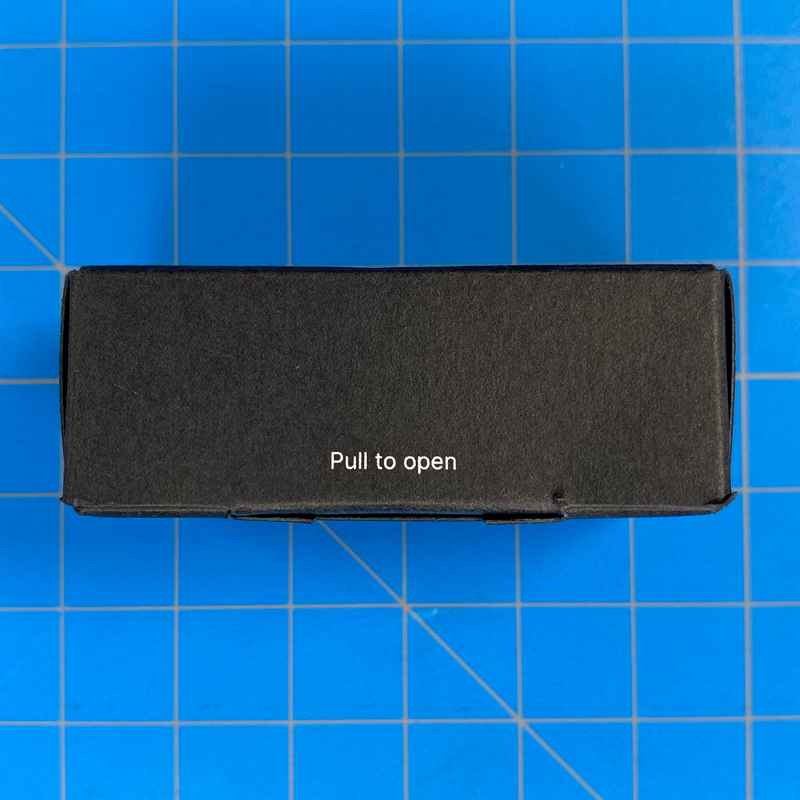
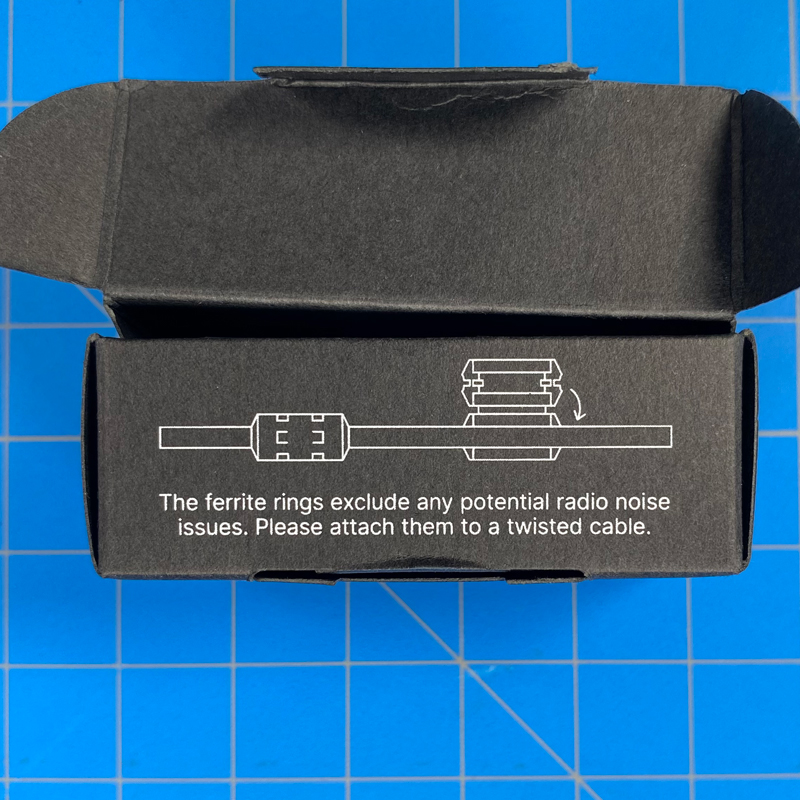
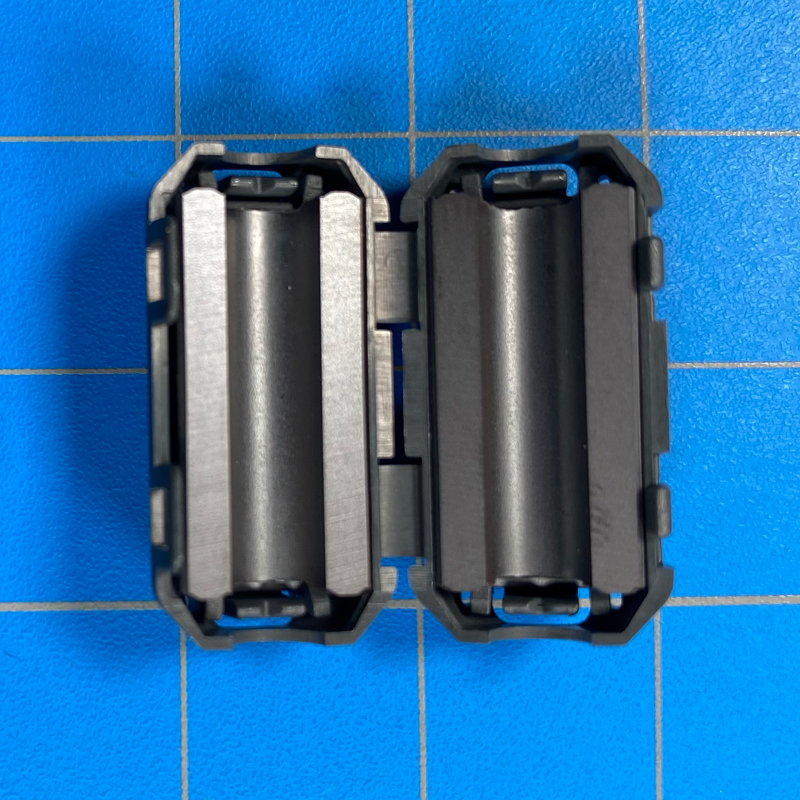
One thing I’ve certainly not seen included with a camera until now is a pack of ferrite rings. The packaging states that these simply clips around the UB-C cable, to exclude any potential radio noise interference. The rings have TDK branding on them, the company that you may well remember made decent audio cassettes back in the day!
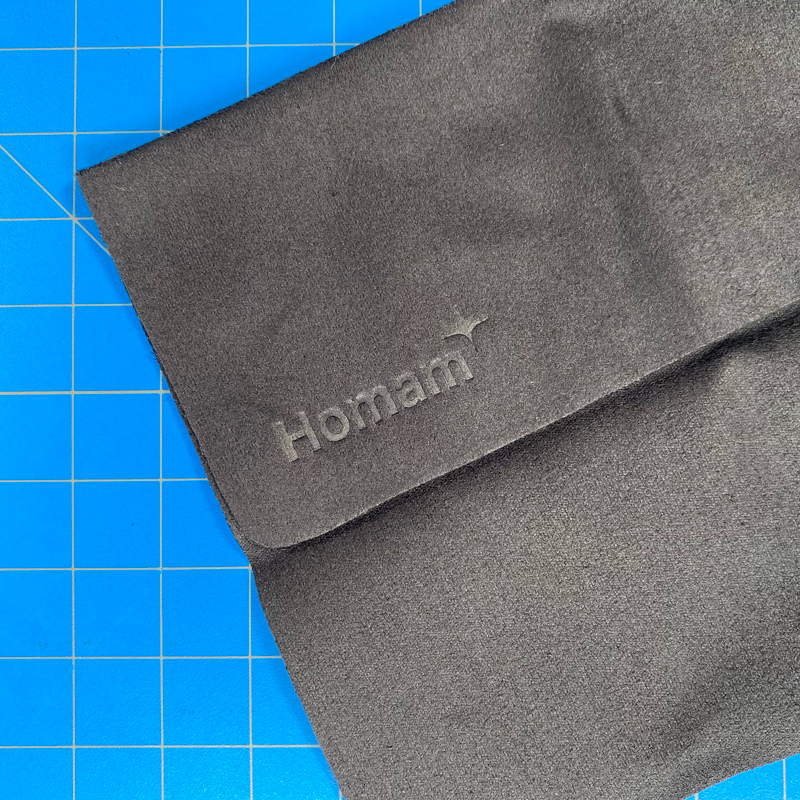
The final pieces include a branded microfibre cleaning cloth, to get rid of those nasty fingerprints, and a small envelope that contained some paperwork and a few stickers. That’s the contents out of the way, now let’s have a see what this camera is capable of, but just before we do, I think it’s important to list all the specs for this camera, so as to in some way give you a better idea of why there might be a premium price tag for this device;
Specifications
Video storage size and type – 64 GB eMMC
Technology – VIS (Verona Index Storage), a Zorachka proprietary development
Security – RSA/AES
Technology – 7-glass, low-distortion fisheye lens, a Zorachka proprietary development
Field of view – Diagonal 156°, horizontal 134°, vertical 75°
Focal length – 2.39mm
Aperture – ƒ/2.0
Minimum focus distance – 0.98ft (0.3m)
F-Tan (Theta) Distortion (%) – –0.7%
Spectral range – Visible + IR
Resolution – 5MP
Technology – Sony STARVIS back-illuminated colour CMOS
Resolution – 1920 × 1080
Size – 1/2.8”
Wide dynamic range – Multiple exposure WDR; digital overlap WDR
Frame rate – 30fps (DOL WDR 2 frames)
Shutter – Electronic shutter with variable charge-integration time
Analogue to digital converter – 12-bit ADC
Spectral range – RGB + near-infrared (400–1000nm)
Technology – Multiprocessor system
CPU – Cortex-A9 Dual 600MHz
Camera OS – Homam OS (Linux-based)
SDRAM memory – 1GB DDR3L 800MHz
Input resolution and frame rate – Multiple 2MP streams at 30fps
Output interface – 8-bit
Output colour format – YCbCr 4:2:0
Noise reduction – 2D-DNR, 3D-DNR
Wide dynamic range – Digital-overlapping WDR 2/3 frames
Camera control
Auto exposure
Auto white balance
Flicker detection
Autofocus
Image correction
Image demosaicing
Gamma correction
Optical black clamp
Colour correction
Shading correction
Blemish compensation
Flicker correction
Texture enhancer
IR optimizer (night mode)
High light compensation
Lens distortion correction
Lens vignetting correction
Electronic zoom – Up to 8×
On-screen display – Up to 8 planes, 8bpp
Rotation – Accelerometer-based 180° automatic image rotation
H.265 HEVC – Multiple 2MP streams at 30fps, level 5, main profile, up to 40Mbps
H.264 AVC – Multiple 2MP streams at 30fps, level 5.1, high profile, up to 40Mbps
JPEG image coding – Baseline (ISO-10918-1/ITU-T Rec.T81)
Video protocol – HOVSP (Hyper Optimized Video Streaming Protocol), a Zorachka proprietary development
Audio codec – MPEG-2 AAC-LC
Number of channels – 2 (stereo)
Sampling rate – 48kHz
Bitrate – 64kbps/channel
Object detection – Static and dynamic detection and tracking
Human detection – Face detection
Tampering alarm – Defocus and global change detection
Type – 2× high-SPL Mylar stereo
Input power – 1W per speaker
Impedance – 4Ω
SPL – 92dB per speaker
Audio amplifier – Class D, 2W
Type – 2× stereo; premium-grade FETs
Sampling rate – 48kHz
Sensitivity – –30dB
Signal-to-noise ratio – 74dB
Frequency range – 20 — 20 000 Hz
Maximum SPL input – 110dB with automatic gain control
Directivity – Omnidirectional
IR lighting – 8 IR diodes
IR diode wavelength – Eye-safe (850nm)
IR LED brightness control – Independent 4-zone, 1024 brightness levels for each zone, proprietary auto adjustment algorithm
IR lighting power – 1.18W (~20 meters)
Day/night switch – Mechanical IR-cut filter
Wi-Fi – Dual Band (2.4/5GHz) IEEE 802.11 a/b/g/n/ac
Bluetooth – 5.0
NFC – NCI 1.0; supports NFCIP-1 and NFCIP-2, ISO/IEC 14443, ISO/IEC 15693, MIFARE Classic IC-based card and FeliCa card
Case material – Anodized and raw aluminium, semi-transparent glossy polycarbonate (lens cover), plastic inserts
Body size – 3” (75mm) sphere
Height with stand – 3.3” (83mm)
Weight with stand – 9.4oz (260g)
Camera mount – Magic Base (magnetic stand to be fixed on any horizontal, vertical or inclined surface)
Indicator – RGB LED
Colour – Anthracite grey
Power supply – USB-C, 5V, 1.5A
Average power consumption – 5W
Weather resistance – Designed for indoor use
Operating temperature – 41–95°F (5–35°C)
Operating humidity – 20–70%
SETUP IN THE HOMAM APP
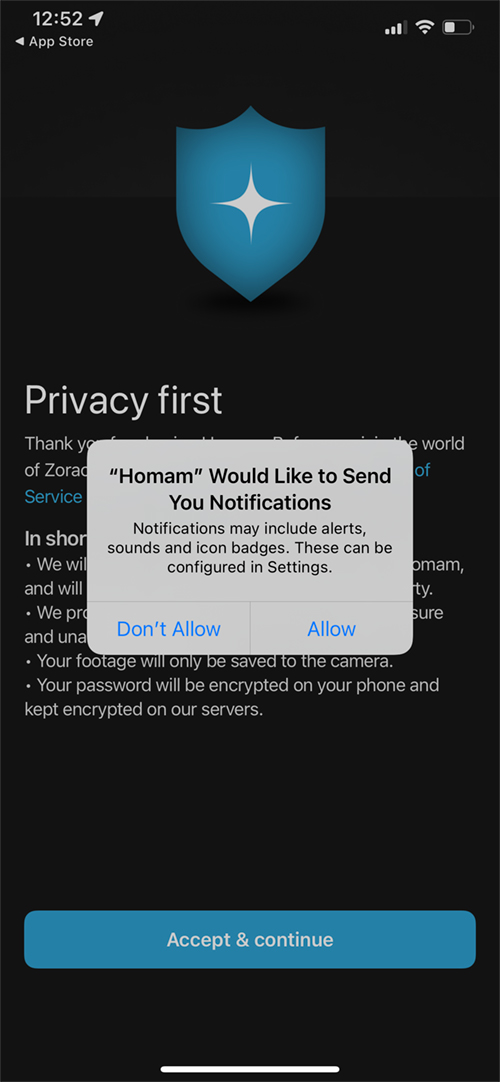
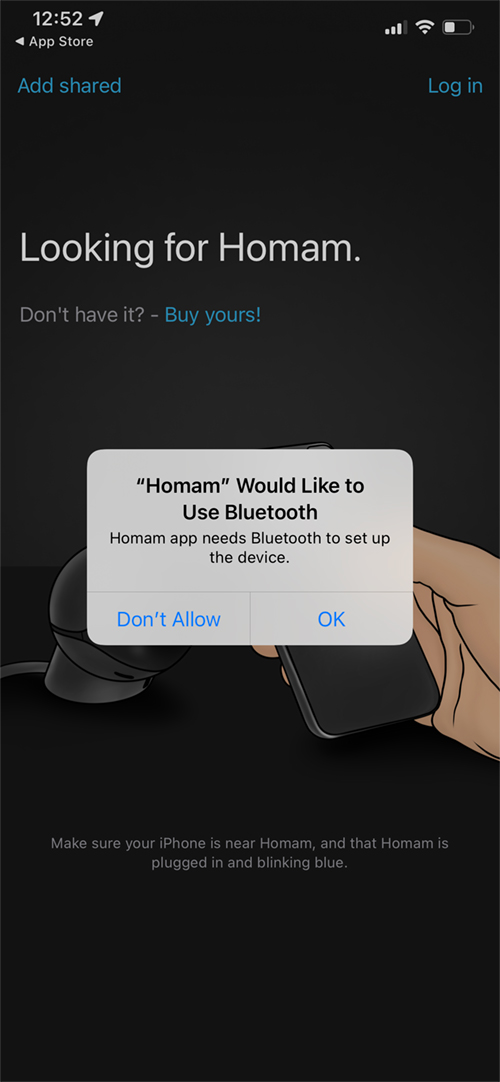
As far as I’m aware, the Homam uses what appears to be a pretty secure system for setting up the camera via Bluetooth (hear me out…). In essence, the phone and camera are paired directly to each using an anonymous account that requires no signing in or entering of a password. We’ll come back to this shortly.
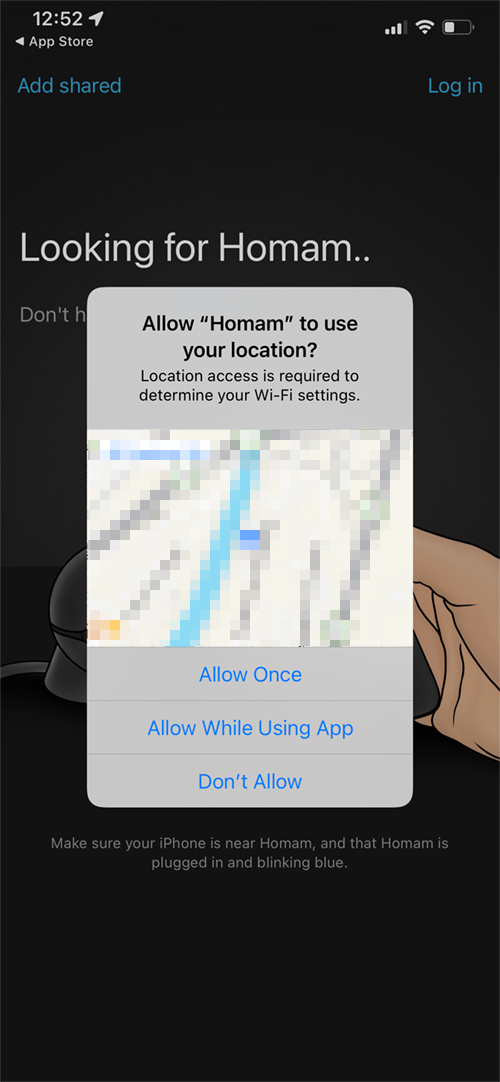
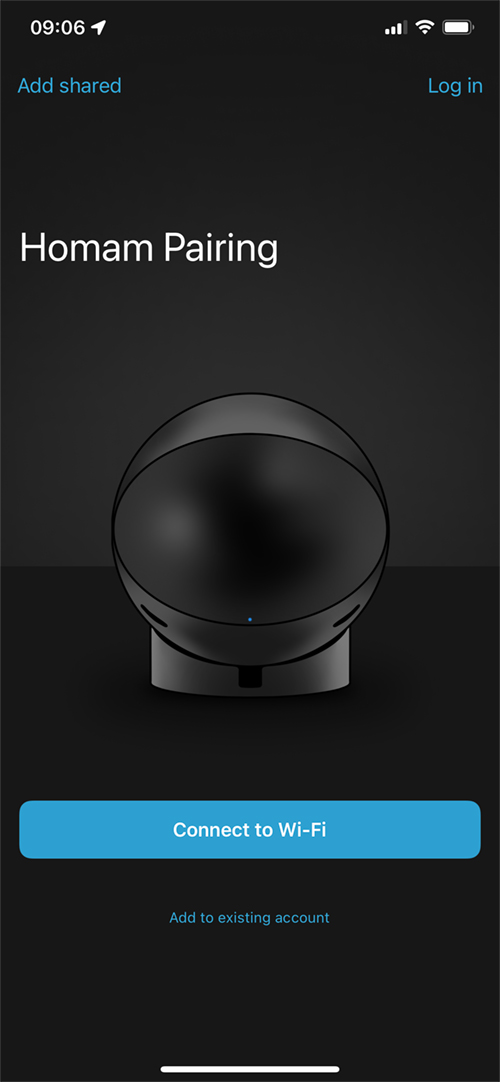
You get a request for your location as is standard but isn’t required. You then begin the process of connecting the camera to your network, which can be either the 2.4GHz or 5.0 GHz band. Your phone doesn’t need to be on the same network for this to work, although it’ll be better if you are. You then simply add your network details to the app, and it’ll begin the process.
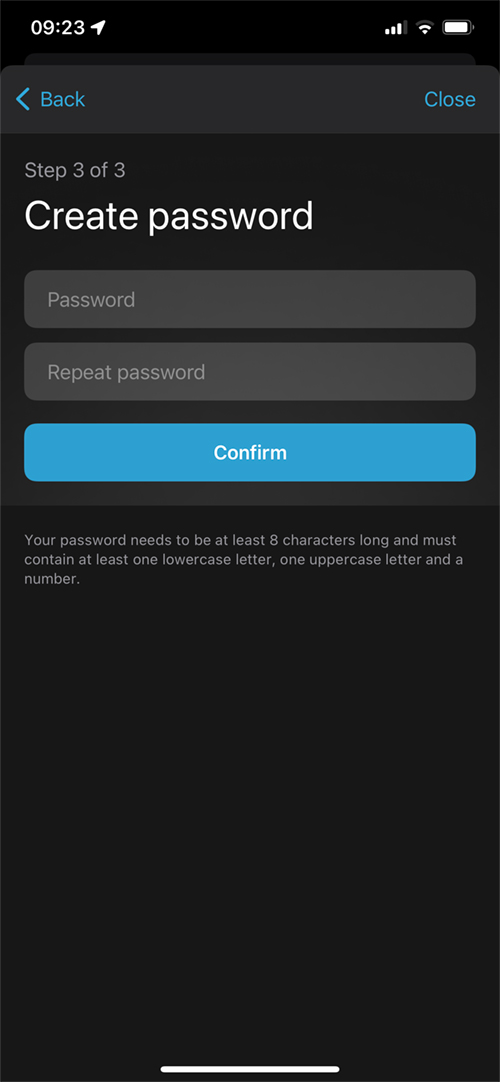
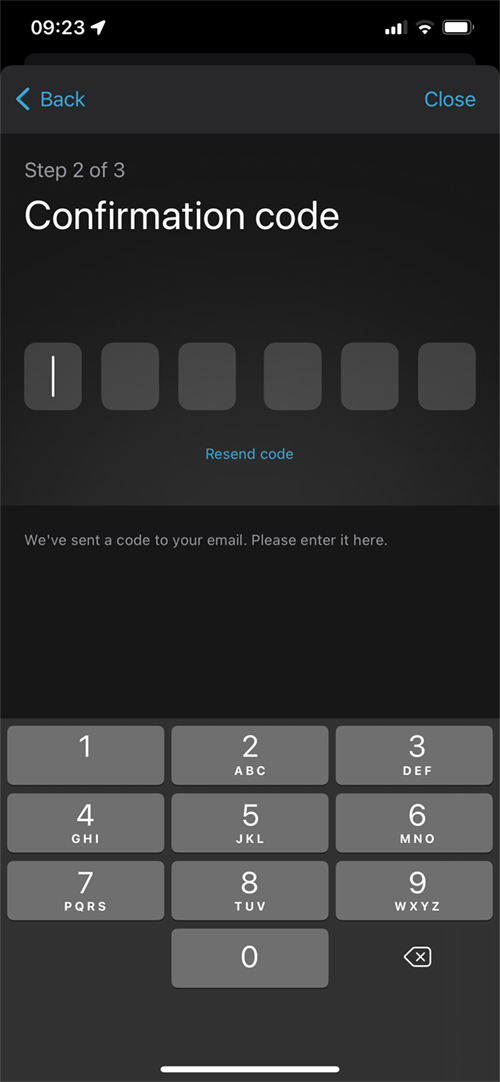
The camera will begin connecting, and once successful, will allow you to use the basic camera functions, but not all of the features. To access all features (that you don’t get access to in HomeKit anyway), you need to convert the anonymous account into a full (but free) account. When you add your email address as part of the process, you’ll receive a six-digit code to complete the process.
This section is quite important, as even though the camera and phone are paired to each other, with the anonymous account, you are still able to factory reset the phone and pair it again, which is not what you want if it’s stolen. To prevent this, once set up, the full account basically turns off the Bluetooth signal so that it can’t be detected for pairing by any other device. Additionally, once the camera is added to a full account, the only way to factory reset the camera is to remove it from this account. If the camera happens to fall into the wrong hands after this is all set up, the camera can be reset, but it won’t be detected, as the Bluetooth signal is still off, which prevents any subsequent pairing to take place. This also means that any footage recorded onto the camera’s built-in storage, can’t be accessed either. Pretty cool huh?
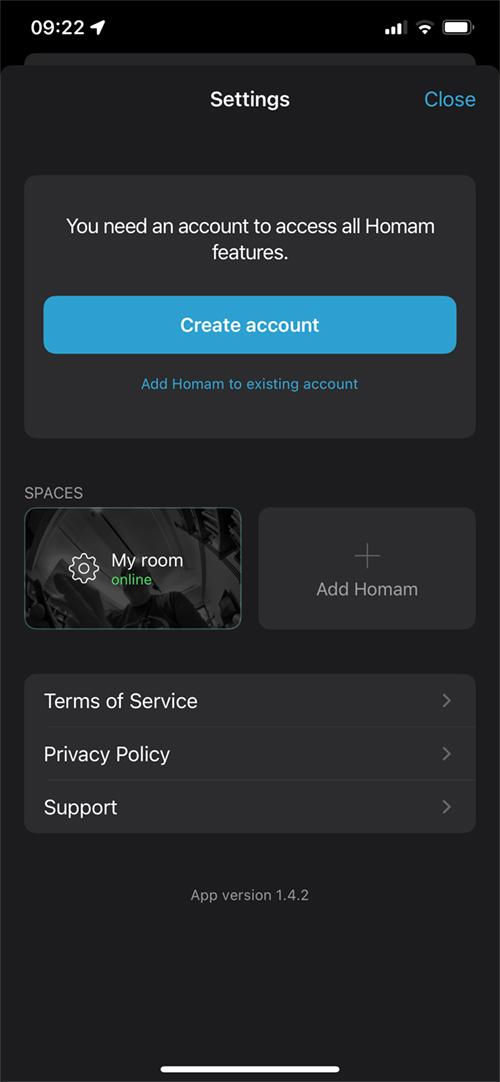
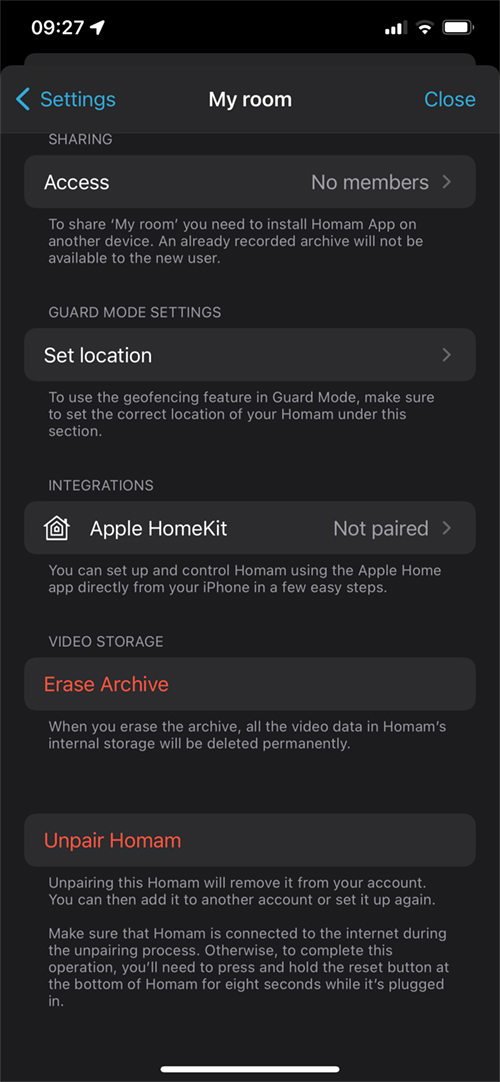
With a full account set up, you then not only get access to all the features, which we’ll look into in a bit, but you also get access to a few extra settings. These include adding other members for access to the camera feed, along with setting your location for location-based functionality, status LED settings, erasing the video archive, unpairing, and HomeKit pairing.
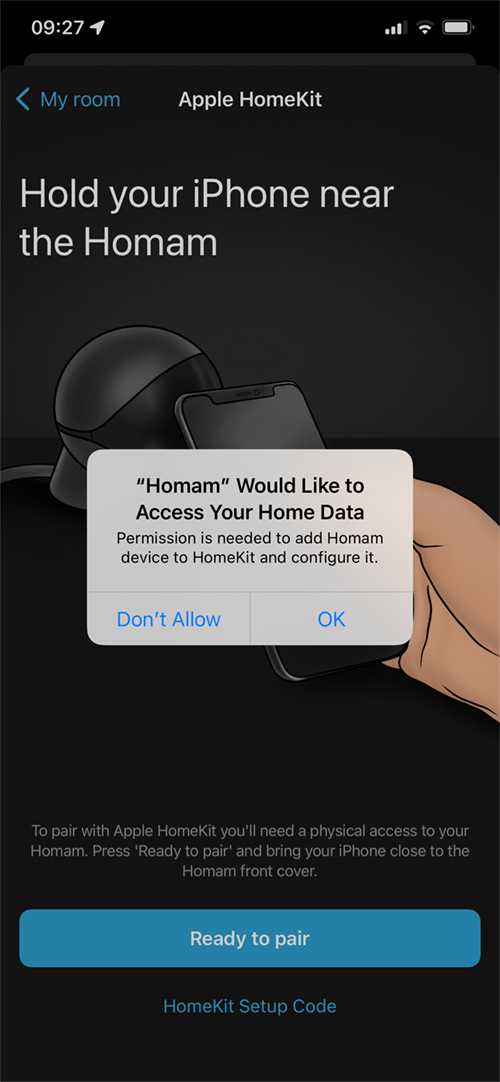
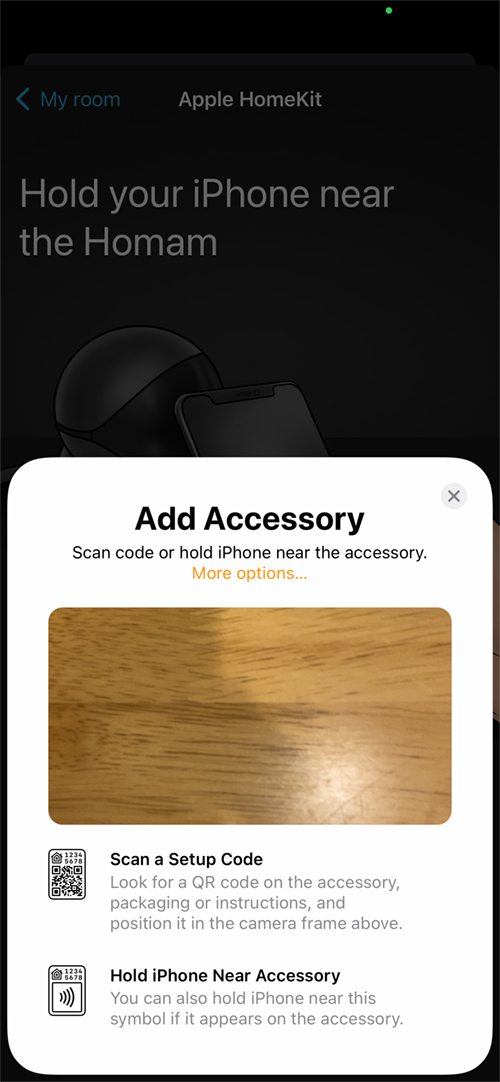
At this point, it should be pointed out that none of this is necessary if you only want to use it in HomeKit. Even though you can get the 8-digit code once you’ve created an account, it’s not needed, as the Homam includes an NFC chip for fast pairing (assuming your phone has NFC built-in). To get into pairing mode in HomeKit you simply rotate the camera so it’s upside down and it will then be in pairing mode with NFC activated. I really don’t recommend you use it solely in HomeKit only, any more than I’d recommend the Aqara G3, as you’ll be missing out not only on the security features outlined earlier but on some other unique features that I’ll go into a bit later.
I won’t bother to show all the screenshots for the HomeKit setup side of things, as it’s all pretty standard stuff you’ll have seen many times before if you’ve added any HomeKit devices to the Home app.
THE HOMAM APP
The Homam app gives you four distinct modes – View, Nanny, Guard, and Capture. The first of these is…
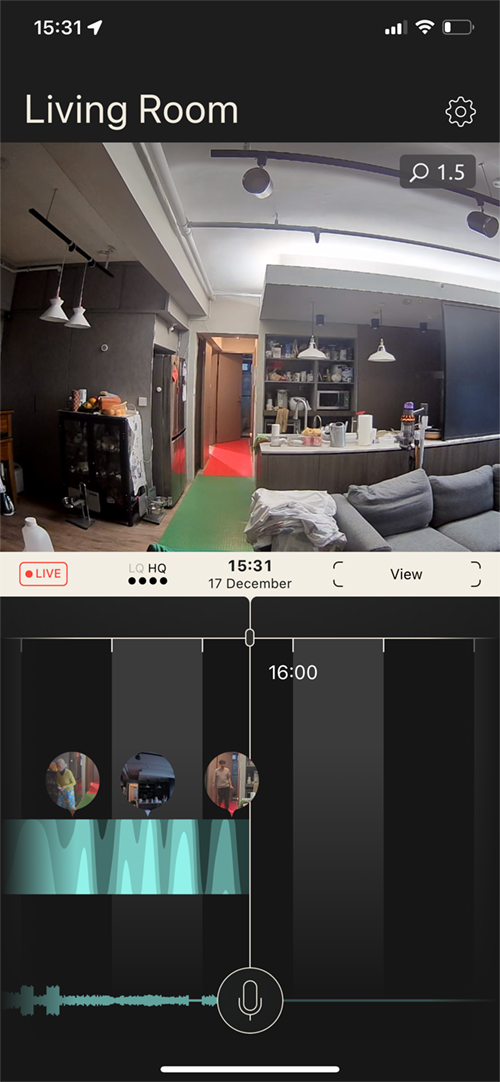
View mode
which gives you a larger view of the camera although it doesn’t give you the whole image, so in order to see parts of the view on the left or right, you need to move the screen with your finger, almost like manual panning, if you will. All four modes include an option to view the live stream or past recordings in high (HQ) or low (LQ) quality. You also have a ‘live’ button, that simply takes you to the live feed if you’ve been watching previously recorded footage.
On the subject of recording, the Homam records at 1080p, and regardless of whether you view the live or recorded stream in HQ or LQ it always records at 1080p. The timeline features two separate indicators for motion and sound. The top section shows waves that increase in intensity relative to the amount of motion. Below that is a separate audio timeline, so even if you can’t see what might be going on if it’s out of camera shot, you can still ‘see’ evidence of something via the audio timeline if it’s picked up by the stereo microphones.
Each of the modes allows you to zoom in digitally up to 8 times, whether it’s a record or live.
Nanny mode
As you might have gathered, Nanny mode is designed more for keeping an eye on your children or toddlers. In this instance, the live window covers the whole of the camera’s view. The difference in Nanny mode is that it gives you two specific features, the first of which is ‘Audio Monitor’. The icon looks like a speaker and once activated allows you to monitor sound picked up by the camera, even when the app is minimised and running in the background.
The second icon that looks like a crawling baby, is for a feature called ‘Sensitive detection’ which ramps up motion detection so that the smallest of movements is registered.
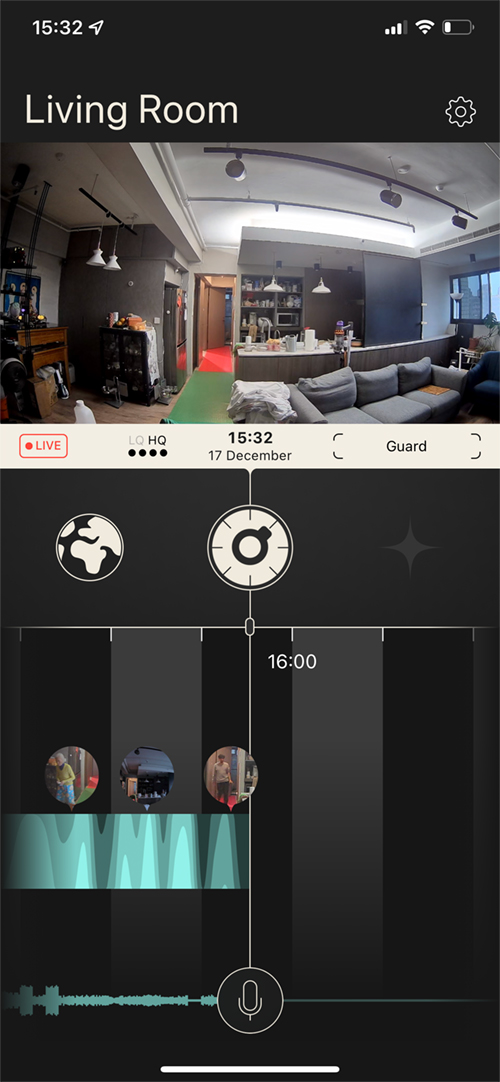
Guard mode
Like Nanny mode, Guard mode gives you the whole of the camera’s FoV but offers two different extra features. The first of these is ‘Intelligent detection’. Once activated, the Homam app will begin sending you notifications when motion is detected. However, this is where the Homam starts to use its built-in AI functionality. With most cameras, with notifications turned on, you’ll start getting message after message when any form of motion is detected. With Homam and intelligent detection, you’ll only get notifications from things that the AI considers worthy of bothering you with, so the camera will detect faces, your pets and people, but once the AI determines who it detects are regulars – i.e. members of the family or people living in your home, it won’t feel the need to inform you every time they walk into the Homam’s FoV. If, on the other hand, it detects unusual movement or a face that it doesn’t recognise, you’ll start to receive push notifications letting you know immediately that something is out of the ordinary. With this feature turned off, you simply don’t get any notifications.
the second option can only be activated if the aforementioned intelligent detection is active, which is for geofencing. With this option, you will still get notifications, but only when you’re not home, that is to say when you’re out of range of the camera for a connection via your network. With this turned off, you will get notifications regardless of your location.
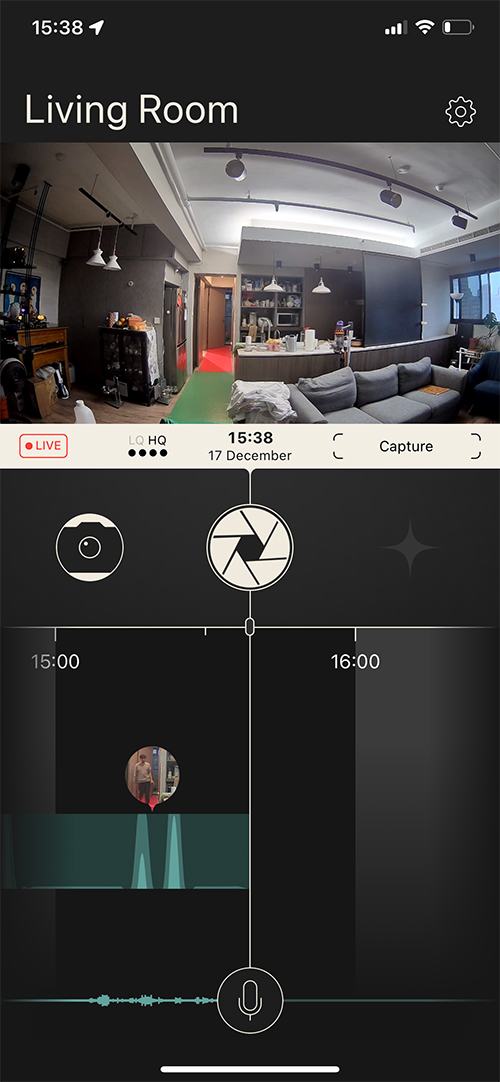
Capture mode
This last mode allows you to view the live stream or recordings like all the other modes, but in addition, you have two separate buttons for capturing images and video. If you’re viewing the live stream, you just have to hold down the ‘Shutter’ icon and it’ll begin recording the live footage, storing it on your phone’s camera folder once you let go of the button. You can also scrub back through the timeline, select an event and do the same, so clips can be grabbed from any point you like, not just when the camera happened to record something, as the camera records 24/7.
The second icon that looks like a camera, is for grabbing a screenshot as opposed to a video clip, this too can be used with the live stream or from recordings in the timeline.
At this point, it’s good to mention that the camera has a built-in eMMC chip that records all the time on a rolling recording basis. The chip is capable of 64GB of recording, hence the product name, which should give you approximately 36 hours of recordings. Whilst this chip isn’t able to be removed, it has a much higher resistance to failure compared to a standard removable SD card. This also means that footage can’t just be taken by anyone without access to an account that’s tied to the camera.
One oddity with all of these modes is that the microphone icon at the bottom can’t be used for simple two-way audio, even though it is available via HomeKit. In the case of the Homam app, you press and hold the mic icon, and say what you want to say, then release the button so the audio message can be sent to the camera, which is then heard a few seconds later by whoever is at the other end.
ARTIFICIAL INTELLIGENCE BUILT-IN
One aspect of the Homam that in some ways is harder to quantify, is the built-in artificial intelligence feature. This functions mostly for the benefit of motion detection, but it goes a little further than in how and when it notifies you of such things. In Guard Mode, the Homam uses on-device AI to discern between humans, pets, faces and more. All of this happens in the background without any intervention from the user.
One of the main uses for this is, of course, with regards to motion detection. The concept the company developed for this is so that instead of getting constant notifications every time something happens, you only get notifications when something is out of the ordinary, or a face isn’t recognised, for example. You won’t keep getting notifications when someone walks into the room if you already know them, or if one person walks into the room followed by another person.
Homam has several scenarios in which it can discern what is of interest, and what is happening, and decide on whether you need to be notified, based on a variety of factors. For example, Homam’s AI has scripts that can detect parties, meetings, children playing, or the sudden appearance of a new face, amongst others.
These features all work in the background and as such can’t be adjusted.
IMAGE QUALITY
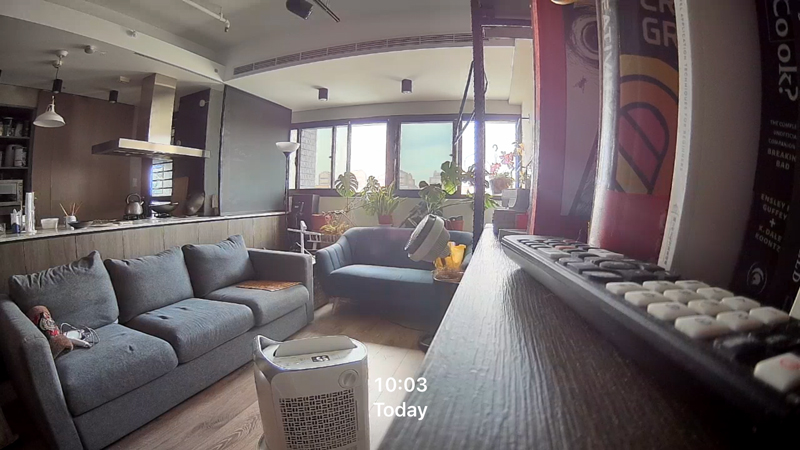
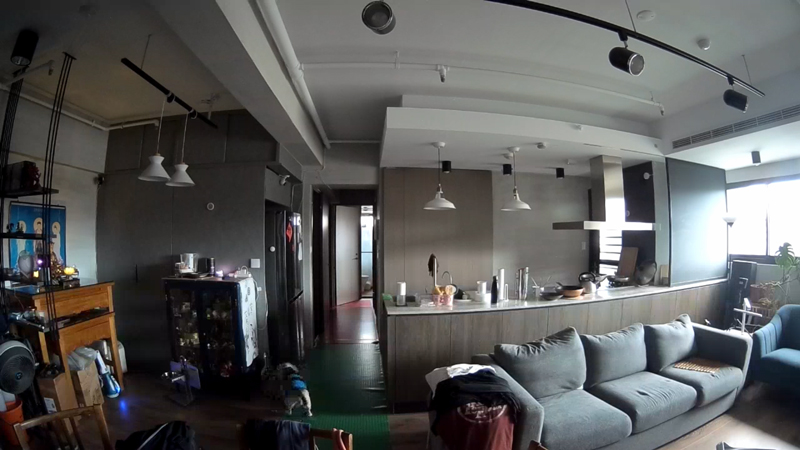
I’ve taken a series of screenshots directly from the Home app, as I feel that best represents where consumers will generally see these. I chose to compare the Homam to one of my favourite cameras, the Aqara G3, and one of the cheapest feature-rich cameras, the Eufy Solo IndoorCam P24. In this first trio of images, I directed the cameras at the window to see how well each would cope with the wide range of brightness levels. They all do fine, but in my mind, the Homam edges them out with marginally more details seen through the window.
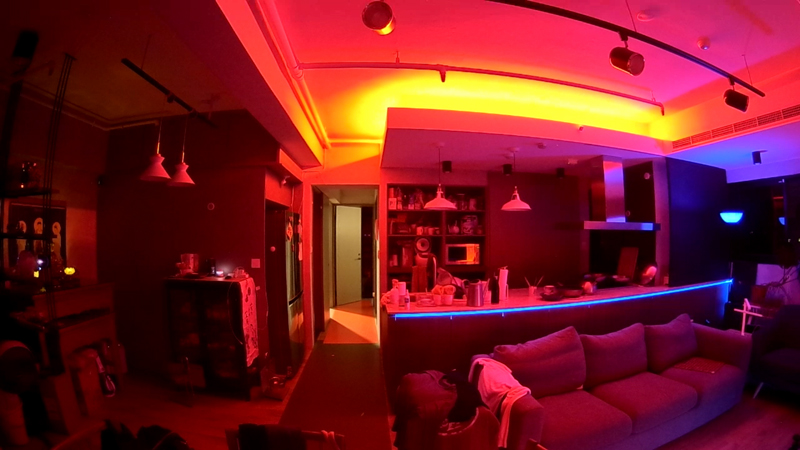
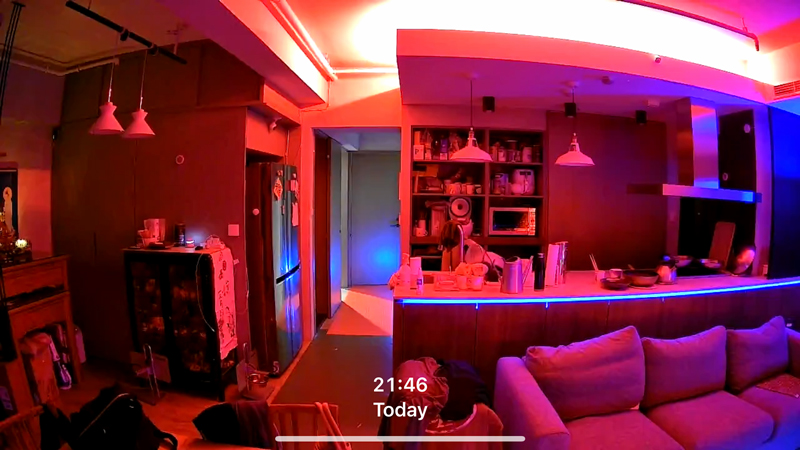
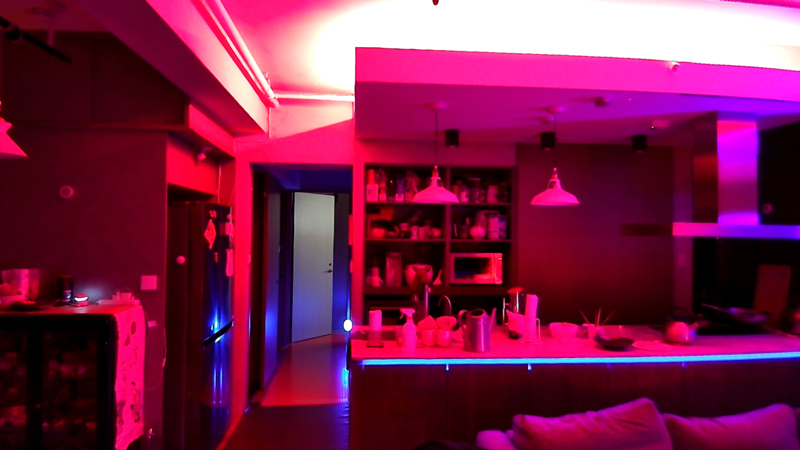
This next set of images was taken with low-level colour mood lighting, involving light strips, colour bulbs and lamps set to a couple of different colours. The Homam once again takes the crown with a more balanced image, whereas the other two cameras have blown out the cove lighting to the point where the colour of the strip is not discernable.
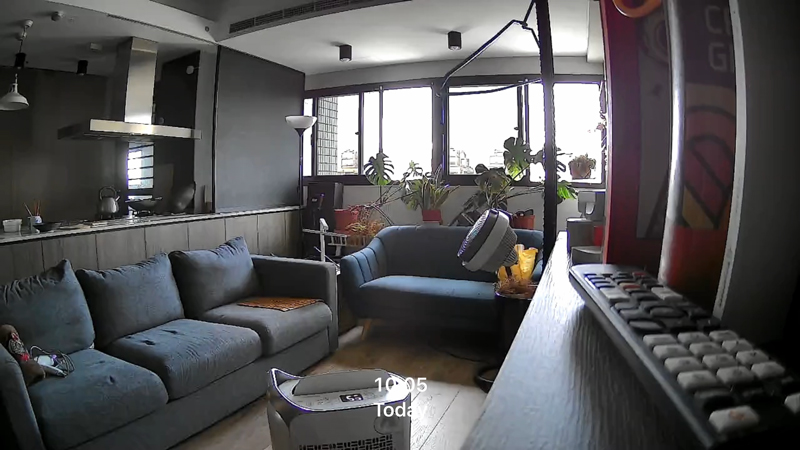
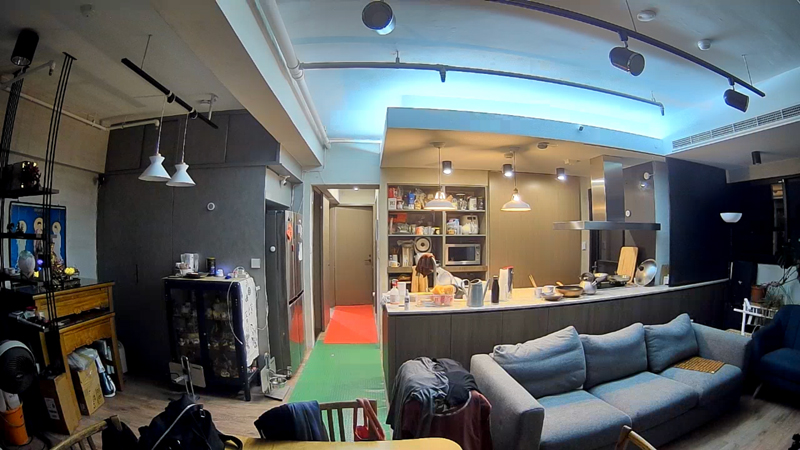
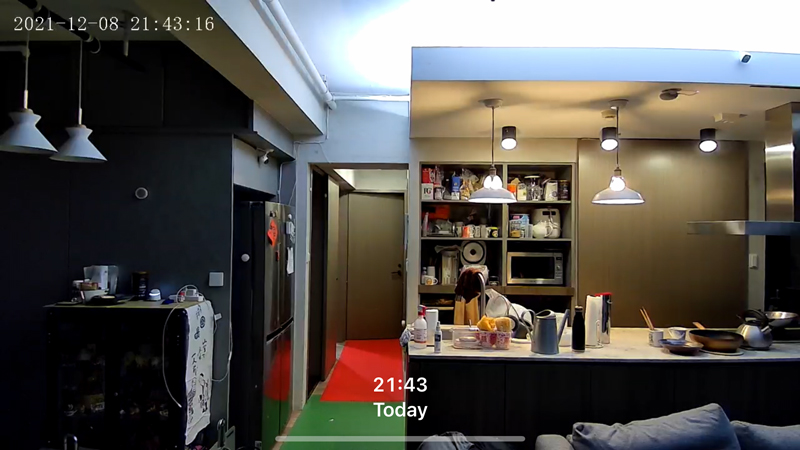
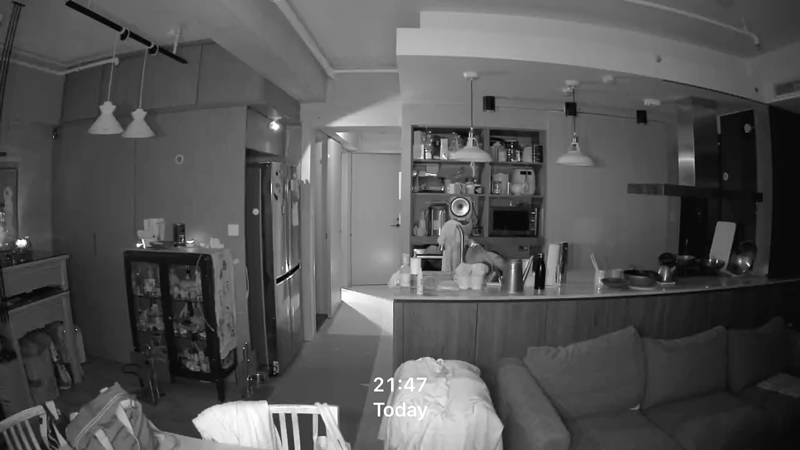
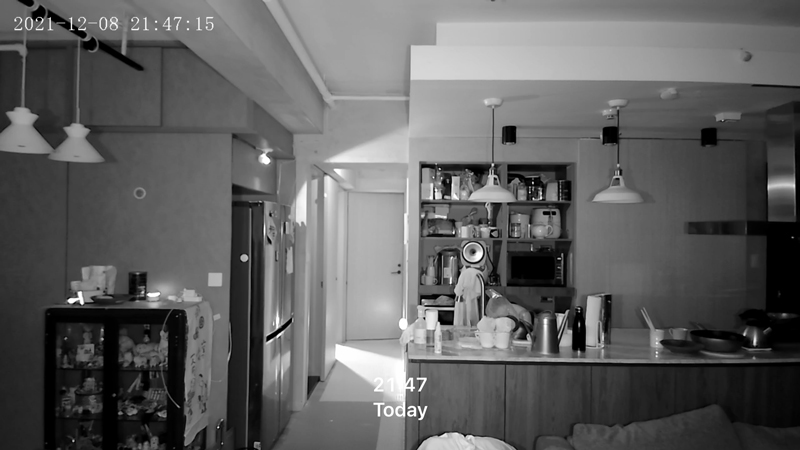
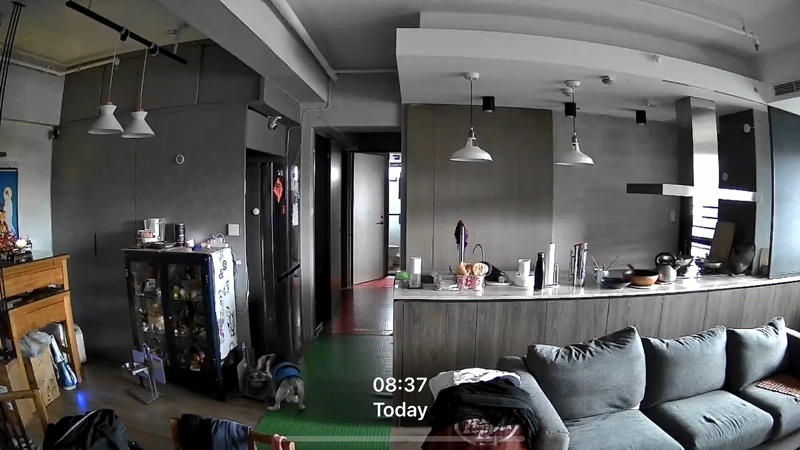
These next three were taken in the evening, with indoor lighting on. All three look fine, with the exception of the cove lighting, once again getting blown out, whilst the Homam can better cope with the contrast.
The next set is taken with most lights off with only indirect light coming from a door off the corridor. All three do pretty well, and I’m not sure there’s a lot of difference in these examples. However (you knew it was coming, right?), on many occasions I’ve noticed that when it begins to get dark in this area, the Homam managed to retain a colour image when other cameras would switch over to night vision.
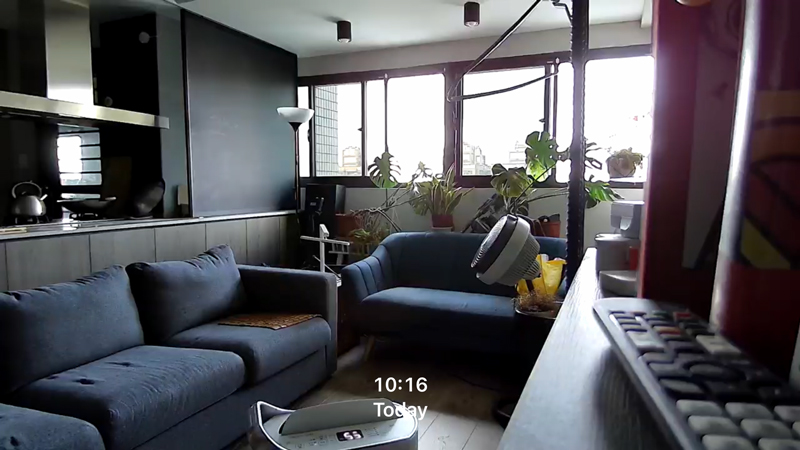
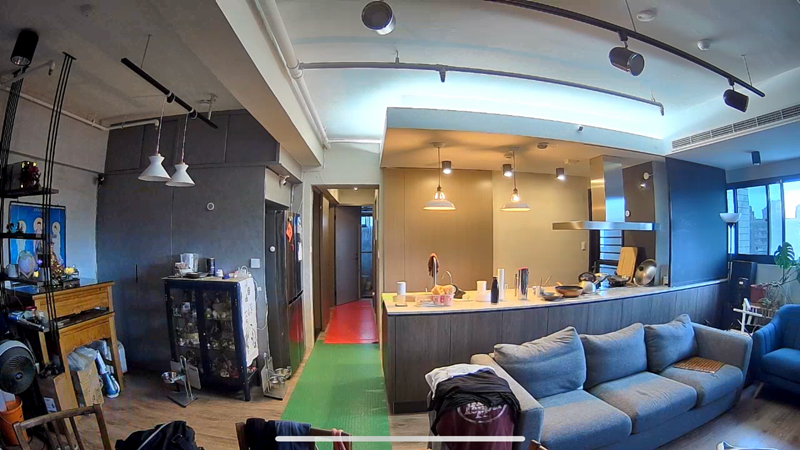
These images were taken in the morning, with internal lights on, and some light streaming through the window, although it was a little grey on this particular day. Even with daylight hopefully balancing things out, the cove lighting still appears blown out on the Eufy and the Aqara cameras, and much less so with the Homam. Aside from that, all images seem fairly decent.
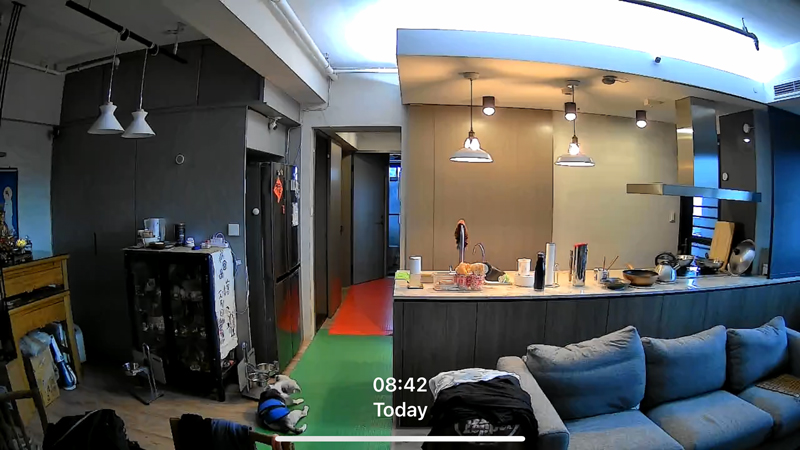
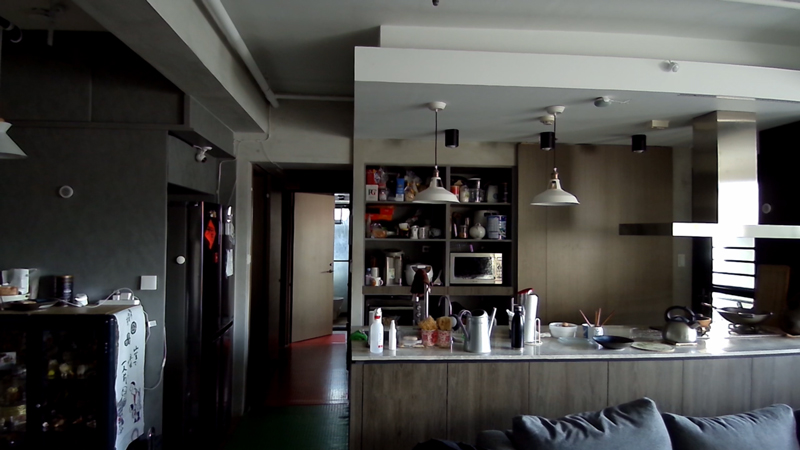
This final trio of images was taken in the morning, without any internal lighting. All three tend to do the job, so I wouldn’t have a particular preference in this case aside from the preference for a wider view, which you get with the Homam, although both the Aqara and Eufy have the advantage of being able to pan. The obvious downside to this is that you need to go into their respective apps in order to control them in this manner.
SOUND & MOTION – MICS, SPEAKERS, AND MOTION SENSORS
This is an area that I admittedly haven’t tended to focus on so much in the past. Still, with the specs for the Homam being what they are, testing both the microphone and speaker quality (in a very non-lab environment way) seemed the right thing to. Obviously, I can’t demonstrate this in a written review, so you’ll have to refer to the accompanying video to get a better idea of how each camera fared. Still, I can tell you that of the three, the Homam did very well, unsurprisingly, with a much cleaner and more detailed sound than either the Aqara G3 or the Eufy P24. The results were less obvious with the microphone tests, but what was apparent was that the Homam’s microphones picked up more ambient sound than the others. Whether that’s a good thing or not is relative I guess.
As regards motion sensors within cameras, as they generally tend to be based on pixel-level changes in the image, I don’t usually regard them as equals to PIR sensors. Still, if you have a camera with one built-in, it can be of use in certain circumstances, and so I did a couple of tests, the results of which you can once again see in the accompanying video. In my tests, I had the lights set to colour mood lighting as per the images seen earlier, with the trigger event happening at the end of the corridor, so essentially as far as possible from all three cameras for this test. In this instance, the Homam only just edged out the Aqara G3, with the Eufy coming in last in terms of response time. The second test involved all lights off in the evening, so as dark as you could get, basically. In this case, probably due to the Homam’s superior optics, it detected movement a lot faster than the other two, with the Aqara coming last in this instance.
IN DAY TO DAY USE
I have to say that this camera has impressed me greatly from the get-go, but should I be surprised given the price? Probably not. Putting the price to one side, the experience from the presentation, to setting it up, and using the app in both HomeKit and its own app, especially, has been as fuss-free as I could wish for, and something I wish I could say for some of my even less complicated devices. That’s not to say there isn’t room for improvements, which I’m hoping are forthcoming at some point. For example, it would be nice to be able to have detection zones, that you already get in much cheaper cameras, but then that’s already available in HSV, so maybe it’s not necessary, assuming you use HSV. The fact that two-way audio is available via HomeKit but not via Homam is also a bit strange, so hopefully, that’s something else that can be addressed.
Of course, US$399.00 is way more than the asking price of pretty much all HomeKit cameras on the market, some of which include things like Zigbee hubs, or 2K and 4K recording, none of which is offered by the Homam, so why the high price point? Well, if you’re an avid Apple user, you may have been asked the same kinds of questions as to why you pay a premium for an iMac over a seemingly cheaper PC, with the same specs. The answer is in the details for such devices, and in some ways, this is the case for the Homam, although the disparity between the price of this camera and others is probably a lot larger than when comparing a PC to a Mac. I’m not here to justify the price, and Zorachka is within its rights to charge what they deem fit, just like I stated in my previous review of the Thinka Z-Wave Gateway, with regards to the asking price. A product like this is an unnecessary commodity, unlike gas, water or electricity, and as such, if you don’t like the price, buy one of the many cheaper options. Ultimately whether this camera is a success (it may already have sold many for all I know) or not is going to be determined by the consumer, and whether they deem the generally superior specs are worth the asking price. Only you can answer that, but in my case, as I’m not ever flush with cash these days, I personally couldn’t justify the price, no matter how good the camera is, however, that’s just based on my own set of circumstances and has nothing to do with the actual quality of the product.