
When it comes to alarm systems, HomeKit doesn’t fare too great at present, with offerings from the budget-friendly Aqara setups, to more expensive and arguably dedicated ones from the likes of Honeywell, and Abode, the latter of which – the Abode Iota Security Kit – we’ve previously reviewed. Whilst the Aqara system is probably the cheapest, and most customisable, mostly due to the abundance of choice and cost of its sensors, the one thing it currently lacks is a dedicated alarm keypad. Of course, automations and/or smart buttons can be used to arm/disarm your alarm setup, but call me old-fashioned, with having a dedicated panel, along with buttons for your code and the different alarm modes, is something that I’ve long wanted – it just feels ‘proper’ when you add something like this, even if it’s something not really necessary.
With me having the Adobe Iota setup already in place, alongside a multitude of Aqara hubs with built-in sirens/speakers, I decided a while ago to take the plunge and buy the Abode Keypad 2 and add it to my Abode system, which I should state, is required for the keypad 2 to be used, whether it’s the Iota Gateway, that includes a camera, or the Smart Gateway, that doesn’t. Without one of these, it’s just an expensive paperweight. So, if you either have an Abode system and fancied the idea of a separate alarm panel, or don’t, but are enticed by the idea of one, read on…
PACKAGING/CONTENTS
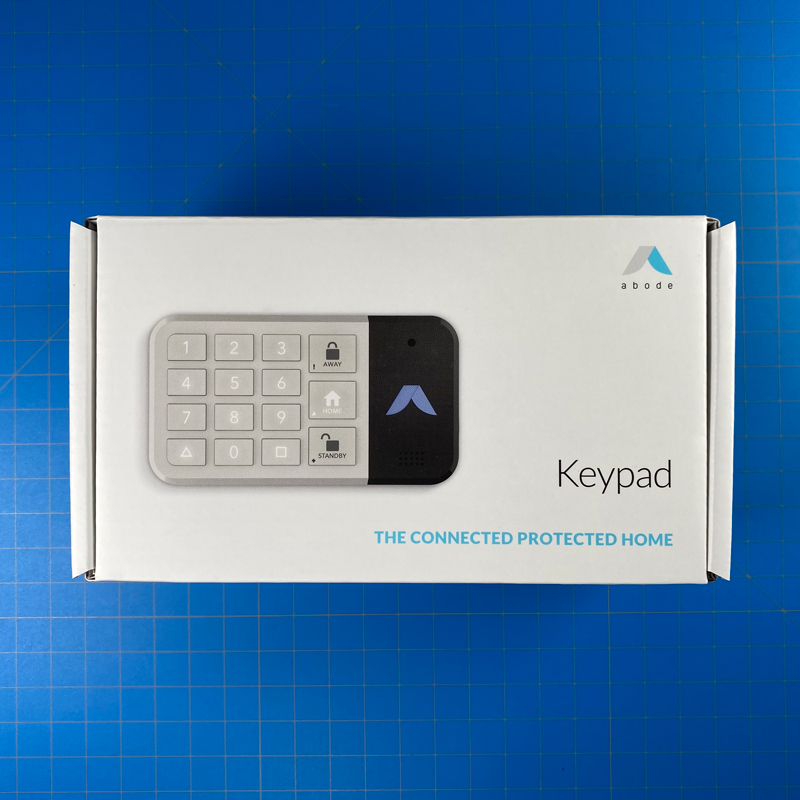
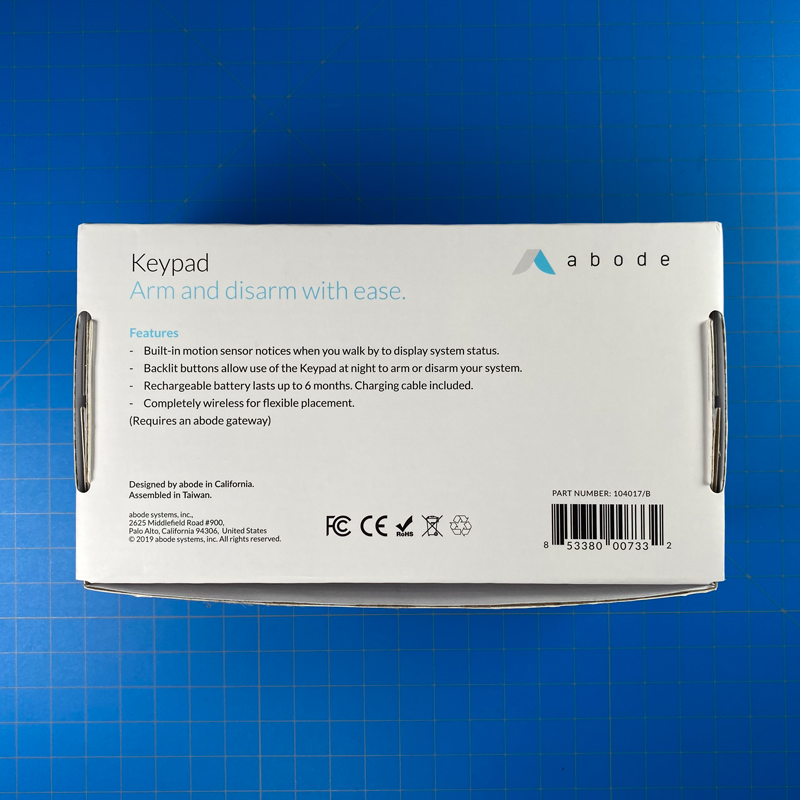
The Keypad 2 (to distinguish it from its non-HomeKit original) is featured on the front of the packaging, and although it’s the second iteration, it still only shows it as ‘Keypad’. There’s no chance of buying the wrong model, however, as the old version doesn’t seem to be available. It’s also visually very different to the 2nd version. The rear of the box states the features, which are;
Built-in motion sensor that lights up the display when you’re in close proximity
Backlit buttons, so you can see what you’re doing when controlling the panel
Rechargeable internal battery that can last up to 6 months between charges
Completely wire-free apart from when recharging the battery with the included USB cable
It does state that an Abode gateway is required, as I stated in my intro.
Aside from that, there’s not a lot to see, but the box is very sturdy, and the contents are well-protected.
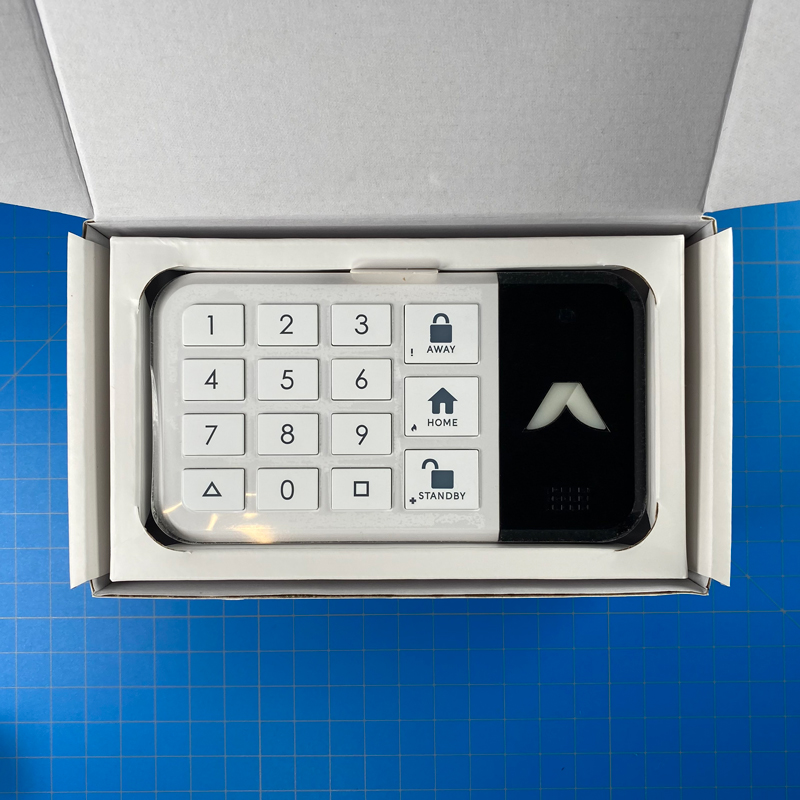
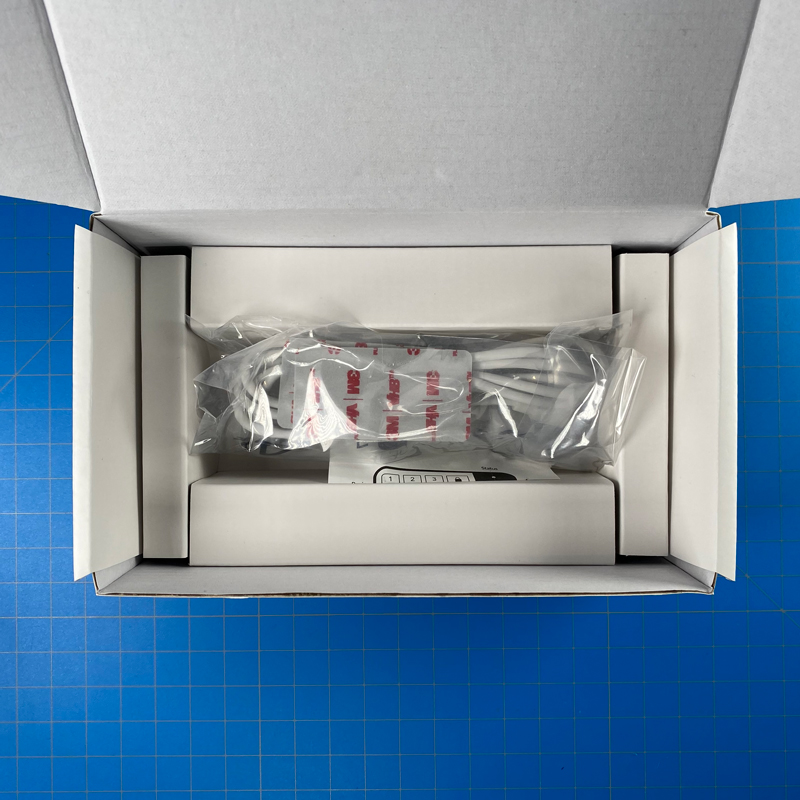
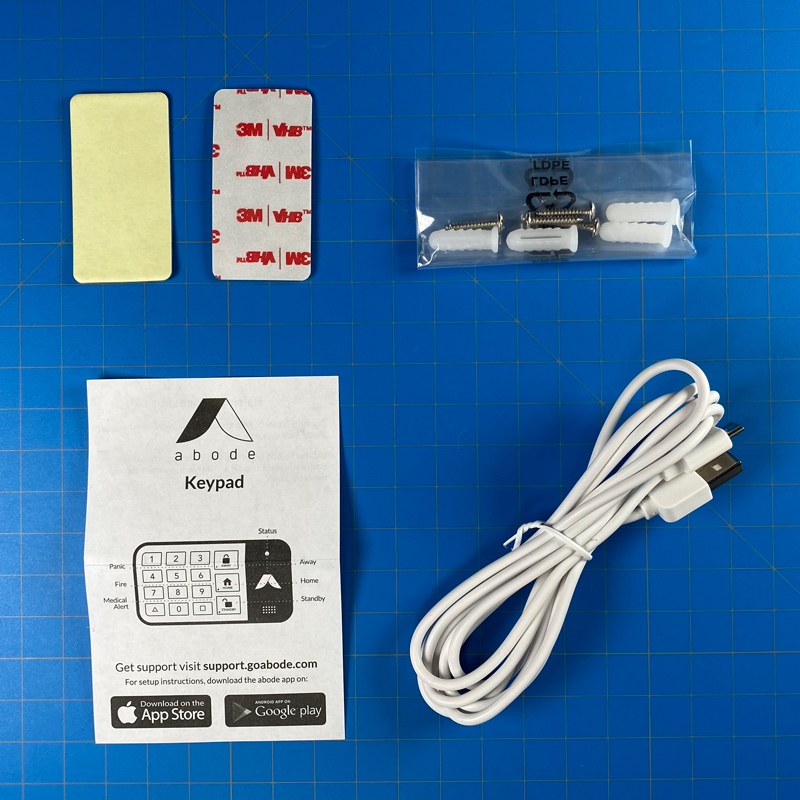
The first thing inside is the keypad itself, which is covered in a plastic sheet to protect it from fingerprints and dust. Underneath it and magnetically coupled to the keypad is a metal backplate, which we’ll touch on shortly. Below that is another layer that includes all the additional pieces;
Two double-sided 3M stickers
four screws and rawl plugs
USB-A to Micro USB cable
Quick guide
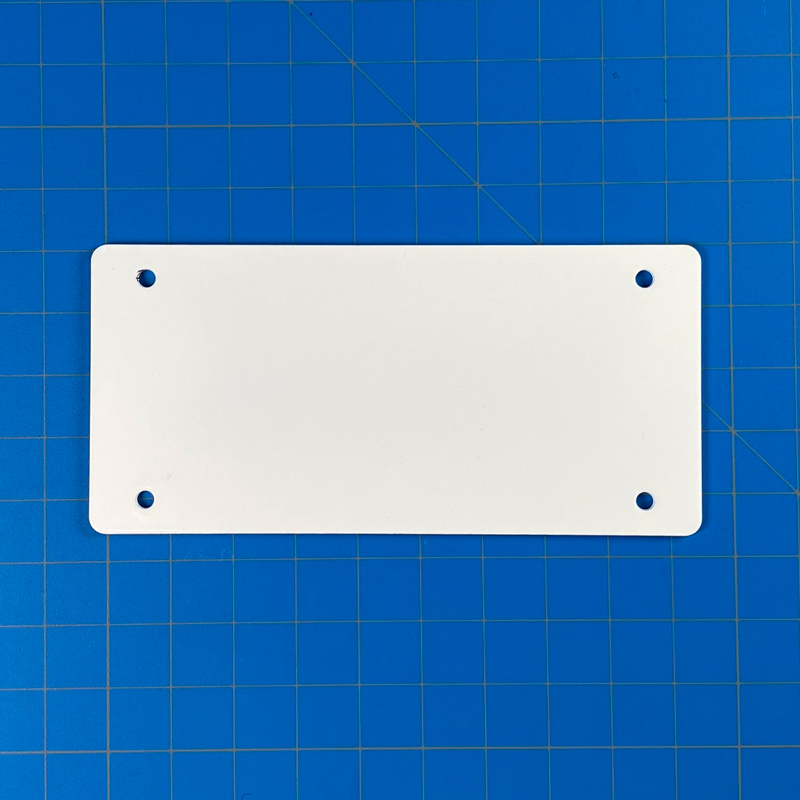
The aforementioned magnetic metal plate I mentioned can be attached to a wall or any surface with either the 3M stickers, or with the provided screws. The small sheet doesn’t really tell you how to pair the keypad to your hub, which is all dealt with in the Abode app, but it does give you a decent idea of the features of the keypad that you may not be aware of besides the obvious ones.
THE KEYPAD
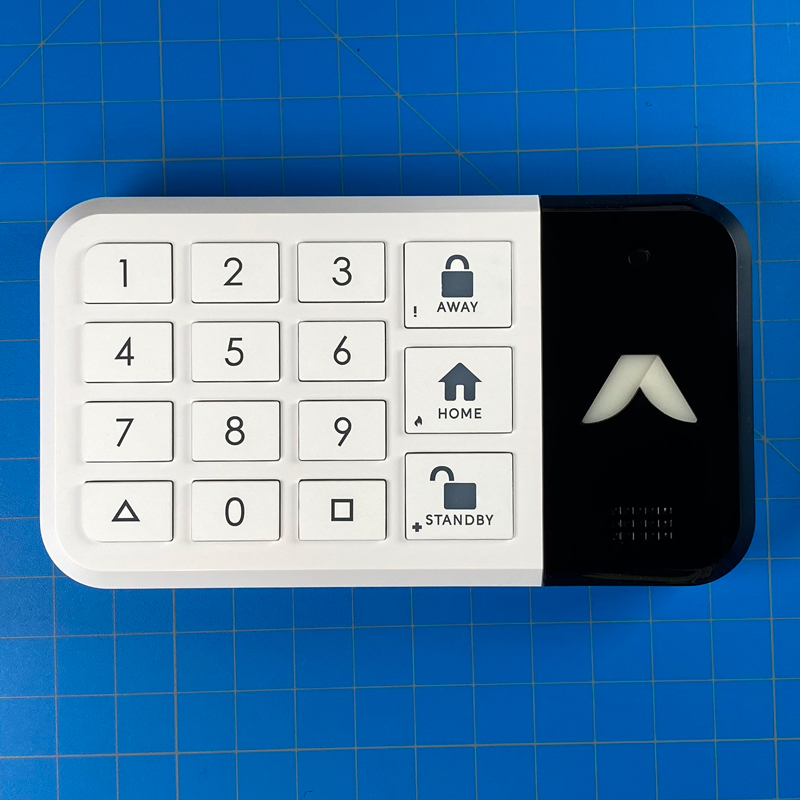
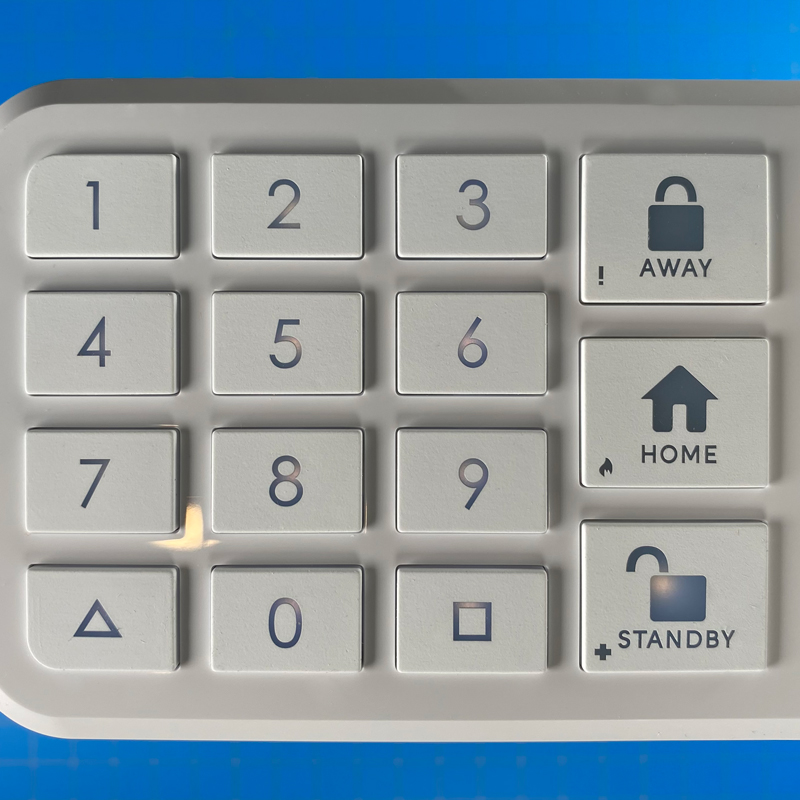
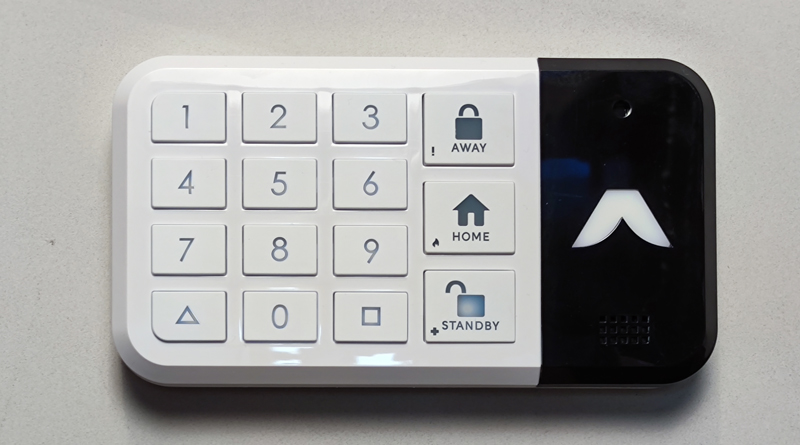
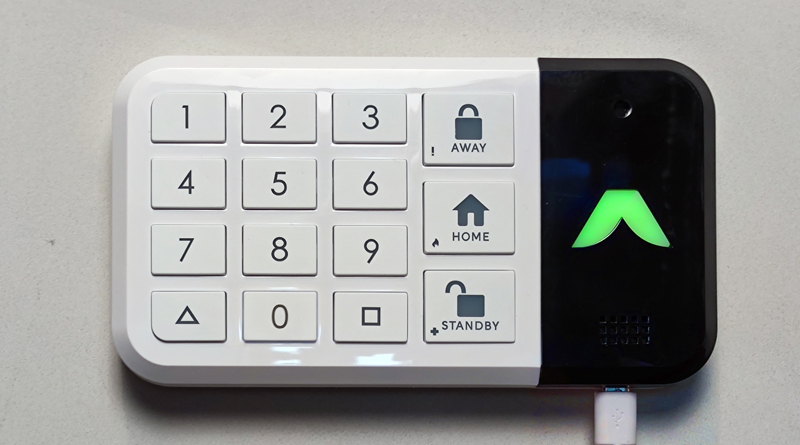
So onto the keypad itself, and whilst it’s quite straightforward in terms of its looks, it’s nonetheless nicely laid out. around 70% of the front is taken up with buttons, which consist of 4 rows of three for digits 0 to 9, plus two buttons with a triangle and square symbol. Prior to the keypad getting an update for HomeKit compatibility, these were designated for ‘future use’ but are now in fact exposed to HomeKit, although not quite in the way you might be accustomed to (more on than later).
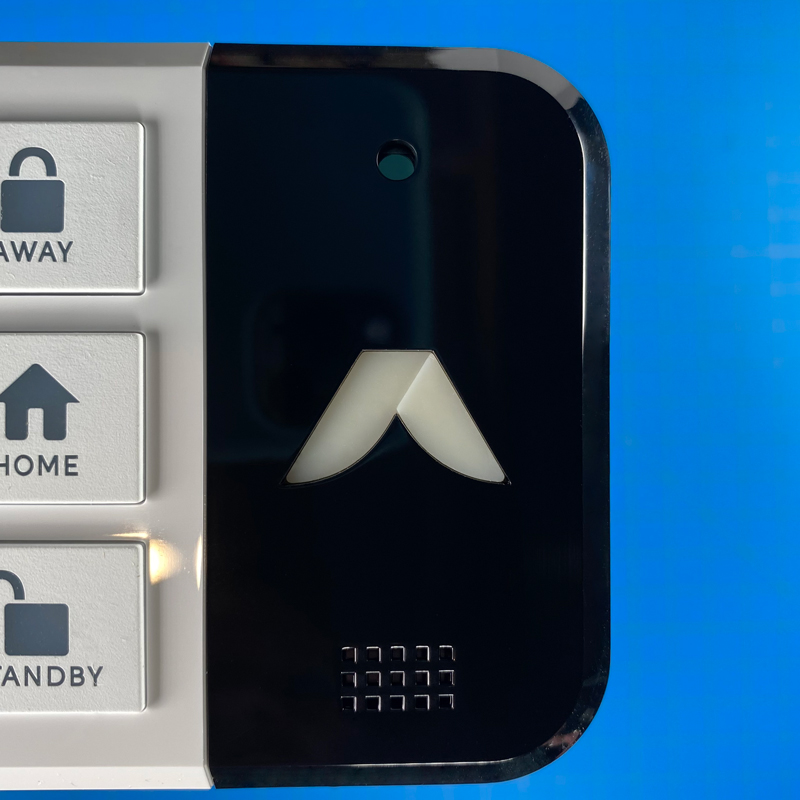
Next to these 12 buttons is a single column of 3 buttons, one for each alarm mode – Away, Home, Standby. The remaining 30% of the panel is taken up with a contrasting black section (just like the Iota gateway) that prominently features the Abode logo, along with a speaker, and a motion sensor.
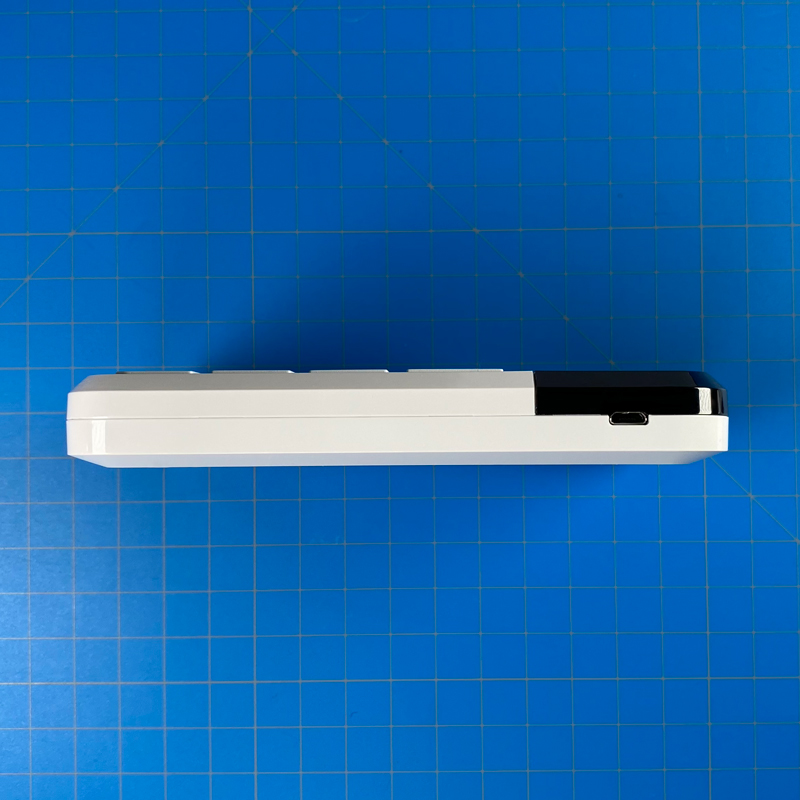
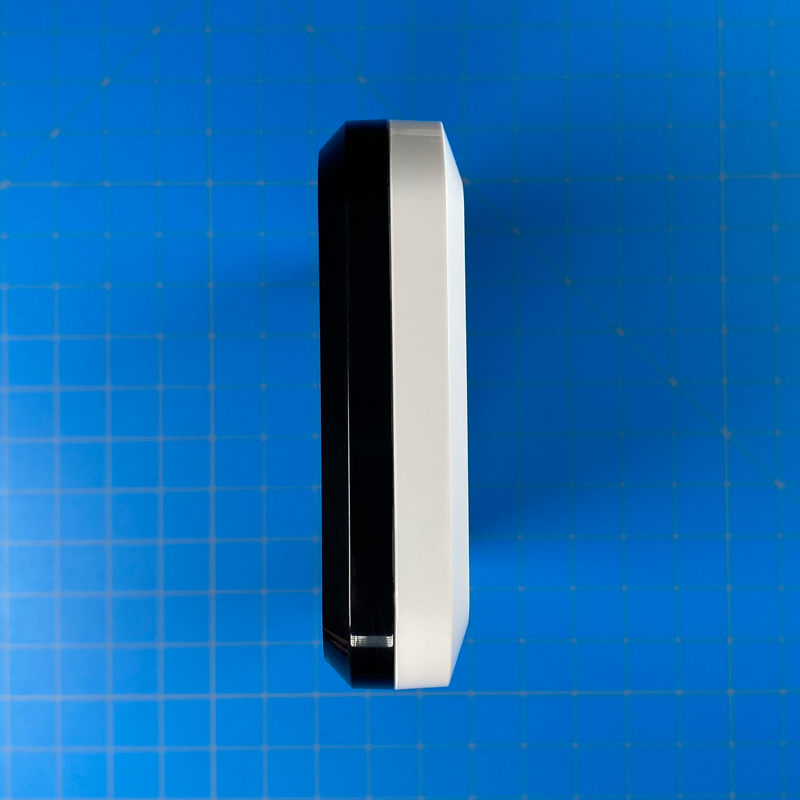
The underside of the keypad features the Micro-USB port for recharging the internal battery, and aside from that, there’s nothing to see around the other edges of the device, which has the following measurements;
width – 3.1″ / 79mm
height – 5.7″ / 145mm
depth – 0.8″ / 20mm
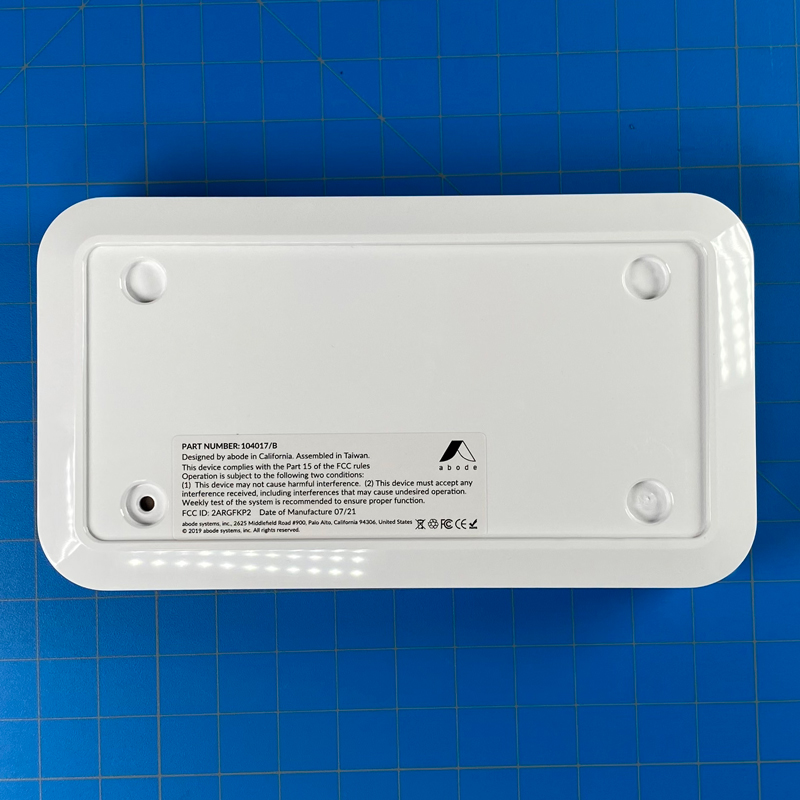
If it couldn’t get any more minimalist, the rear of the keypad has nothing to see with the exception of an indented section for the magnetic mounting plate (and screws) to match up with, which is simply white, with four holes should you want to use the included screws to mount it to the wall with. One of the four recesses on the back of the keypad features a reset hole should you need to factory reset the device.
Overall, my initial impressions are really good, and I like that the company have gone for the two-tone approach that matches some of their other products. The buttons are really well spaced out, so even the ‘sausage fingered’ amongst us won’t have any problems arming or disarming the alarm. I do have one reservation which I’ll mention later, but it’s nothing major.
INSTALLATION VIA THE ABODE APP
As with any device that requires a hub, you need to add the keypad to your Abode gateway first, via the Abode app. The Abode devices that go through the hub and are exposed to HomeKit – of which there are many – usually use the RF433MHz wireless protocol to communicate with the gateway, which in turn exposes them to HomeKit. The Keypad is one such device.
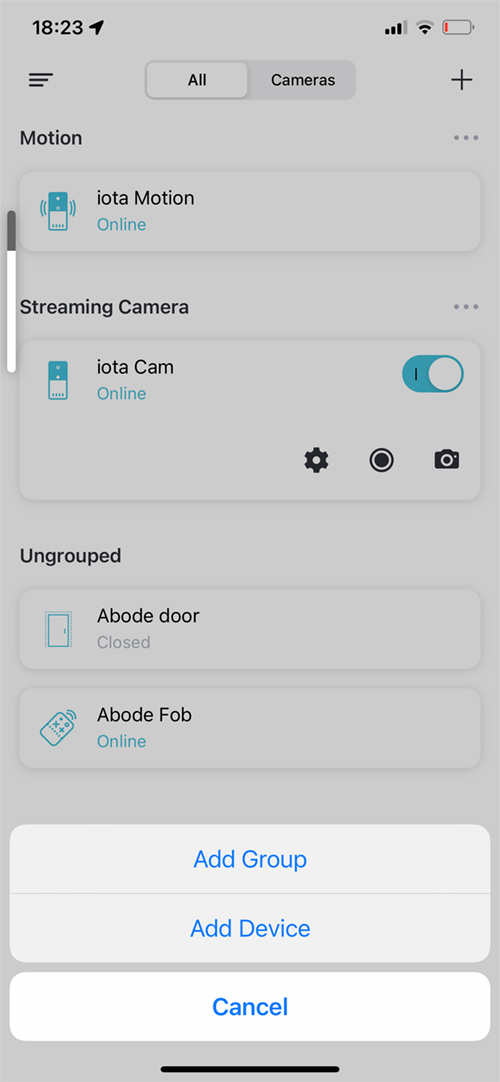
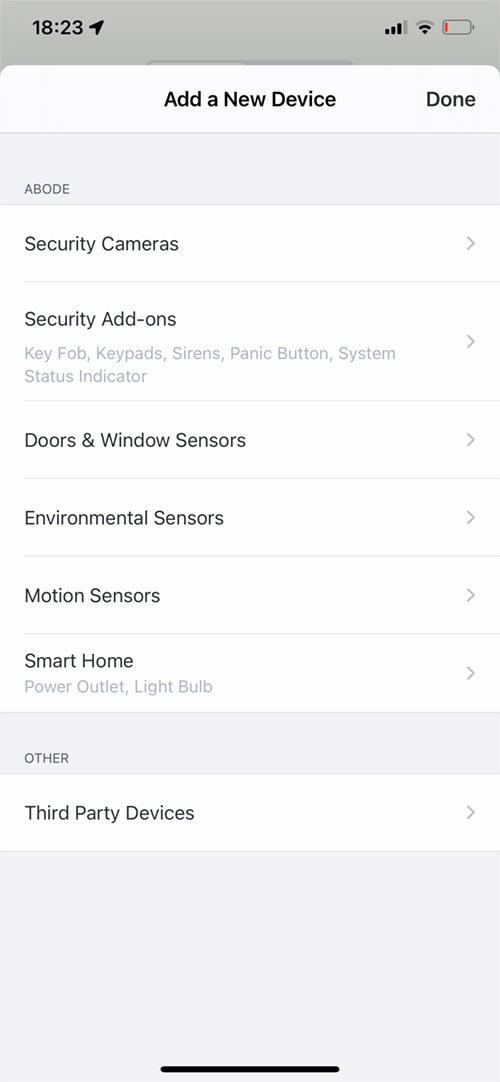
Click on the ‘+’ icon
Select Add Device
Select Security Add-ons
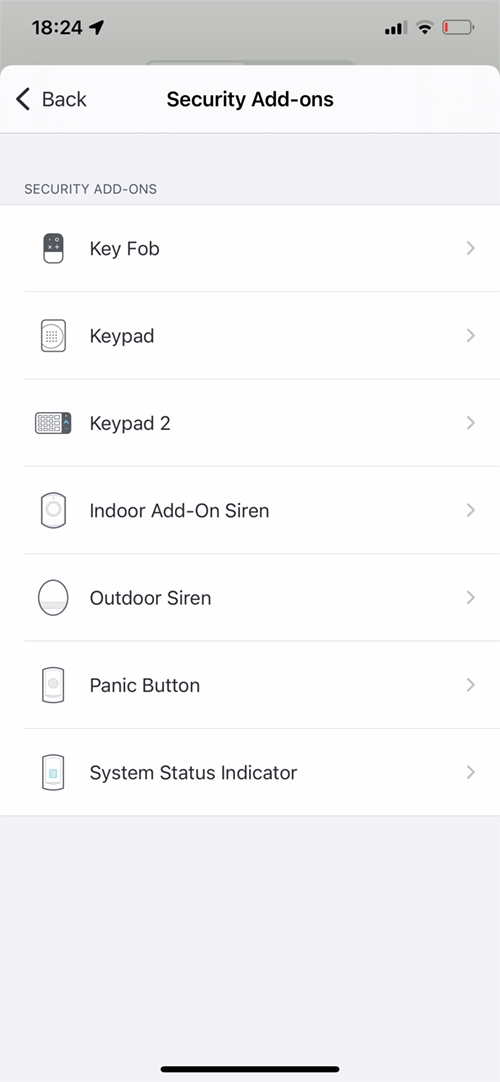
Select Keypad 2 from the list
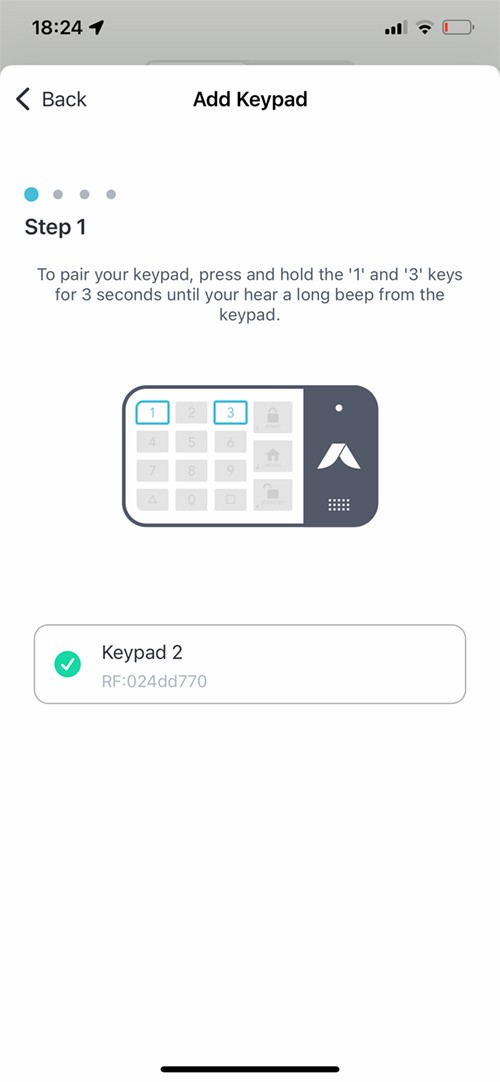
Follow the on-screen instructions to pair the device
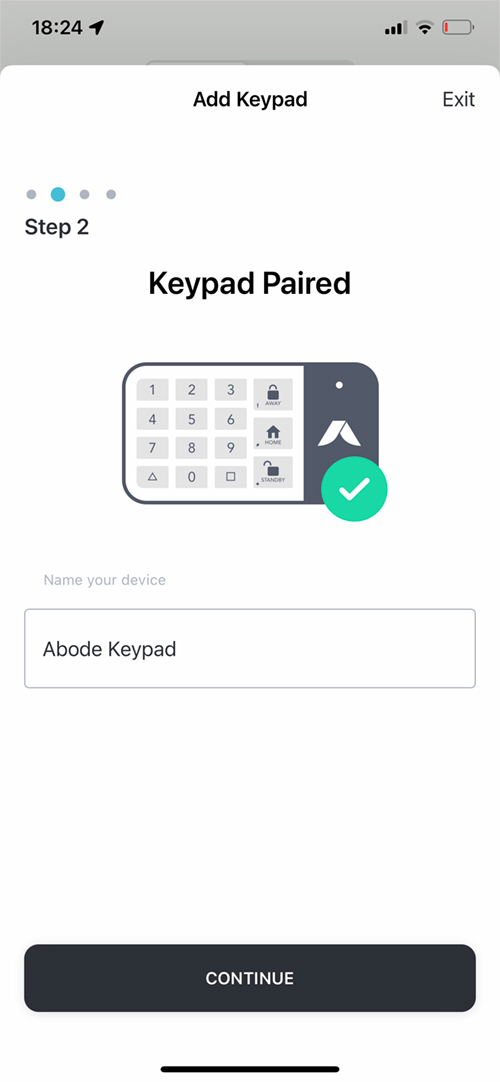
Once paired, name the keypad
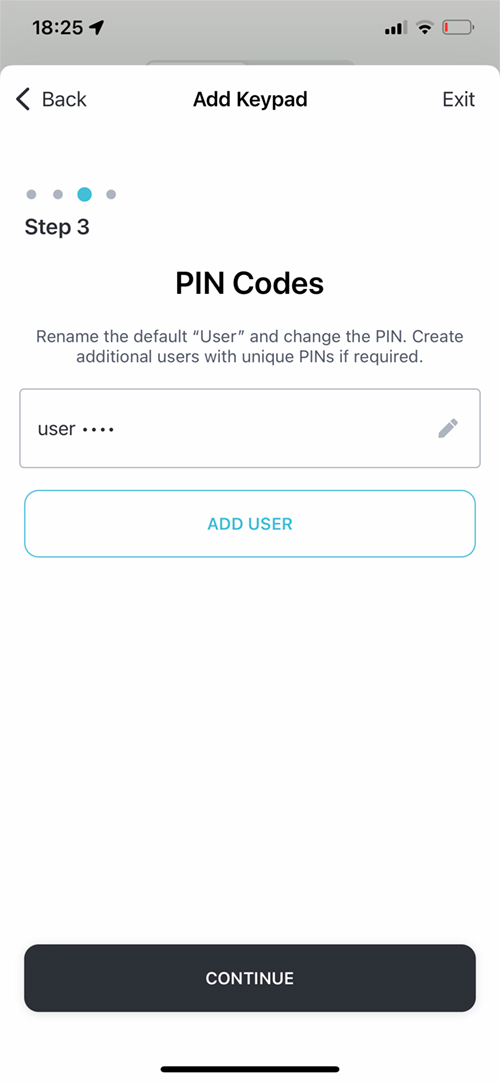
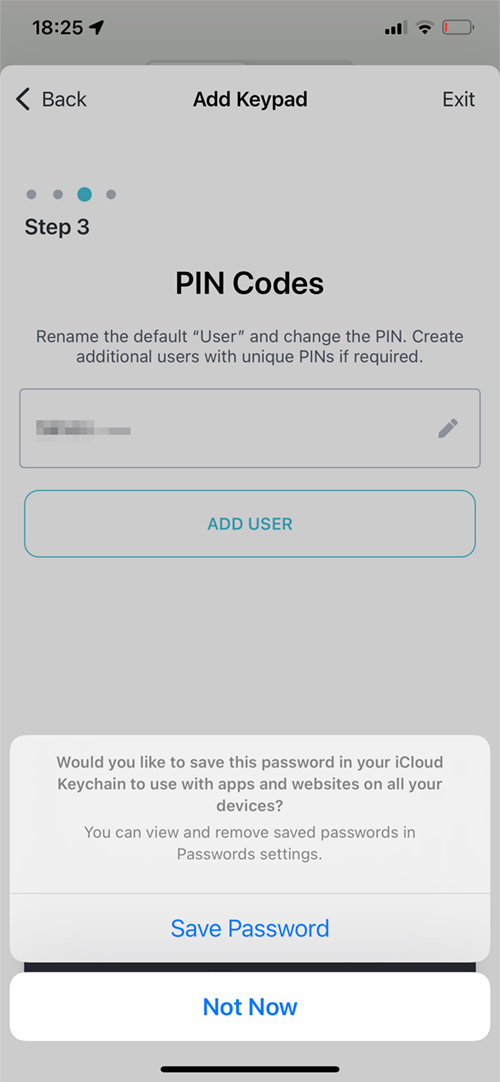
Next, you need to change the default user to a name of your choosing
You can also set your own pin code at the same time
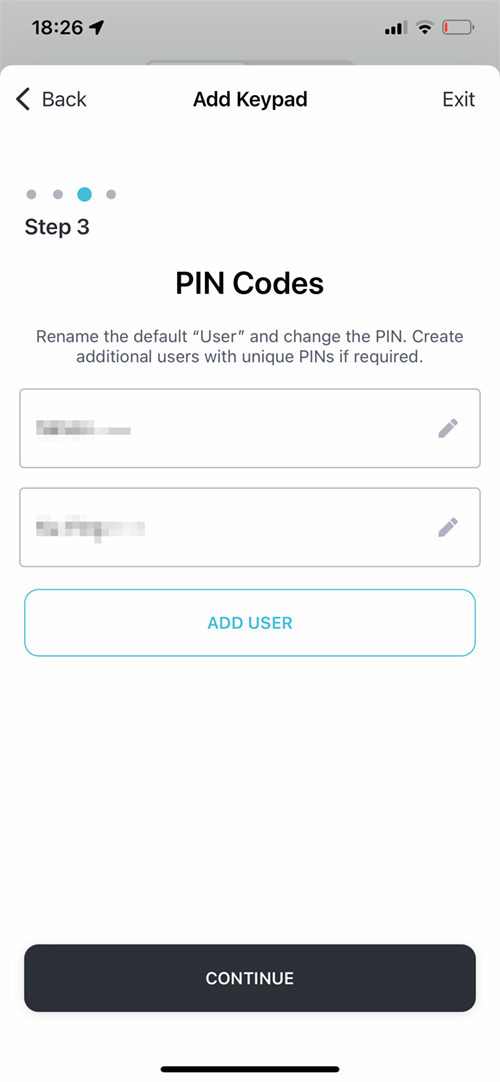
Additional users can then be added, with up to 40 users
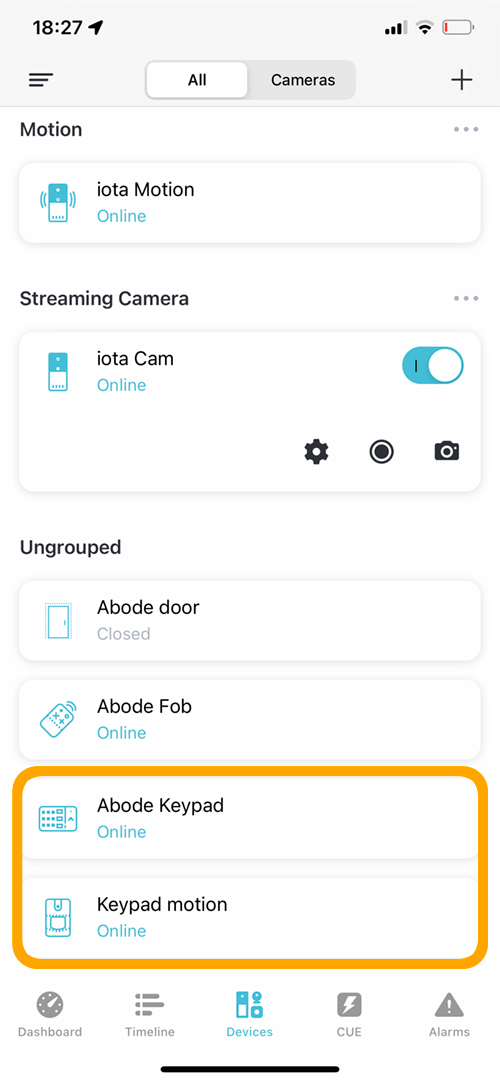
After that, the motion sensor inside the keypad will be automatically paired
You can also assign an appropriate name for the keypad if you wish
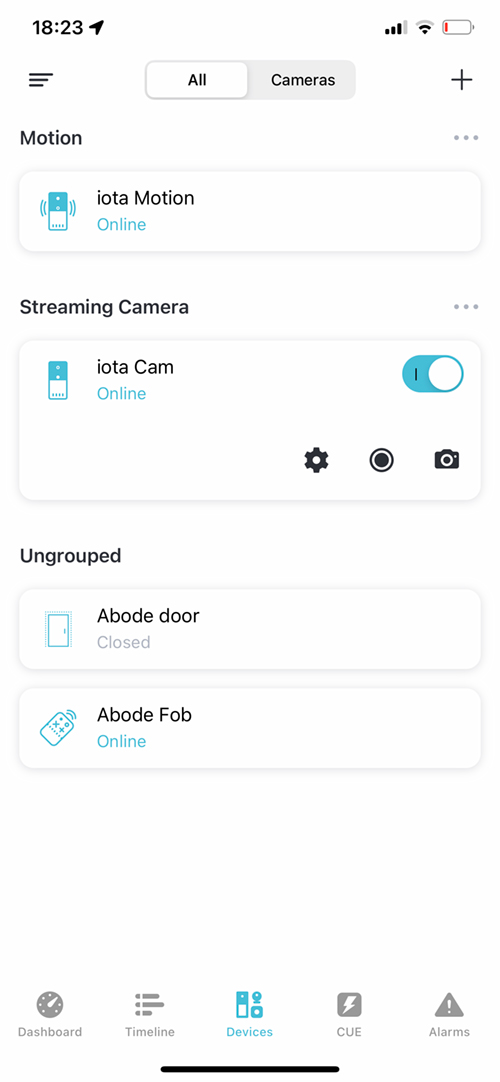
Once that’s done, you will see two separate entries in the Abode app – one for the keypad, and another for the motion sensor within the keypad.
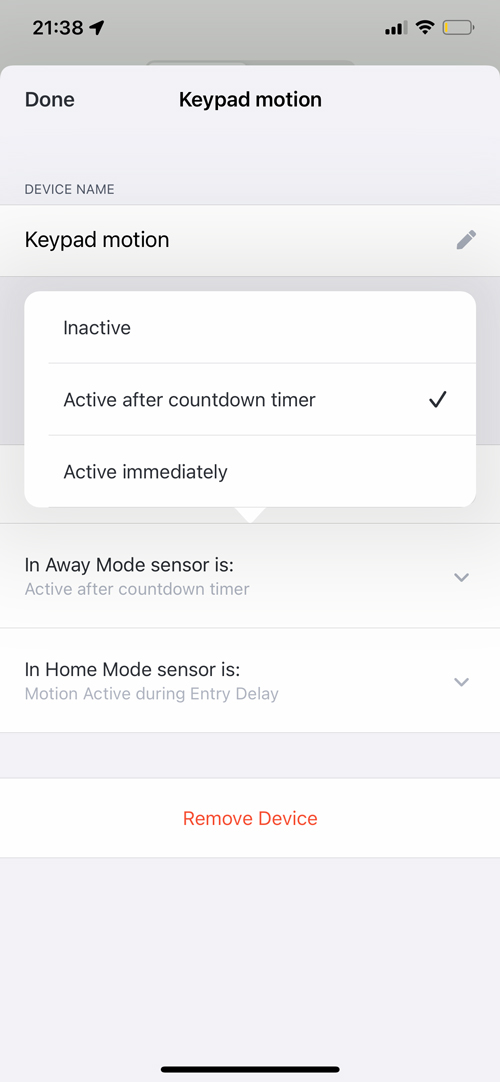
As the keypad and the built-in motion sensor are essentially security devices, for the motion sensor, you have the option to set it up as a trigger for alarms in both the Home and Away modes. For either mode, you can have the sensor to be Inactive, Active after countdown timer, or Active immediately.
If you’re not familiar with how the Abode alarm system works, essentially you have three modes, all of which (sort of) correspond with the four modes you find in HomeKit. They are Standby (Off in HomeKit), Away (same as HomeKit), and Home (which is the same as Home and Night/Sleep in HomeKit). As you can deduce, Abode doesn’t differentiate between Sleep and Home modes, which sort of makes sense, but if you set the alarm to Home in the Abode app, it’ll always show it as set to Home mode in HomeKit, which avoids any potential confusion.
When you set up any motion or contact sensor in the Abode app, you can have it so that the sensors don’t trip any alarm until the countdown timer you would have previously set, has expired, which is what is referred to by the option ‘Active after countdown timer’. You can have sensors to be inactive of course, and ‘Active immediately’, which means they’ll trigger an alarm as soon as the alarm is set regardless of the countdown timer.
The reason for the countdown timers, if you haven’t already guessed, is so that upon setting the alarm as you either go to bed or leave home, you have time to get yourself ready before the alarm and trigger devices become active. Conversely, upon coming home, you can buy yourself some time to get into your home and disable the alarm before the siren starts alerting your neighbours.
IN HOMEKIT
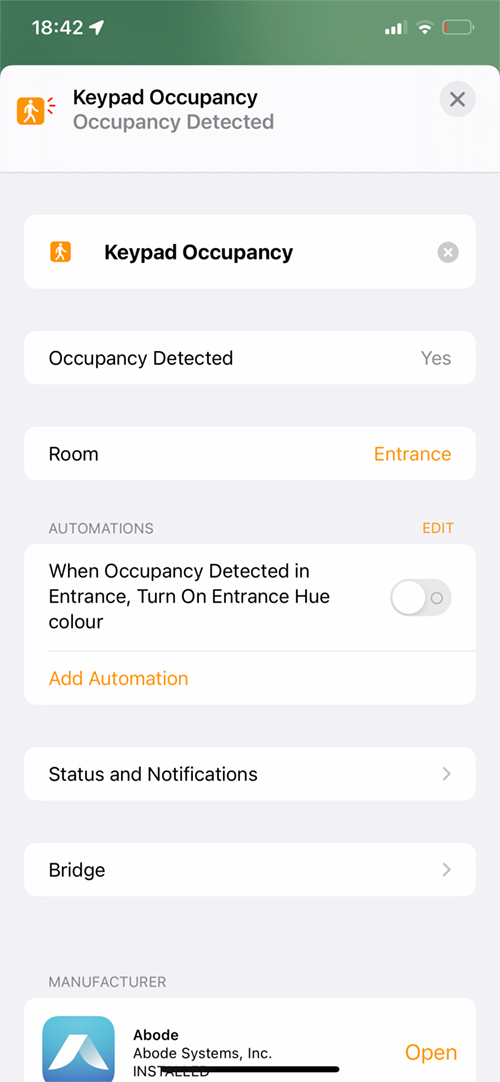
Onto HomeKit, and just like the Abode app, the keypad and the motion sensor are both exposed as separate devices, although as there’s actually no ‘keypad’ functionality that relates to HomeKit as such, what you get is options to assign functionality to the two buttons I mentioned earlier that have a square or triangle symbol on them.
The way in which Abode has done this is a little odd, but it still works once you’ve got the hang of it. For the Keypad 2, which is exposed to HomeKit as a button, it lists one set of actions, with Single press and double press. However, the single press actually relates to a single press on the button with the triangle symbol, whilst the double press is actually related to a single press for the button with the square symbol. It would obviously have made more sense to just expose each button separately, with just a single press option for each, but it is what it is.
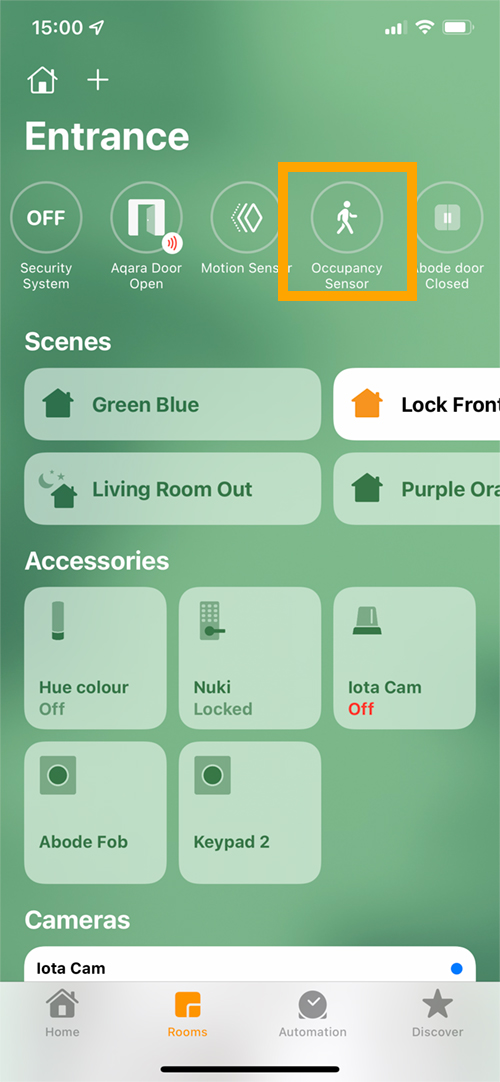
As with all sensors since iOS14, the Keypad motion sensor is grouped at the top of the Home app screen. Strangely enough, this motion sensor is listed separately from the other motion sensors in the same room, as HomeKit sees motion sensors and occupancy sensors as separate. After speaking briefly to Abode’s online support as to the difference between their motion and occupancy sensors (I believe there is inherently a difference), I was told that the occupancy sensor is actually just a motion sensor, and was simply assigned to the ‘occupancy’ section when it was originally set up. This is also the case with the company’s standard motion sensor, which is also exposed to HomeKit as an Occupancy sensor.
THE KEYPAD IN USE
Speaking of the motion sensor, when you approach the keypad, the display automatically lights up for a few seconds, so you can see the keys. The motion sensor is supposed to cover 90 degrees, which I assume is in the horizontal plane, at a distance of up to 3 metres/118in. So far the sensor has picked up motion very well, so there are no complaints in that respect at all. The keypad itself doesn’t have an alarm as such, and merely activates or deactivates the alarm/siren built into the Abode gateway, as well as being a trigger for the alarms via the built-in motion sensor, if used. However, it does have a speaker, which allows the keypad to emit elementary beeps when you press the buttons or set the different alarm modes.
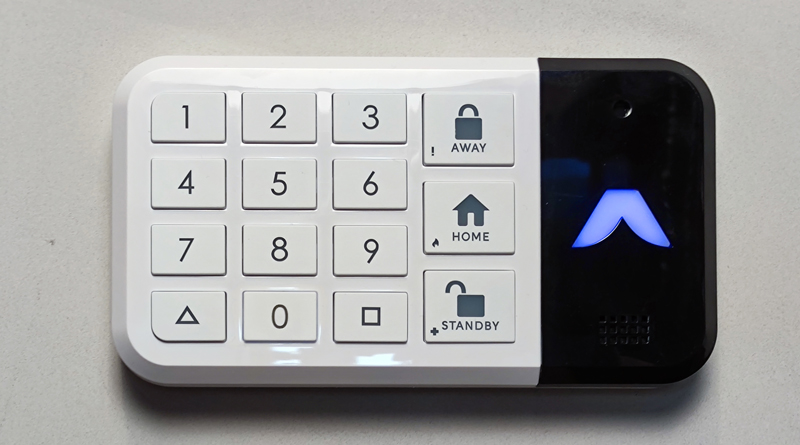
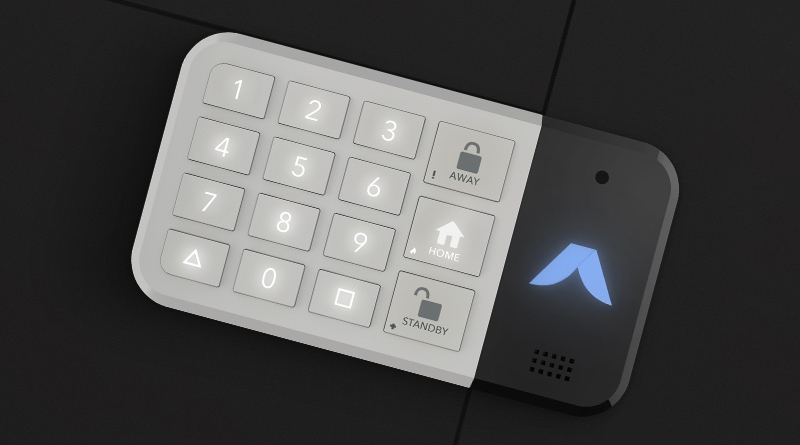
When the keypad lights up as you approach it, the Abode logo will also light up and display the logo in one of three colours to show you which mode the alarm is set to at that time;
In Standby mode, the logo will simply appear white, like the rest of the lights on the keypad.
If the alarm is set to Away, the Abode logo will appear red.
If the alarm is set to Home, the Abode logo will appear blue.
Additionally, when you’re recharging the internal battery, the logo will appear green and will stay illuminated. Once charging is complete, the logo light will turn off. The first three colours are also replicated on the LED on the front of the Iota Gateway, so if you are in Away mode, the LED on the Iota will be red also.
This brings me to the one thing I’m ever so slightly less keen on with the keypad buttons, which are made of durable rubber. I don’t mind the material used, but because of this, on occasion, if you don’t press them squarely in the centre, the buttons can slip to the side slightly, which in some rare instances means a button can get slightly caught under the surrounding plastic casing. Usually, the button pops back into place by itself or with a little light help, so it’s really a non-issue for the most part, but something to be aware of if you start to notice it happen more often.
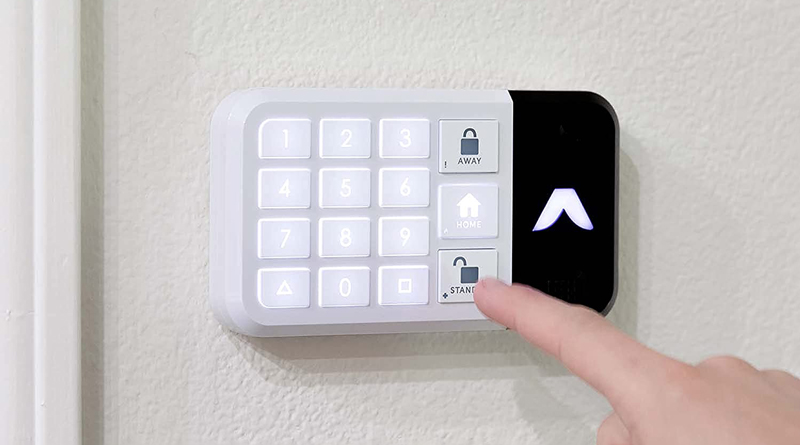
When it comes to how you operate it, I’ll assume that anyone reading this has never used an alarm panel before, but it really is quite straightforward. If you’re going to bed or leaving the home, you tap on the appropriate button (Home for bedtime, Away for leaving the house). Once you do that, you have a certain amount of time before the alarm is armed, which is something you set in the Abode app. Once you’ve left home or gone to bed, and the alarm is armed, you’re set. If you want to disable the alarm, you simply have to type in the code you created by yourself in the Abode app, followed by tapping the Standby button to disarm the alarm. Once again, you should set the amount of delay time to give yourself enough time to deactivate the alarm before the siren goes off (more appropriate when you’re coming home and the alarm is in Away mode).
EXTRAS
As the Keypad is wireless and it’s magnetic, it can be placed almost anywhere where there’s a magnetic surface, although using it with the provided plate in a permanent location is really the best place for it, as the metal plate provides a lot more ‘grip’ ensuring there’s no chance of the keypad falling off. The magnets are really quite good, and so I don’t have any worries that it’ll come crashing to the ground unless someone deliberately gives it a pretty good whack!
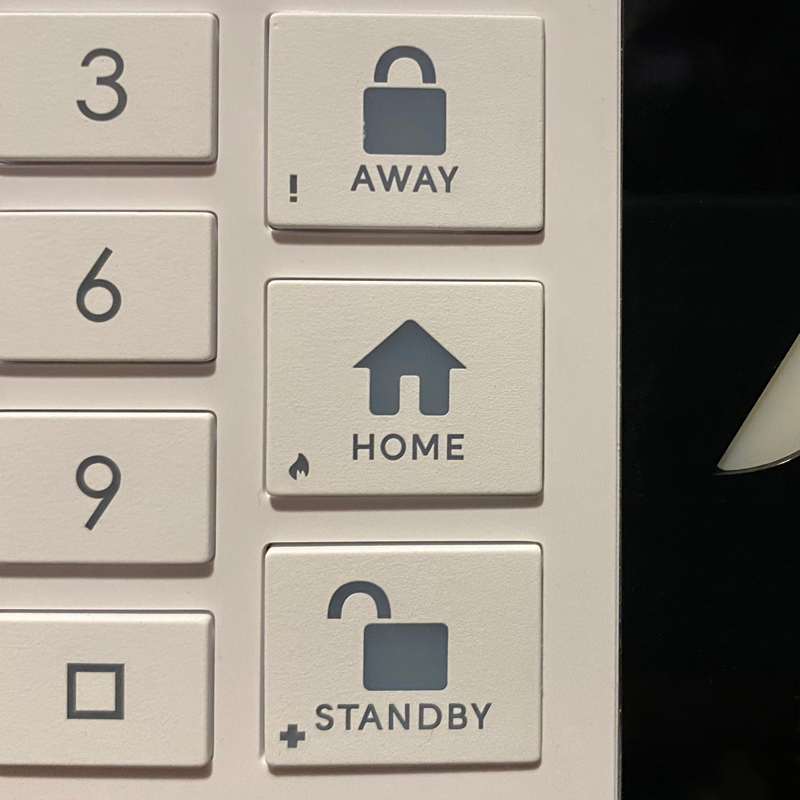
What you might have missed is that the three mode buttons each feature additional small icons – an exclamation mark on the Away button, a fire icon on the Home button, and a Plus or Medic icon on the Standby button. These represent a Panic Alarm, a Fire Alarm, and a Health Alarm once set up via the app or the keypad. It should be noted that these functions are generally the preserve of the paid monitoring services that Abode offer. Long pressing any of these keys will activate the appropriate notification to Abode, who will then take the relevant action to deal with the request, so if the ‘Fire’ alarm is activated, they’ll call the fire department for you, or an ambulance if the Health alarm has been triggered. The Panic trigger will, as I understand it, trigger a call to your nearest police department. As these paid features are only supported in North America (and maybe the UK now that Abode has a presence there), in my case, living in Taiwan, there’s no option for me to use such things, and so I can’t test it – not that creating a test to call out the cops out is ever a good idea of course…
The Keypad can also be used as a quick way of changing the settings for the built-in motion sensor. Long pressing the 4 & 6 buttons together will enable or disable the motion sensor, whilst long pressing the 7 & 9 buttons will disable or enable the button press and countdown sounds.
ABODE KEYFOB
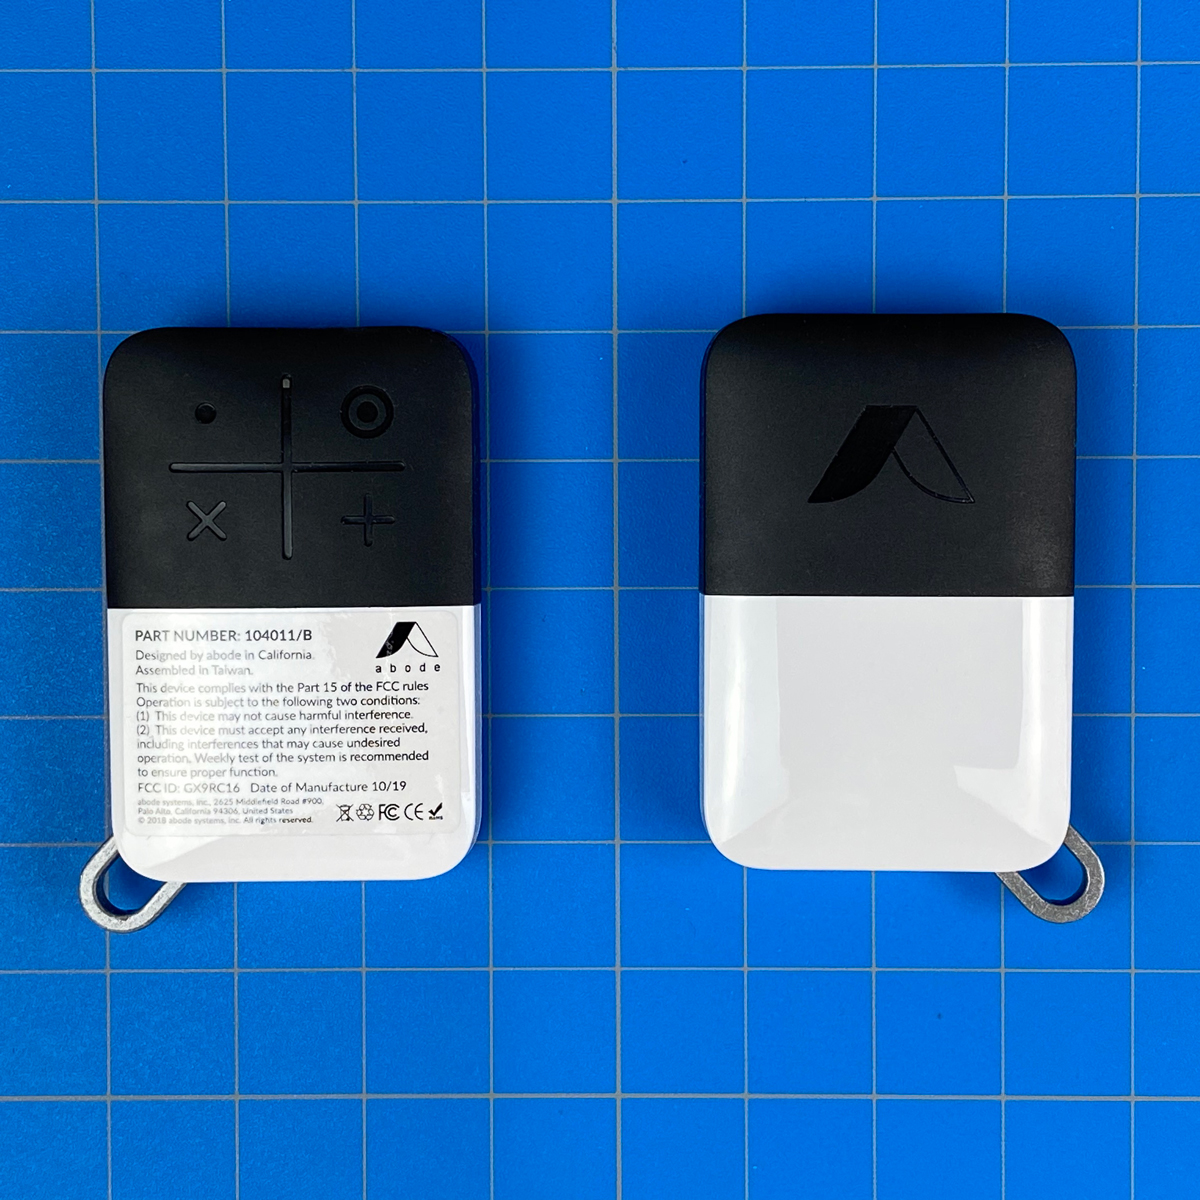
If you purchased the Iota Security Kit, you would also have received the Abode Keyfob which also allows you to control the gateway’s different alarm modes, but only when you’re within range of the hub. The only downside is that the icons on the fob don’t match up with the icons on the keypad, which is a little confusing. Still, if you forget to set the alarm and don’t fancy opening your door again to set the alarm via the keypad, this is a handy solution. Of course, when you’re outside the door, you can also use the keyfob to disable the alarm before entering, assuming your gateway is within range. You can check out our video below of the Abode Keyfob as part of the video on the Iota Security kit;
SUMMING UP
I guess first off the bat, the question would be is it a necessary device? Well given that you can set the alarm modes using a variety of methods, especially in HomeKit with automations and geolocation functionality, or even by making use of a spare wireless button to do much the same, then no, it’s totally not necessary. But then in the world of Smart Homes, when has that really mattered? Still, for those of you that have various family members, some of which either don’t have a smartphone or even if they do, don’t use HomeKit, Google, Amazon or Abode’s own app, then a traditional physical device for an alarm system is going to be a welcome sight for just about anyone – except for burglars of course. It’s this aspect of it that works for me on one level, and the fact that it does it for a reasonable price (usually between US$80~$100) only adds to its appeal.
Even though it works primarily with Abode’s own Gateways, if like me you also have alarms via Aqara that are also exposed to HomeKit, then with a couple of simple automations, you can get those alarms to sync with the Abode, so all of your alarms are synced. You could also make use of the two programmable buttons to activate or deactivate your other alarms independently if you wish, so as long as you have an Abode setup in place, this is something I’d really recommend regardless of whether its necessary or not.
I’ve had it for a while now (around 6 months), and although I didn’t really start testing it until a couple of months ago, I’ve had no issues with it, other than one instance where I accidentally triggered the alarm. After that, even though I’d set it to Standby mode, the Abode logo was glowing red. At first, I thought the battery needed recharging, but it soon became apparent that it wasn’t the battery at all. In actual fact, the glowing logo was trying to tell me that the alarm had been tripped (even though it had since been set to Standby after), I guess so that I might want to investigate if I wasn’t there when it had happened. After a bit of quick Google ‘research’ it seems that to get rid of this, you have to activate either Home or Away mode, then turn it back to Standby, which then clears the ‘warning light’.