
Since the launch of the company’s latest Zigbee hub, ZemiSmart has been eager to prove they’re into HomeKit for the long haul, with more devices becoming compatible more frequently than we’ve seen for a long time. This is partly due to the products themselves existing before the HomeKit hub, so the development of the device was already in the bag, with only HomeKit certification remaining.
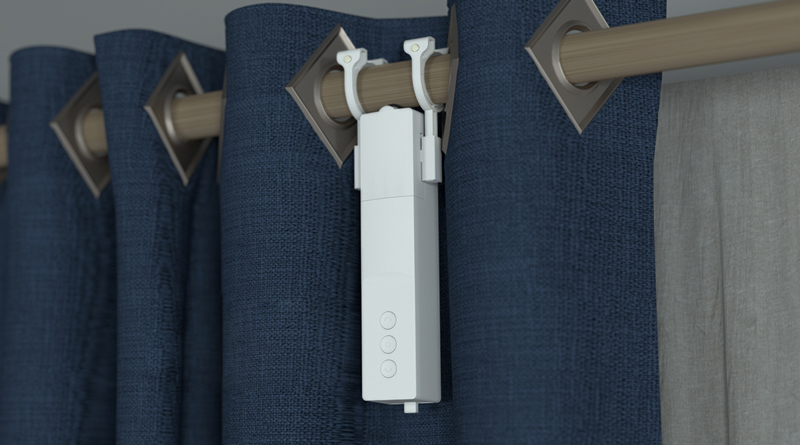
One such device is their retrofit take on a curtain driver/motor, that sits behind your curtains, whilst gripping onto your curtain rail or rod. The result is that the motor rolls along the underside of the track, almost like a suspended monorail, dragging the curtain with it.
ZemiSmart sent their latest such device for us to test out and review, and whilst you should note that the apartment where I live – and test out products – doesn’t use curtains as such, I decided to purchase a set of curtains and a curtain rod from Ikea to test the motor out anyway (such dedication…). I made sure to test the motor out constantly and consistently for 7 days in a couple of temporary locations, so as to get at least a feel for how the product works, so if that interests you, read on.
PACKAGING | CONTENTS
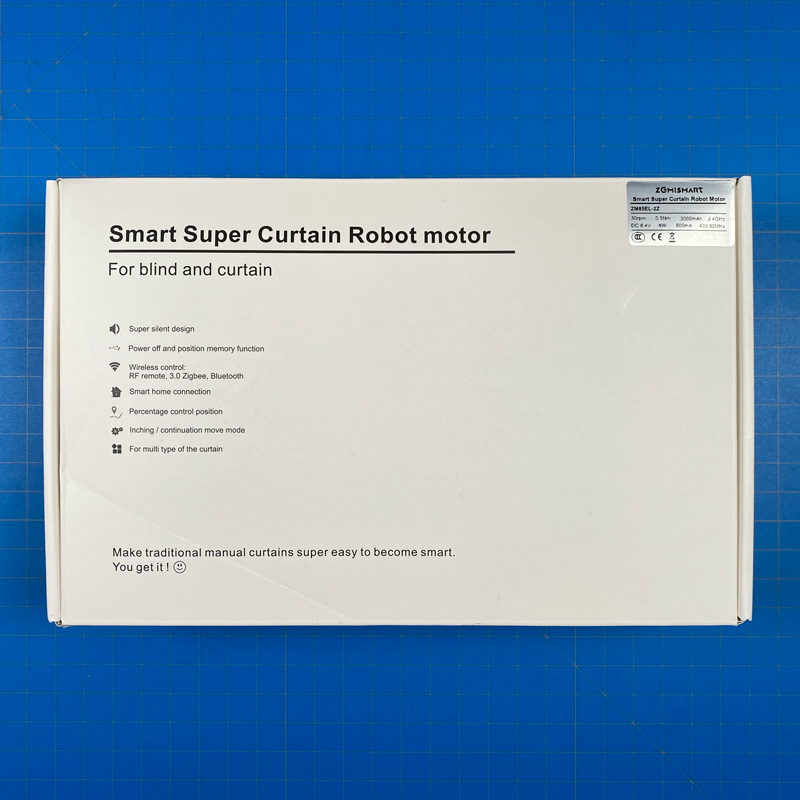
If there’s one thing that ZemiSmart has yet to sort out (IMHO) is their branding. As it stands, a lot of their products come in either cheap or rather basic packaging, with barely a hint as to what’s inside unless you want to read the rather small print. I guess in many ways, as long as it keeps costs low, protects the contents, and is beneficial to the environment, it shouldn’t matter, so it is what it is. Nothing to see here really, with one exception; It does say “For blind [sic] and curtain”. Whilst it might work with some types of blinds that use a rail or rod, generally speaking, this is for curtains only, and even then that should be singular, as the motor can only pull one curtain. So, if you have a pair of curtains, which you almost certainly do, then you’ll need a pair of these motors.
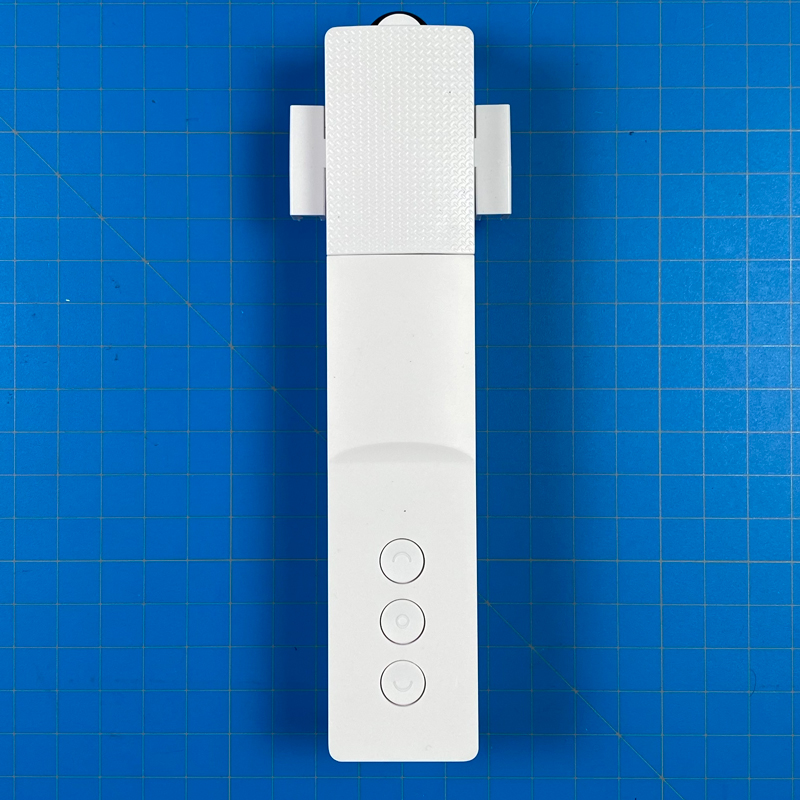
Onto the contents, and starting off with the motor itself, which is 205mm/8.07in tall*, 40mm/1.57in wide, and 37mm/1.46in deep. Although it comes in two pieces, for the most part, it can be treated as one complete unit, as the cog section doesn’t really need to be removed at any point.
* The height doesn’t include the arms that connect to your rail or rod.
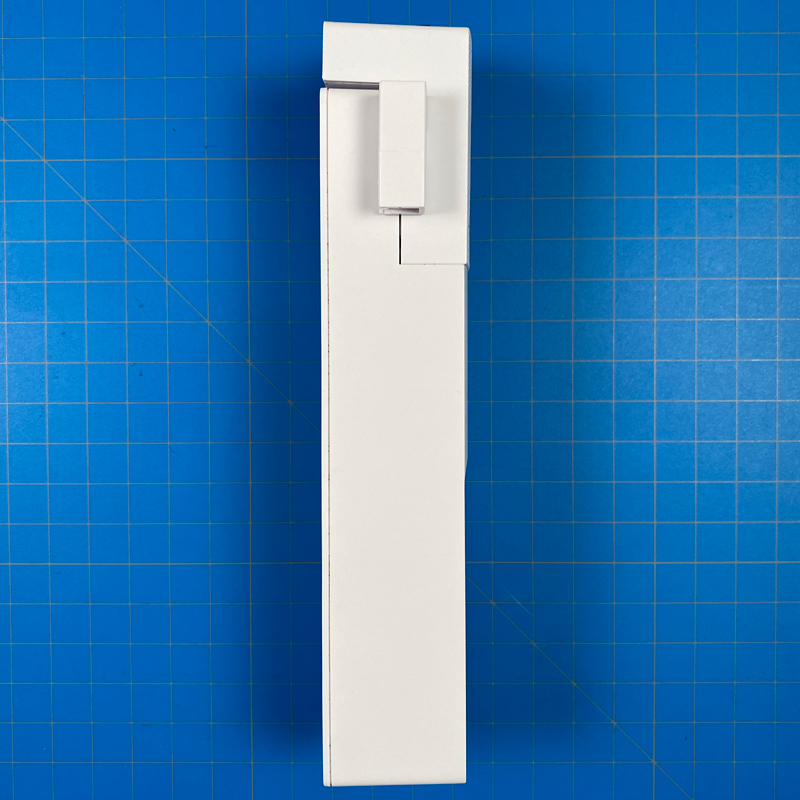
The front is home to just three buttons – open, closed, and stop/pause. The sides contain two ‘holsters’ which hold the arms that connect the motor to the rail/rod.
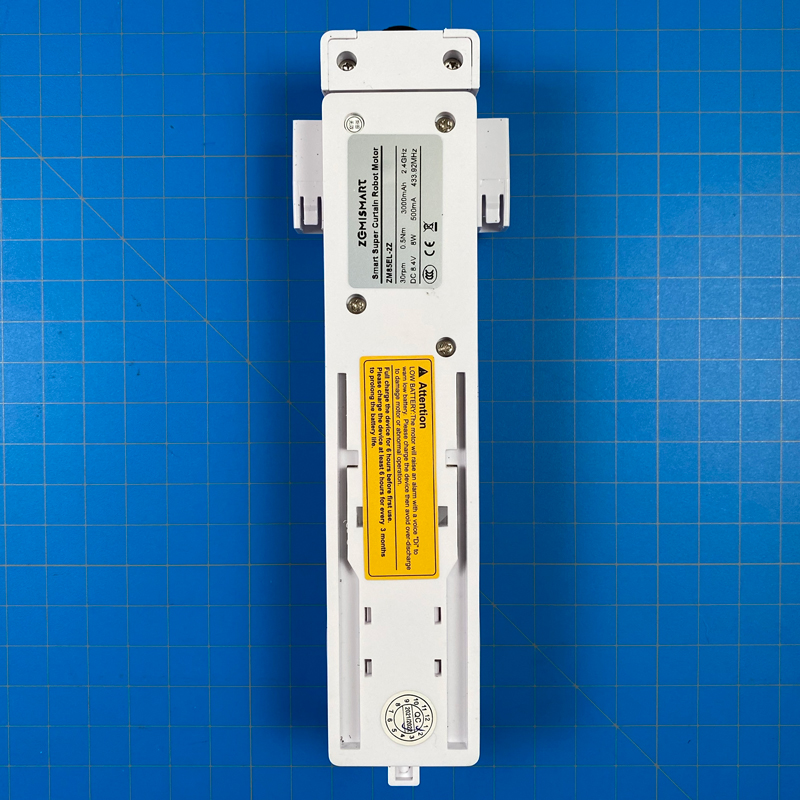
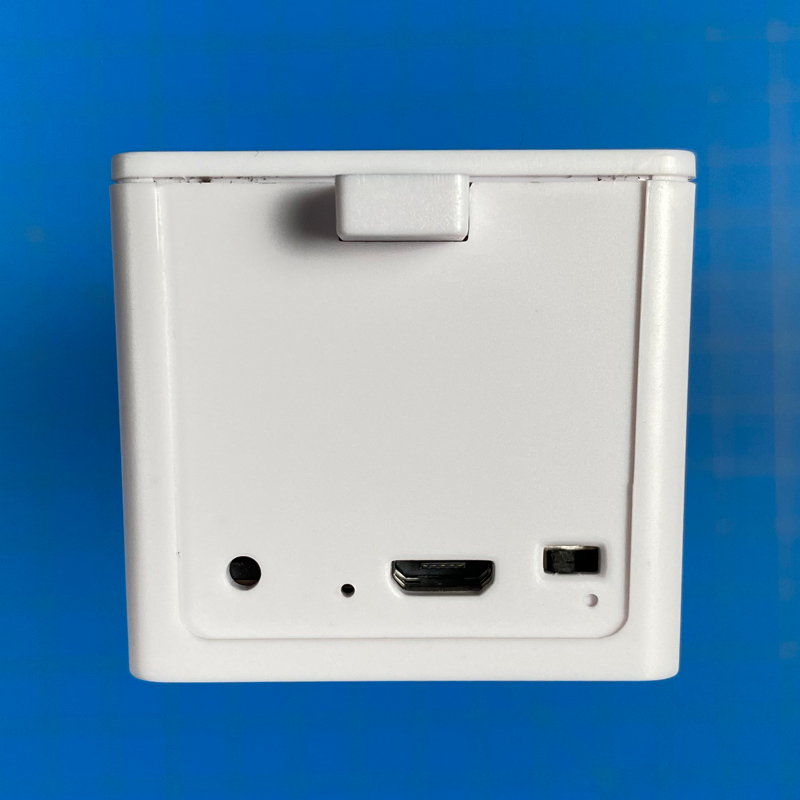
The underside of the motor is home to a recessed reset button, a micro USB port for recharging the internal battery, and a tiny on/off switch. Conversely, the top is home to the rubber-tread wheel that moves the motor along the rail/rod.
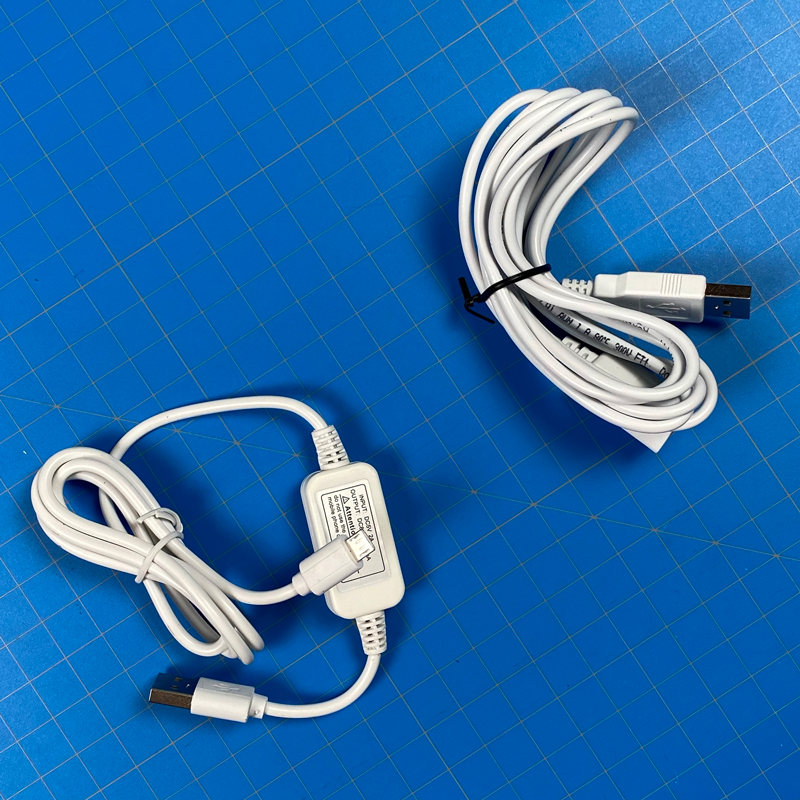
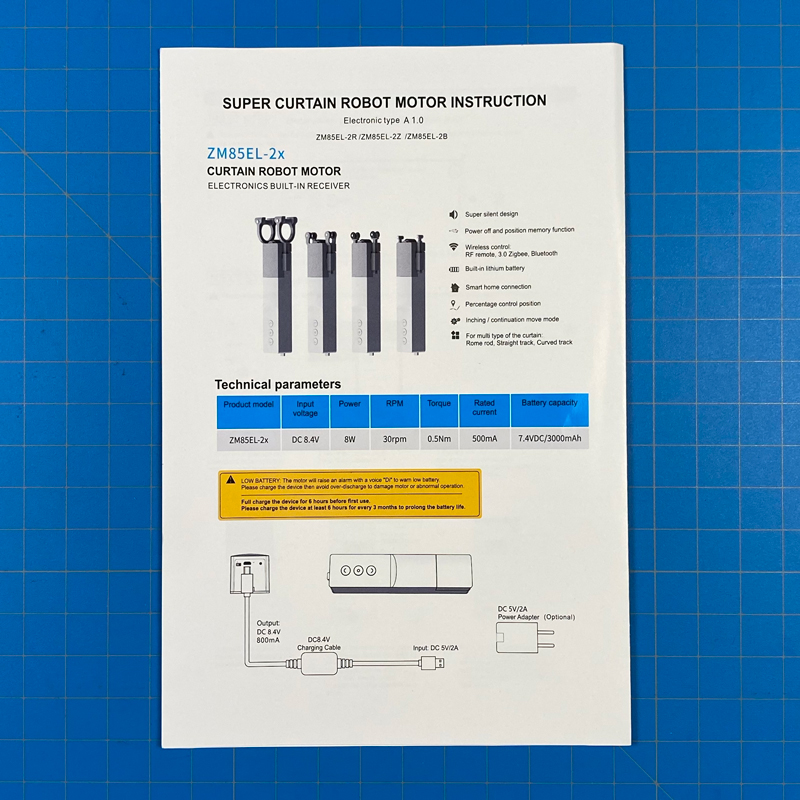
There’s a manual in English, and a couple of USB cables, one of which acts as an extender if needed.
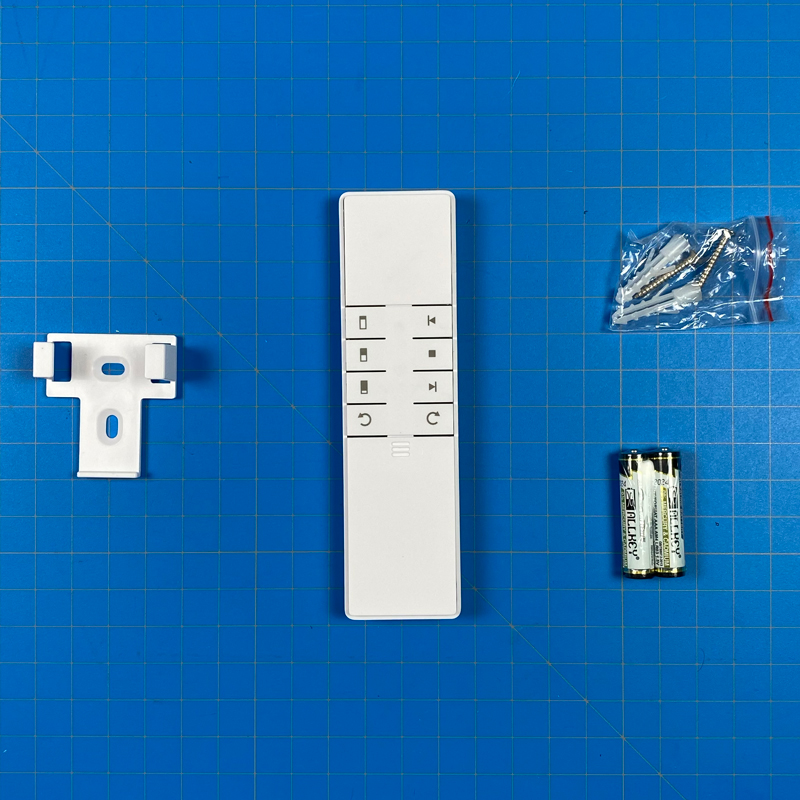
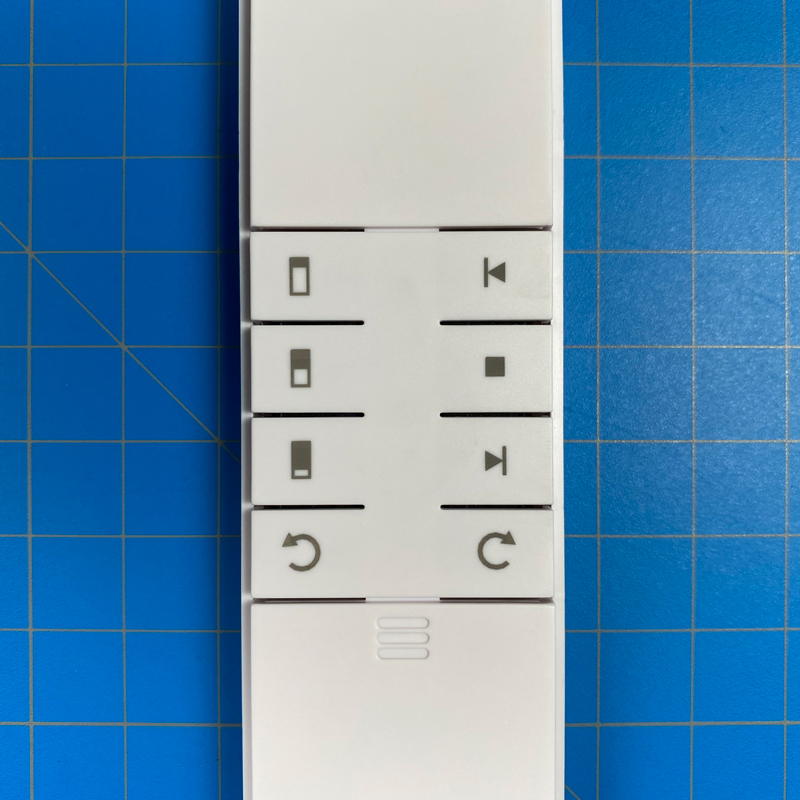
Depending on which package you go for, you will probably get at least one remote control unit. This basic remote comes with eight buttons, the bottom two of which are only used in the initial setup procedure. The remote uses RF433Mhz to talk directly to the motor, whilst the motor talks to the Zigbee hub, which in turn connects to both your home network and HomeKit (you can read our review of the ZemiSmart Zigbee hub HERE).
Even though the remote is basic, I’ve found that it could actually be quite useful, especially if you don’t want to either get your phone out to control the motor or use Siri. One side has three buttons that essentially correspond to the three buttons on the motor (open, closed, stop/pause), whilst the other three are for preset open positions – 80%, 50%, and 20%.
The remote comes supplied with a couple of AAA batteries and a holder that can be wall-mounted, either with some included double-sided patches or with the included screws and rawl plugs. As already mentioned, with the direct connection to the motor, there’s virtually no delay from the button press to the motor kicking in, so don’t underestimate its uses.
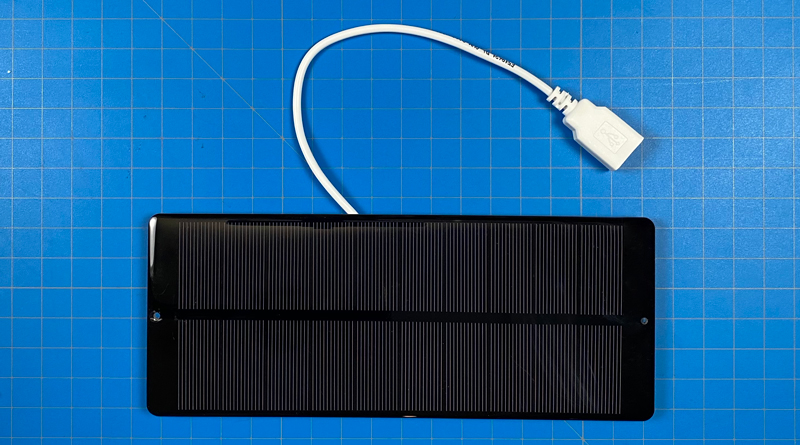
ZemiSmart also includes a solar panel with a USB cable connected to a USB port. While this is great, it wasn’t entirely clear as to how you were meant to connect the panel to the motor, even though stickers were included. To me, I’m not sure I could rely on stickers to keep the panel stuck to the motor, although you may have more faith than me that the solar panel won’t fall off a smash into a few pieces. You could always mount it to the inside of a window, and with the included extra-long USB cable, that’s quite possible, as long as you don’t mind a cable dangling from the curtain.
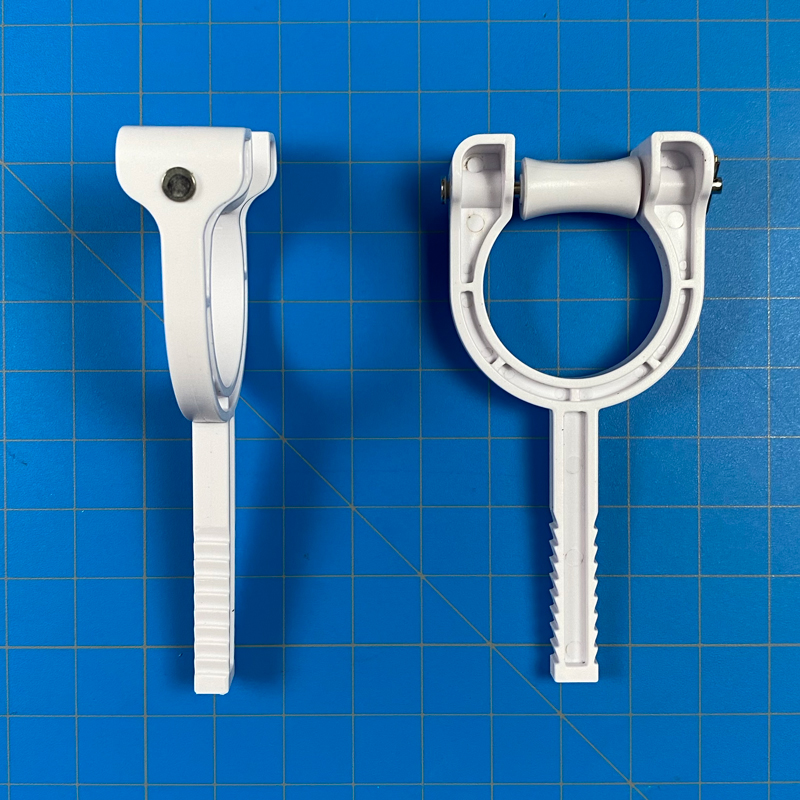
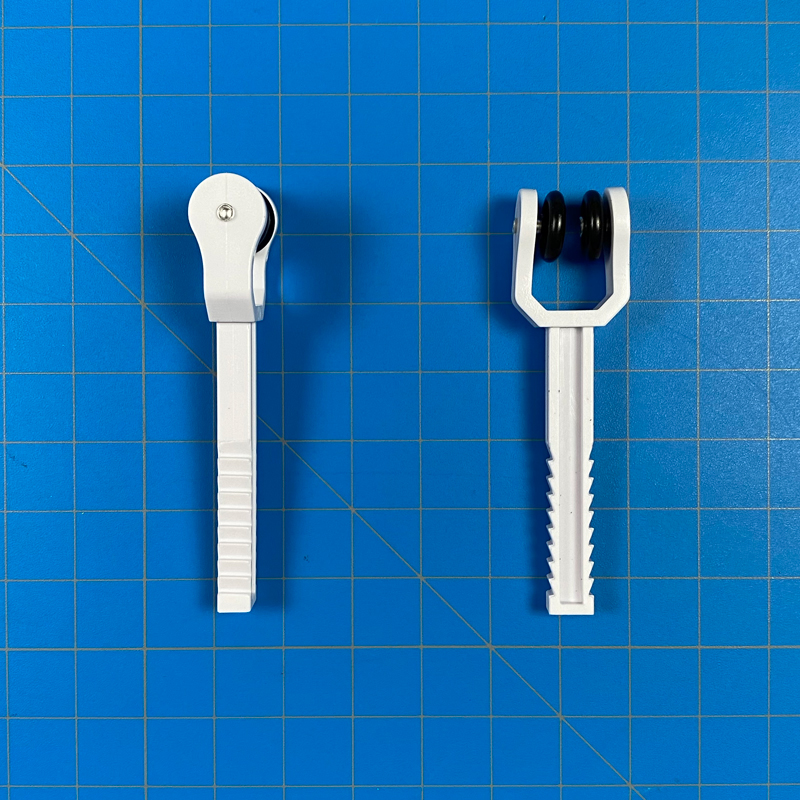
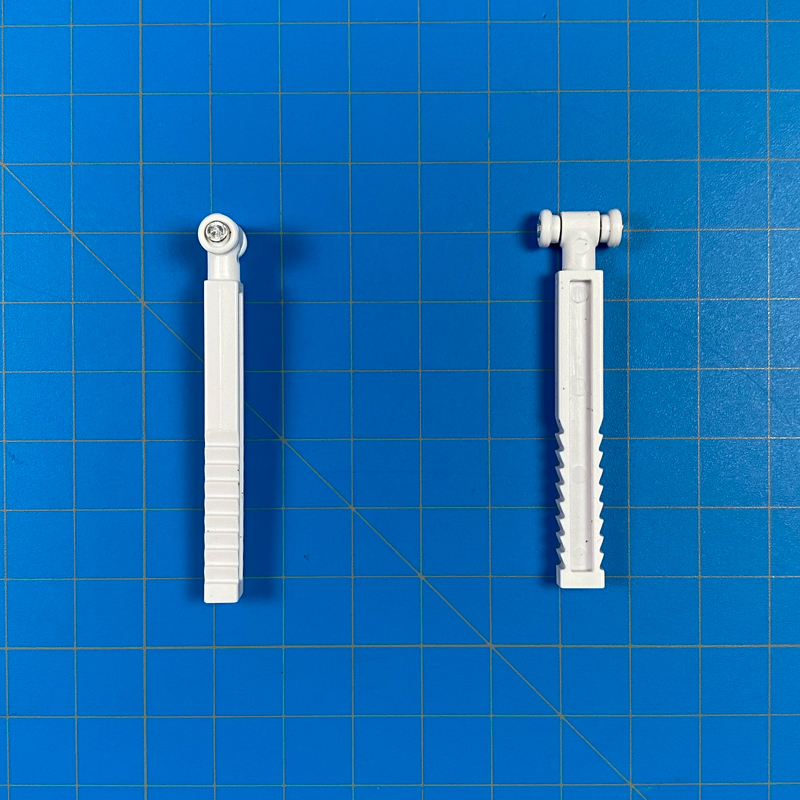
Onto the final parts, which allow the motor to connect to your curtain rail or rod. The company include four separate pairs of arms, two pair of which are the same, just different sizes.
You get one pair of arms for curtain rods, one pair for I rail curtain tracks, and two pairs of arms for U-Rail curtain tracks of different sizes.
HARDWARE INSTALLATION
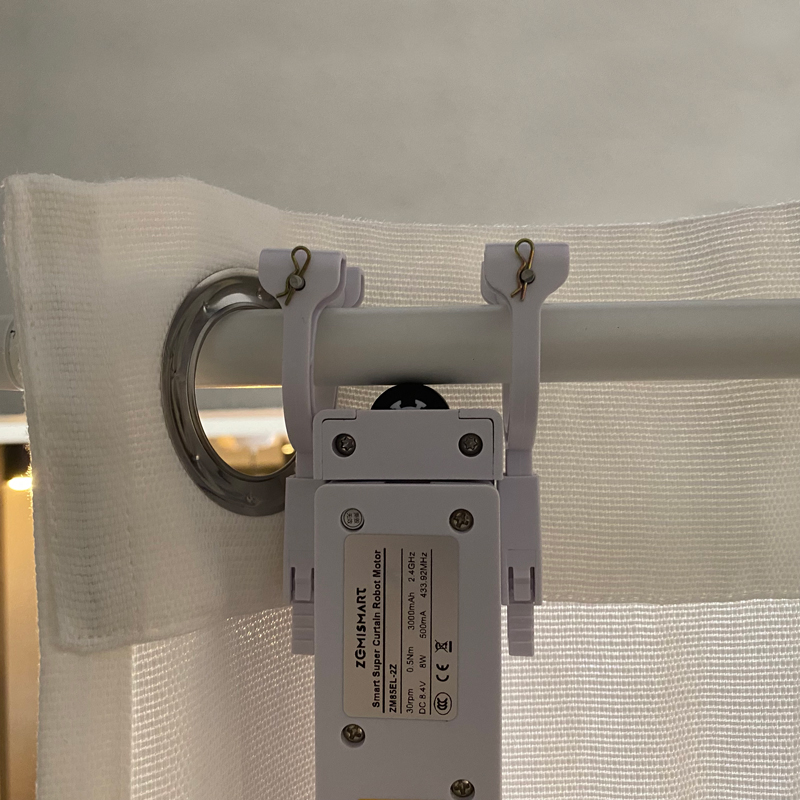
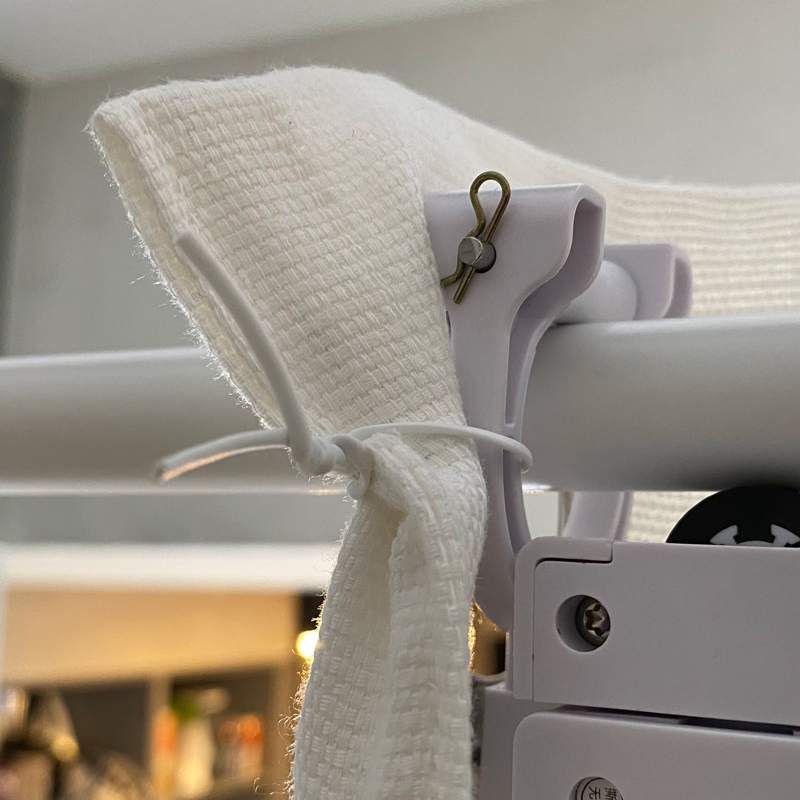
Installation was pretty easy, at least compared to the company’s Roller Shade motor, which itself wasn’t difficult. As you can see in the first image above, the motor, along with the arms, hold onto the rod, sitting behind the curtain. The motor should ideally be sat between the last and second last rings on the curtain so that it can pull the whole curtain along. Still, I did find that it helped to use a bit of wire to keep the end of the curtain tied to one of the two arms so that when the curtain motor is opening, the end of the curtain isn’t dragging behind so much. Maybe the company can devise a simple clip to do the same in future.
The rubber wheel needs to sit fairly tight against the rod/or rail in order to get enough grip to move everything in either direction. This is aided by the two holsters that the arms sit in, as they’re sort of spring-loaded, and can provide a little give when you affix the arms to the tightest position possible, which you do with the aid of gear teeth within the holsters.
It’s all fairly simple in principle, although if I’m honest when it comes to retrofit devices, this is probably one of the most ‘mechanical’ solutions I’ve seen, and just doesn’t feel right somehow. That’s not to say it doesn’t work, because it does work well enough. It just seems too reliant on a basic motor for my liking. That probably doesn’t make a lot of sense, I know – it’s difficult to explain, but it’s just my opinion of course. This also applies to other products that use the same solution, like CurtainBot or the forthcoming Aqara offering, so it’s not a reflection on ZemiSmart’s product in particular, an more of the basic way it works.
As this motor only pulls one curtain, to pull a pair of curtains coming from opposite ends of a rod or rail, you’re going to need two motors. If you only have the one wide curtain going from one side to another, then you’re good with the one motor of course.
IN APPLE HOME & TUYA SMARTLIFE APPS
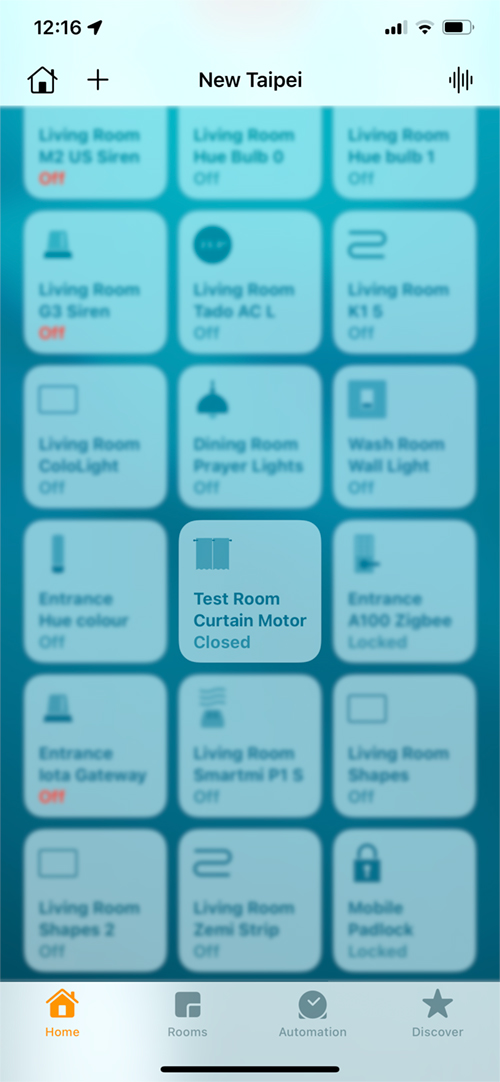
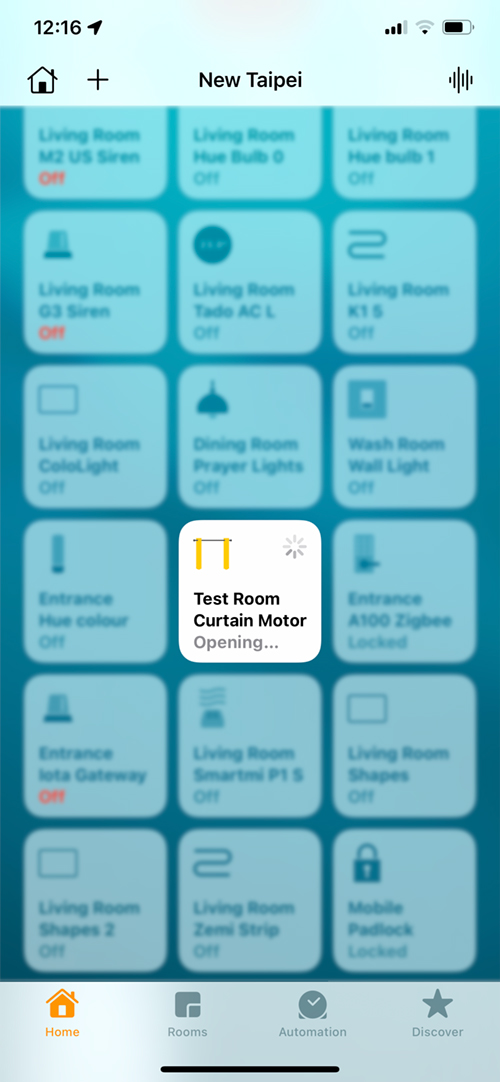
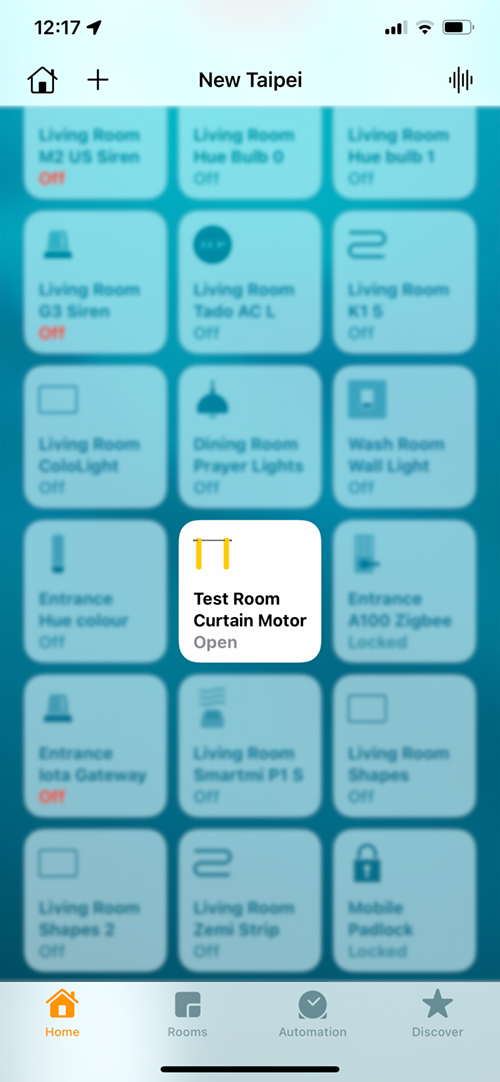
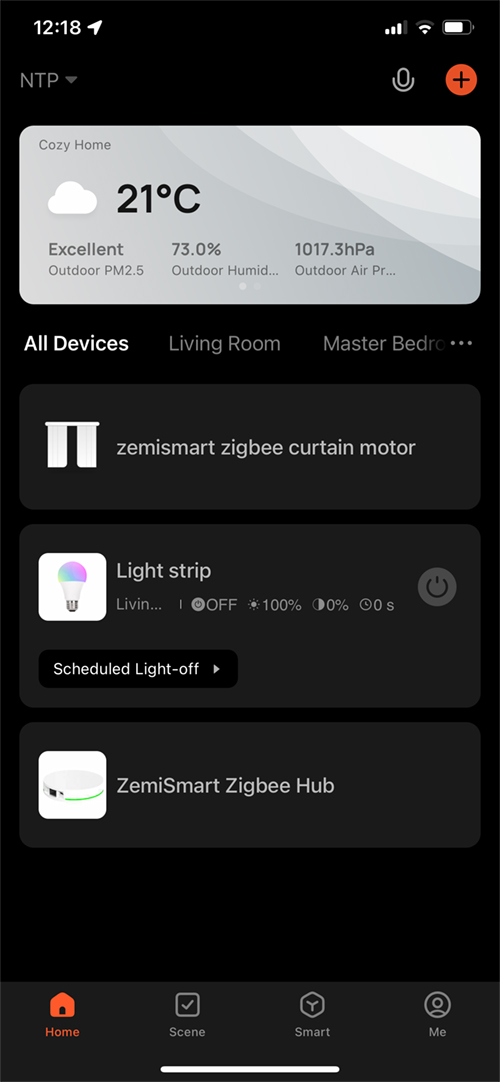
Getting the curtains is quite easy, but as it’s essentially a Zigbee child device, just like with Aqara products, you’re going to need to pair it with the ZemiSmart hub first. Once paired, the device will appear in HomeKit and the Home app, although it’s advisable to set up the open and closed limits in the Tuya app first. As you can see, I already added it, and it’s showing up with a single tile.
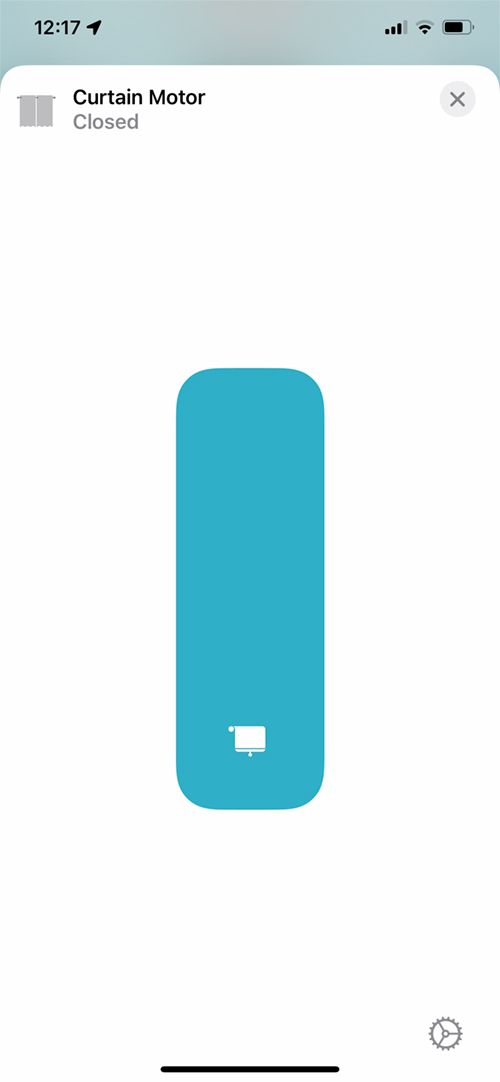
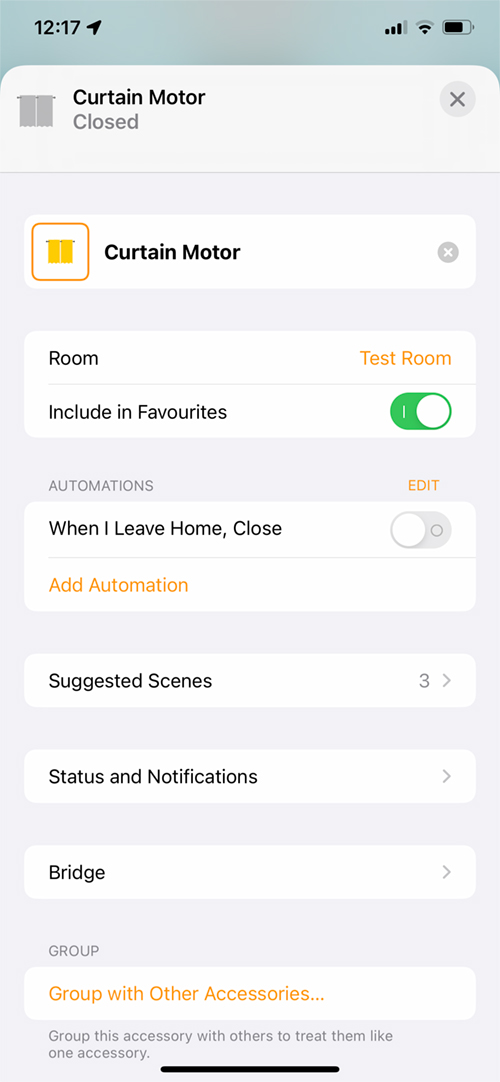
In terms of HomeKit, as you might expect, things are slightly basic. Aside from the single tile, a long press will take you to the screen with the slider control, which allows for opening the curtains to a specific percentage of your choice. The settings panel offers nothing except the basics and doesn’t feature the motor’s battery level, which is a shame. You can see in the third screenshot that it’s connected to the ZemiSmart hub. Of the two accessories currently connected to the hub, aside from the curtain motor, we’ve got a ZemiSmart light strip, which we’ll be reviewing later.
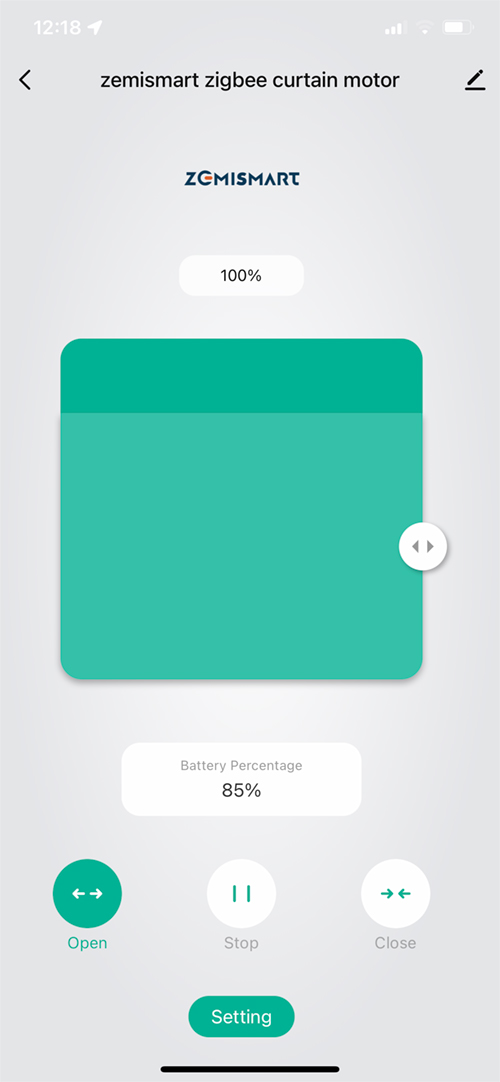
In the Tuya app, you get the same options as the Home app, but additionally, you get the battery levels, and the previously mentioned options to set the curtain’s open and closed limits.
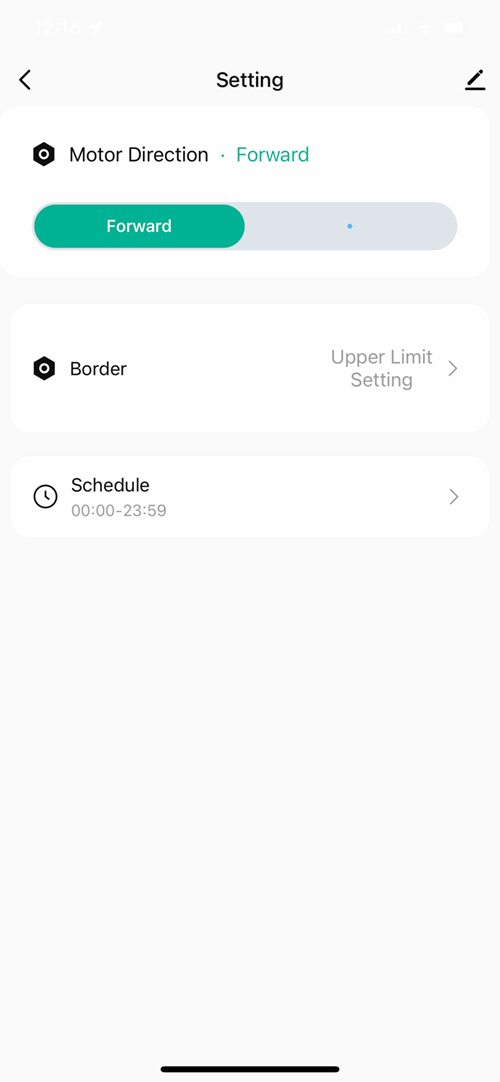
You can set the direction of the motor, as well as set or remove/reset the aforementioned limits.
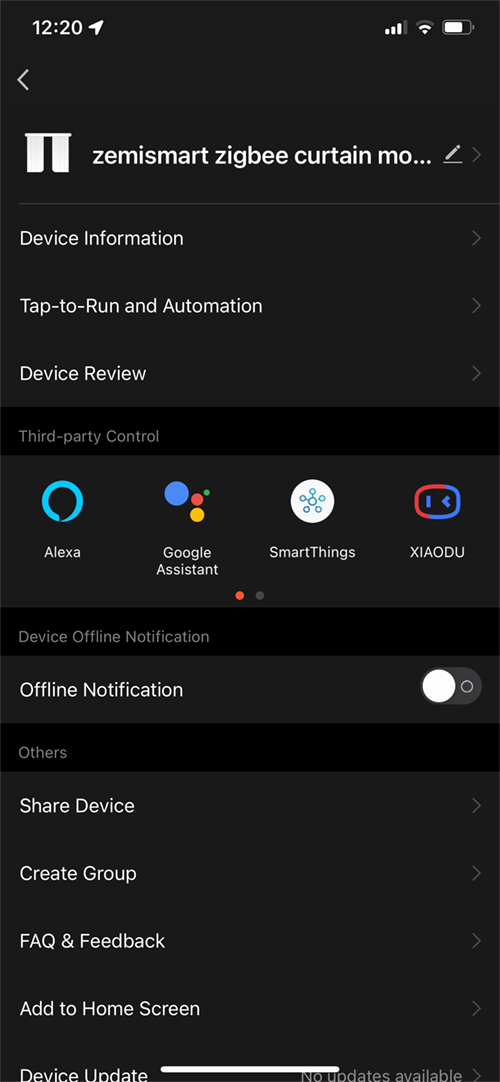
Even though we’re really happy to see HomeKit integration, it’s worth noting there are also integrations with other platforms and voice assistants, including the obvious – Amazon Alexa, Google Assistant, and SmartThings – to the less common – Xiaodu, Xiaowei, DingDong, Tmall Genie, and Yandex. IFTTT is also an option listed elsewhere in the app. Siri isn’t mentioned, but as the devices work in HomeKit, Siri will work with any connected devices exposed to HomeKit this way.
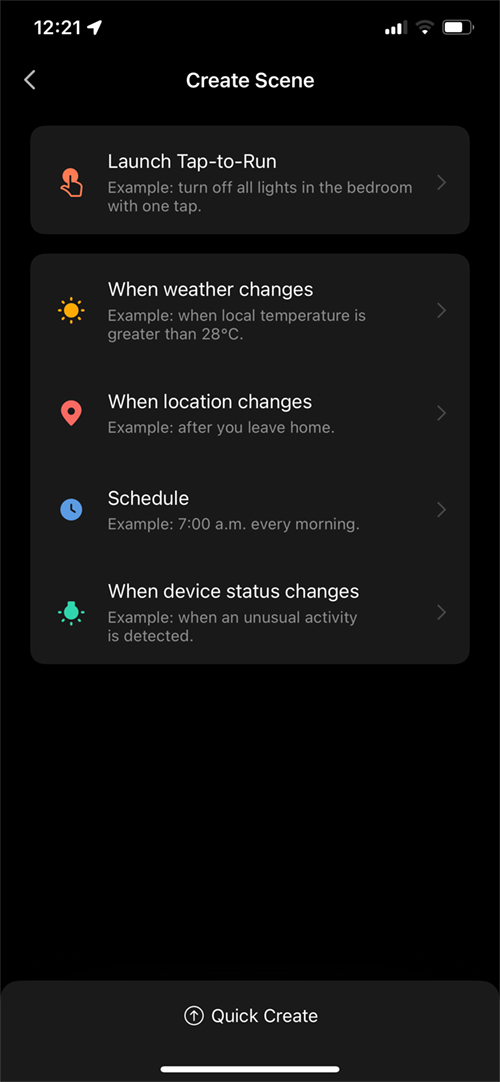
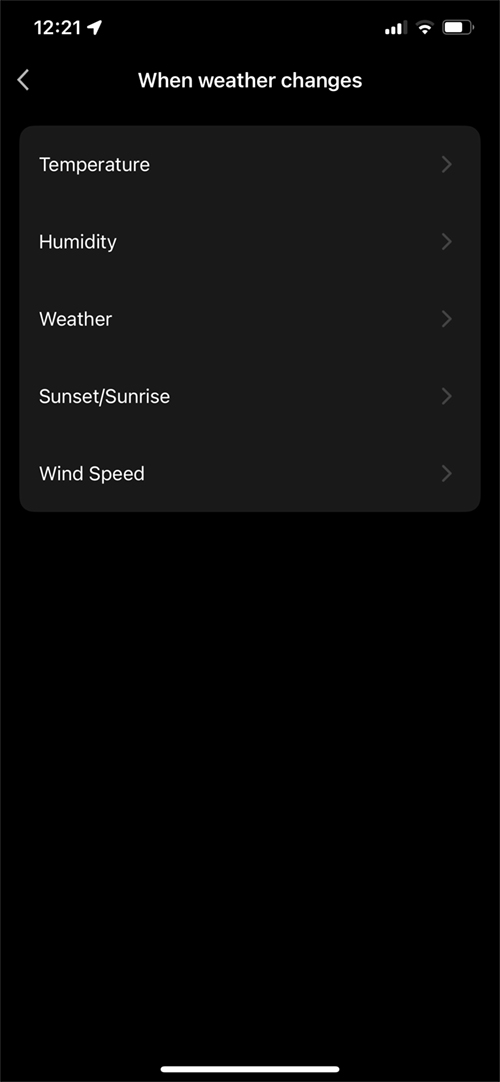
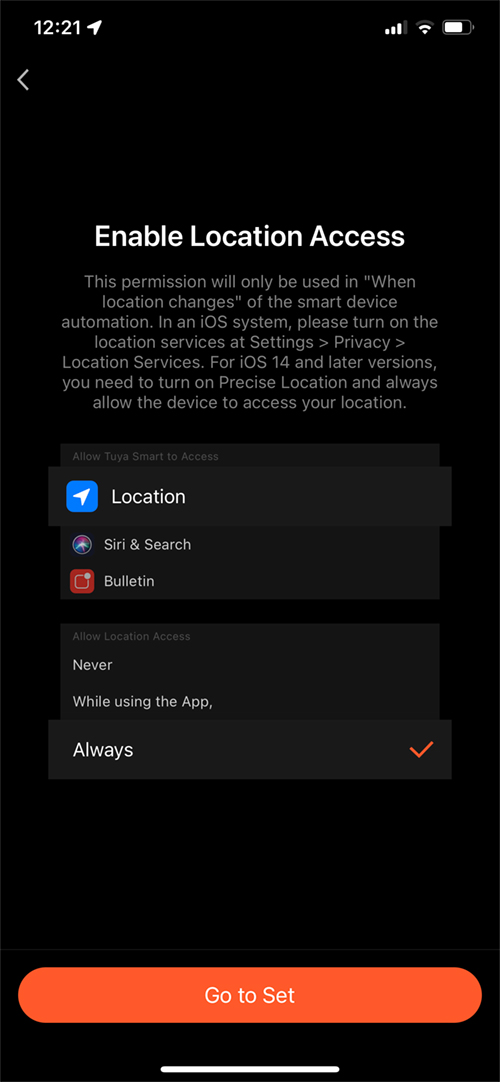
The Tuya app also allows for some pretty neat scene/automation options that involve not just the common types of triggers, like location, or the status of other devices, but also weather conditions, which include temperature, humidity, general weather conditions, local sunrise/sunset times, and even wind speed. To use at least some of these, you’ll need to grant location access of course.
Although I’ve deliberately limited my use of the ZemiSmart hub for logistical purposes (I currently run 19 different hubs of all types…), which in turn means I don’t really use Tuya SmartLife, it’s still a rather underestimated app, with a lot of potential. the UI isn’t all that bad either.
THE MOTOR IN USE / FINAL THOUGHTS
As already stated at the beginning of this review, we don’t have curtains, so aside from me investing in some temporary equipment in order to actually test this device, it hasn’t really been set to good use. I tested it in a couple of locations (to test its signal strength connected to the hub), whilst also setting routine tasks to open and close four times every day. In this limited time, I found it to work without any issues and didn’t get stuck at any point, as I half expected, due to the manner in which it operates, there may well be an instance of it getting stuck. This was of concern due to the possibility of the curtain motor burning out. I’m not aware of any protection against such a situation, so that’s something to bear in mind.
As I also stated early on, whilst I have no issues with retrofit devices in general – I used the Nuki Smart Lock 2.0 for nearly two years and was very happy with it – on this occasion, I’m less sold on the more mechanical nature of how it does its job. That may not matter to you of course and is just a personal thing.
What I would say is that if you’re already deep into the Aqara side of things, like myself, it may be a good idea to wait and see what their forthcoming offering is like. Still, I think ZemiSmart offers yet another compelling option if you aren’t in too deep with any particular brand, and with the hub and devices being region-free, there’s a lot to like.
As regards sound levels, the motor averaged out at around 35dB, although my testing was far from laboratory standards, I’ll admit. The sound and volume levels will most likely vary depending on a whole variety of acoustic situations of course, so it’s not easy to give a definitive answer, but it was quieter than I expected.
Battery life is a difficult one to test, due to the limited time I was able to effectively test it. However, in terms of basic calculations, I’d say that the claim of 5 months between charges is probably about right. It will also depend on the drop length and weight of your curtains, of course, so your mileage may vary.
Summing up, despite being less than enthusiastic about the mechanism of how it works, it was better than I expected, and so, putting to one side the fact that you may need two of these, depending on your setup, it’s still a decent product.
Full disclosure: ZemiSmart provided HomeKit News with ZemiSmart Curtain Motor for the purpose of this review. No other compensation was made, requested or has not in any way influenced our opinion of this product.