
For a while now, Canadian smart heating company Mysa has been pretty much alone in manufacturing thermostats that work with either baseboard heaters, or more recently underfloor heating systems that work with HomeKit, and earlier this year, the company extended their reach by moving into the smart AC controller market, with their Mysa Smart Thermostat for Air Conditioners. Not so long ago this particular market was very underpopulated, however, with the likes of Tado, Sensibo and Aqara, Mysa’s offering joins a slightly more crowded market. How does it compare to these other brands? Read on to find out.
UNBOXING
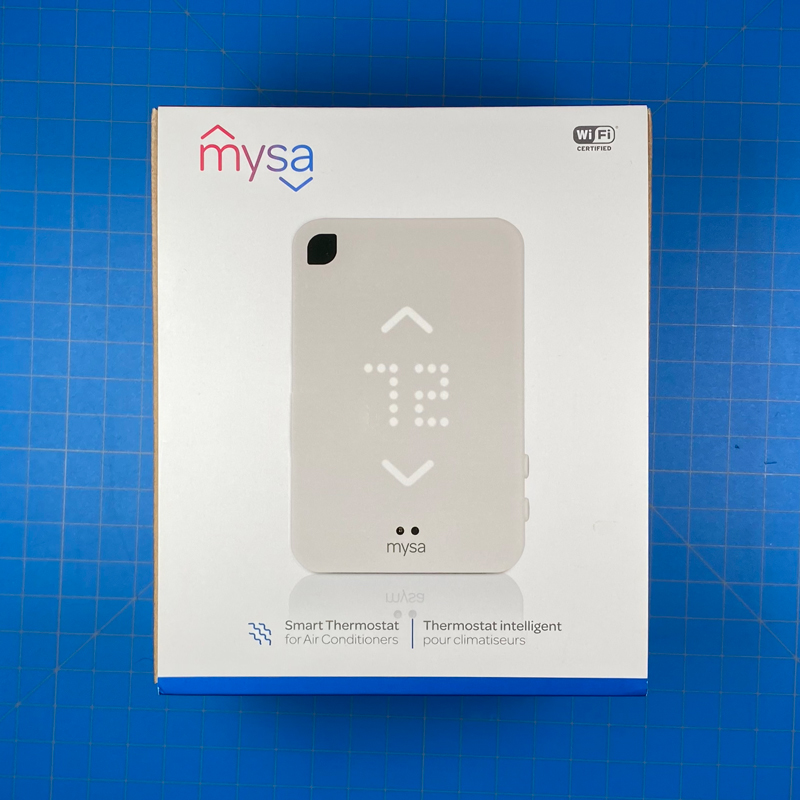
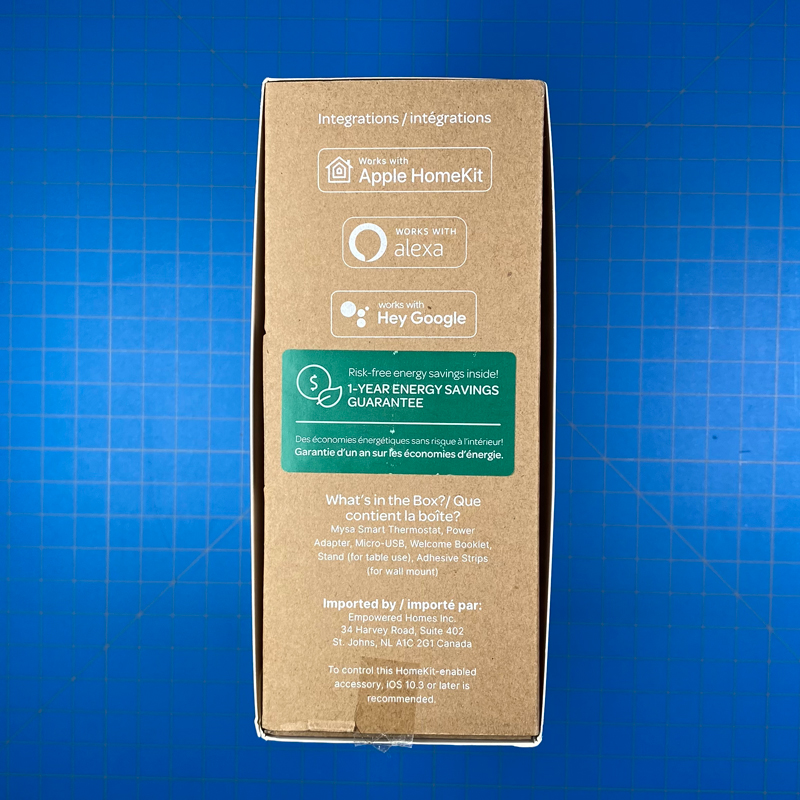
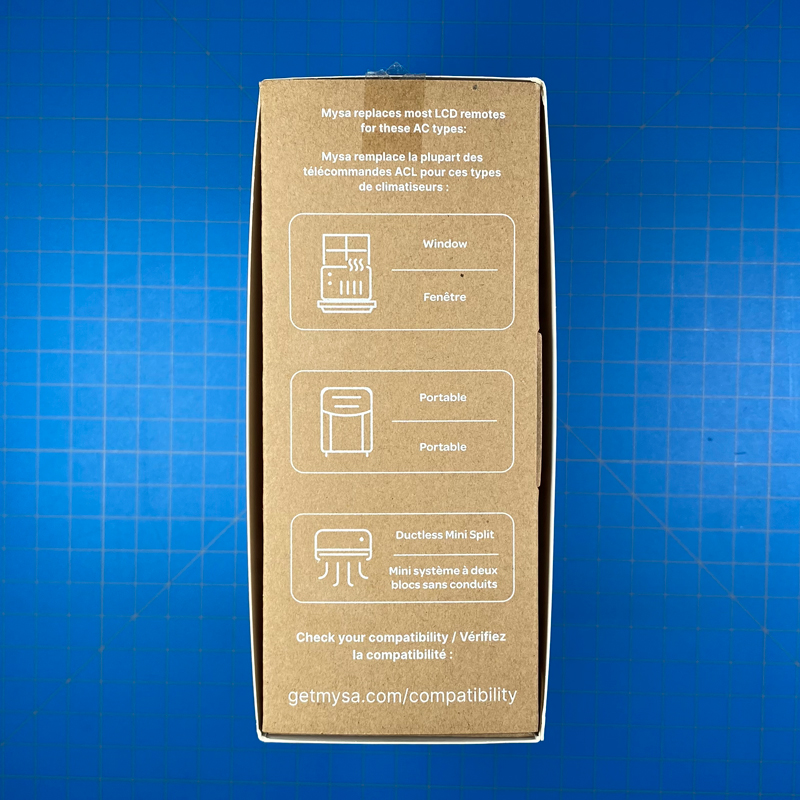
I pre-ordered the Mysa for ACs directly from the company, and although it took a while to arrive, and from such a large distance, due to the decent packaging, everything arrived unscathed, so full marks to the company for making sure my investment was protected. All text on the packaging is in English and Canadian French, and if you were to spot this on the shelf of a store, the box tells you pretty much everything you need to know. This includes information on which smart home systems it works with – Apple HomeKit, Amazon Alexa, and Google Home. It also shows the types of ACs it can work with, which includes window ACs Mini Split ACs, and even portable ACs, although in all cases this depends on the remotes that come with these devices, as the Mysa is essentially replacing the remote. If your remote isn’t capable of displaying the different modes or the target temperature, chances are this is not going to work for you.
If you’ve ever had a Smart AC thermostat before, you’ll know that apart from having to navigate some menus on an app to determine the make and model of your AC, as well as the app downloading the relevant codes for infrared signals, it’s all pretty simple to get running. This is exemplified with a quick 3-step setup guide on the inside of the box if you’re keen to get things running ASAP.
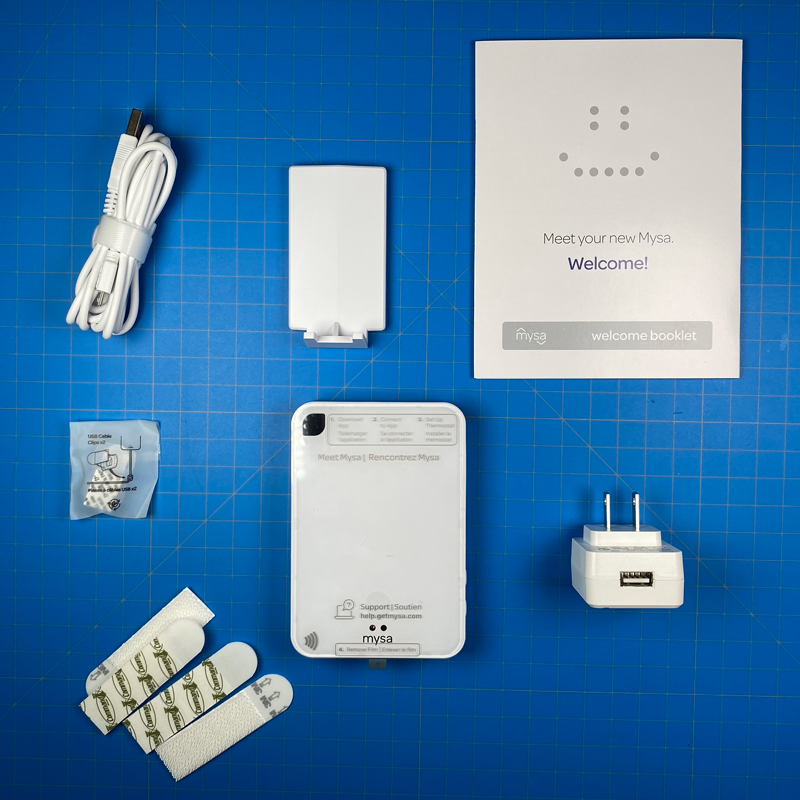
In the box, you get;
The AC controller
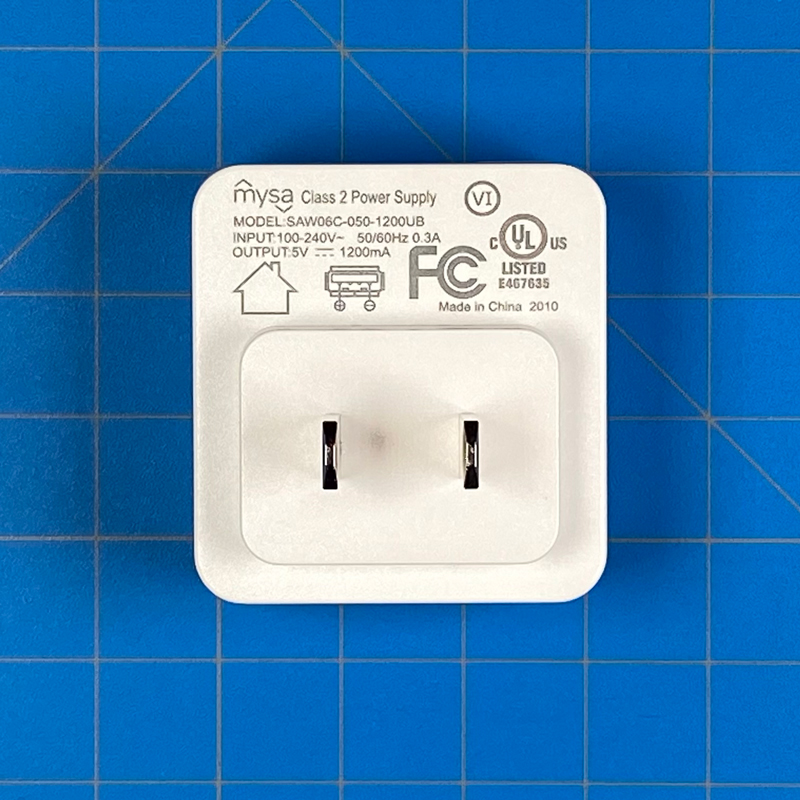
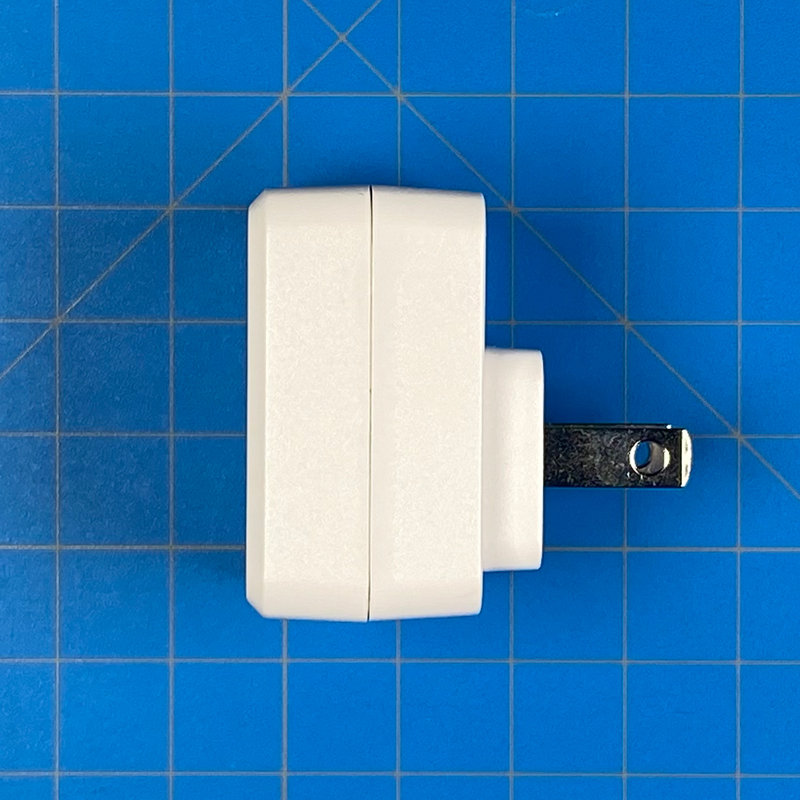
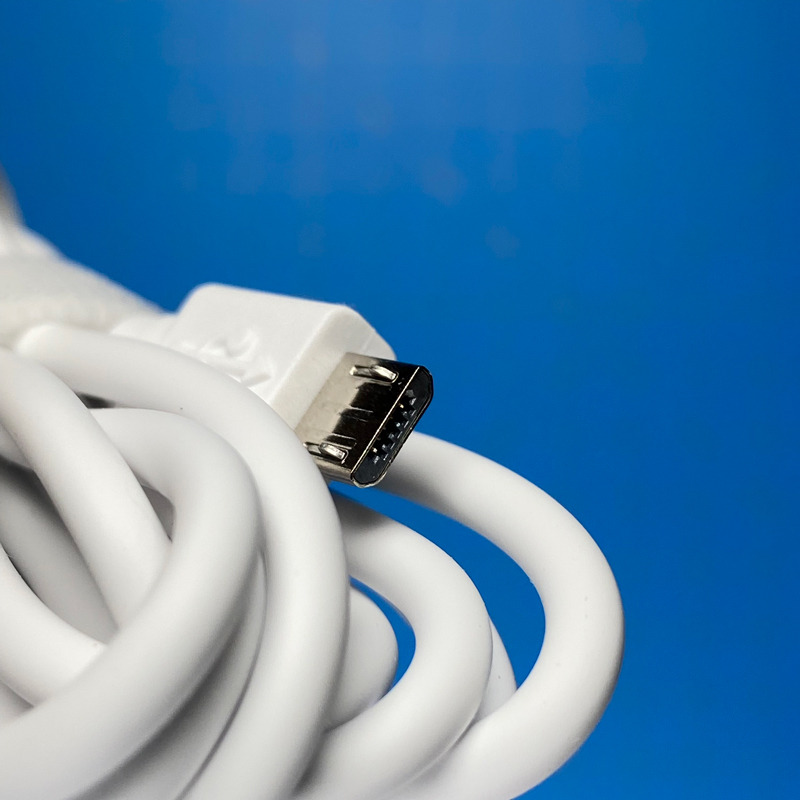
A USB-A to Micro USB cable for power
A USB power brick (Type A, non-polarised)
A desktop stand
Some cable clips
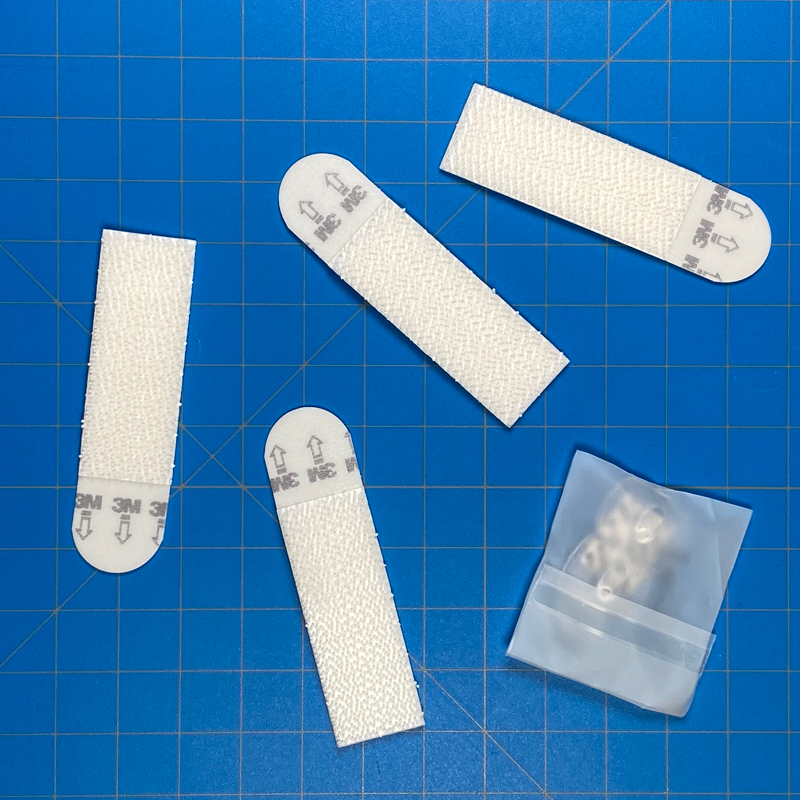
Four adhesive strips with velcro on one side
A welcome booklet
THE DEVICE
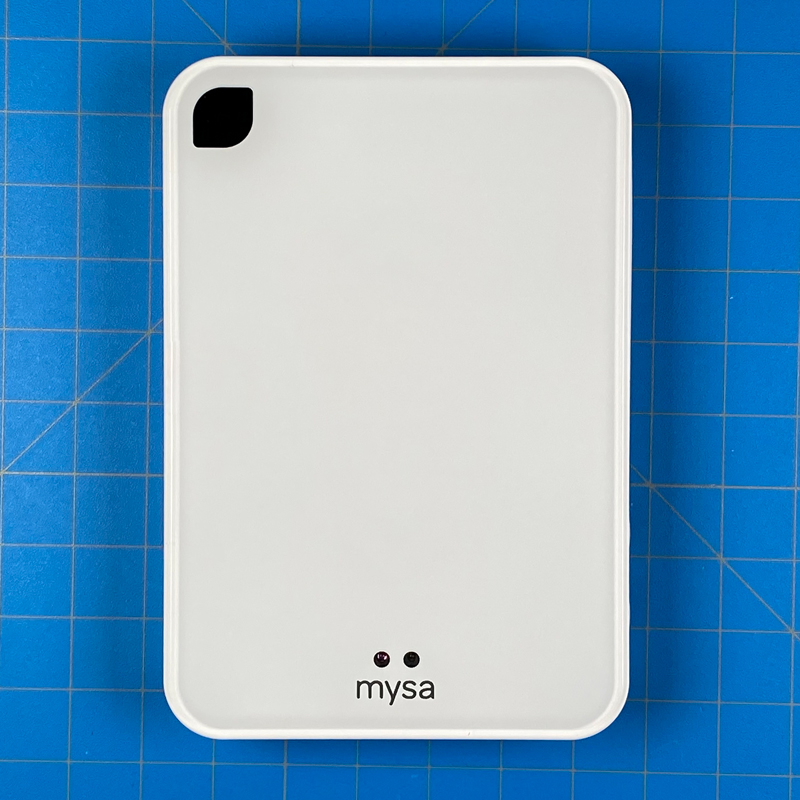
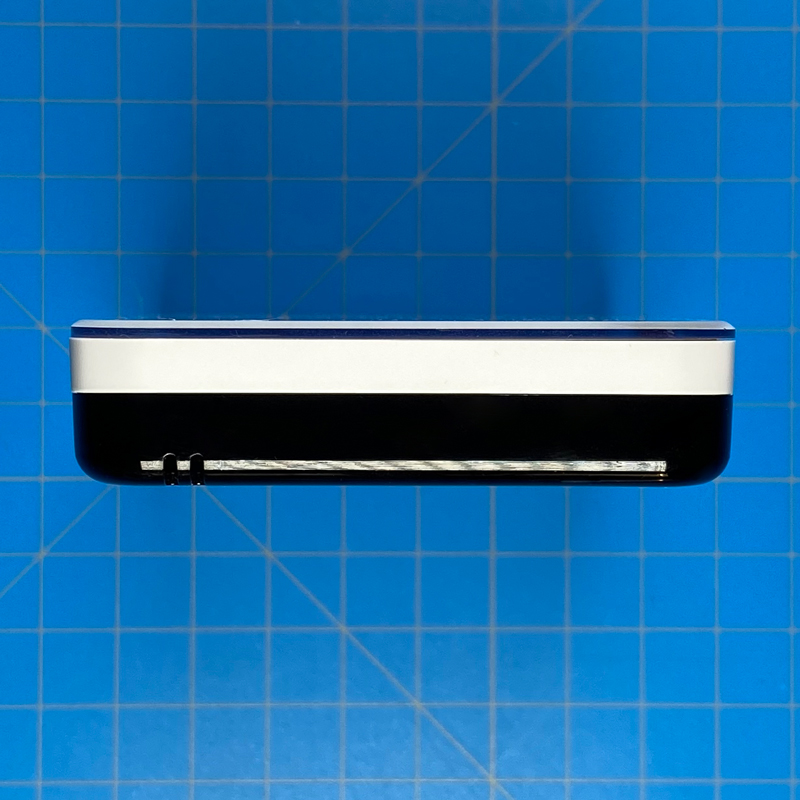
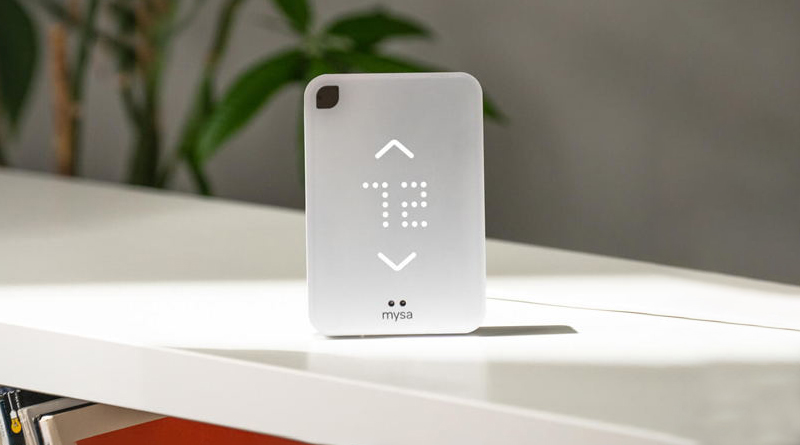
The AC controller itself follows the same design language of their other products – the Thermostat for Baseboard Heaters, and Thermostat for Underfloor Heating – in that the front is one large slab of white plastic. The front employs touch-sensitive controls, which I’ll go into more later, along with a couple of sensors, which at the time of writing are inactive. One of the sensors is for proximity, so when someone approaches, the display turns on, in anticipation of being controlled. The other sensor is for ambient light detection, so the display will dim in relation to the overall brightness of the room. Mysa inform me that these functions will be activated at a later date, so hopefully, by the time you do read this, that functionality will arrive.
First impressions of the unit are that it feels well made, with a decent amount of weight to it.
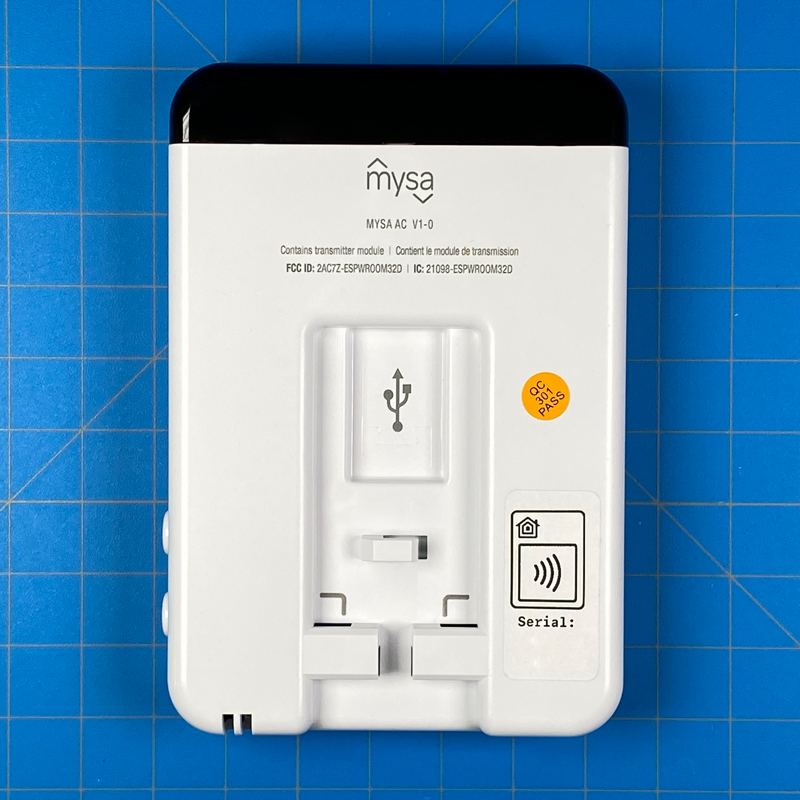
The rear of the unit has a cutout section for the USB cable to fit flush into the back of the Mysa, which is important if you plan to wall-mount the device. Also on the back is a HomeKit code, which in this case doesn’t deploy a QR code, instead opting for the 8-digit code. The QR code is replaced by the icon used for NFC, as the Mysa has an NFC Chip embedded just under the front face. This allows you to not only add the device without the code (which may be inaccessible if you’ve already wall-mounted the Mysa) but guarantees that should you lose or remove the code, you can still pair it using NFC – even when it’s not powered up! The welcome booklet does come with a standard HomeKit QR code, however.
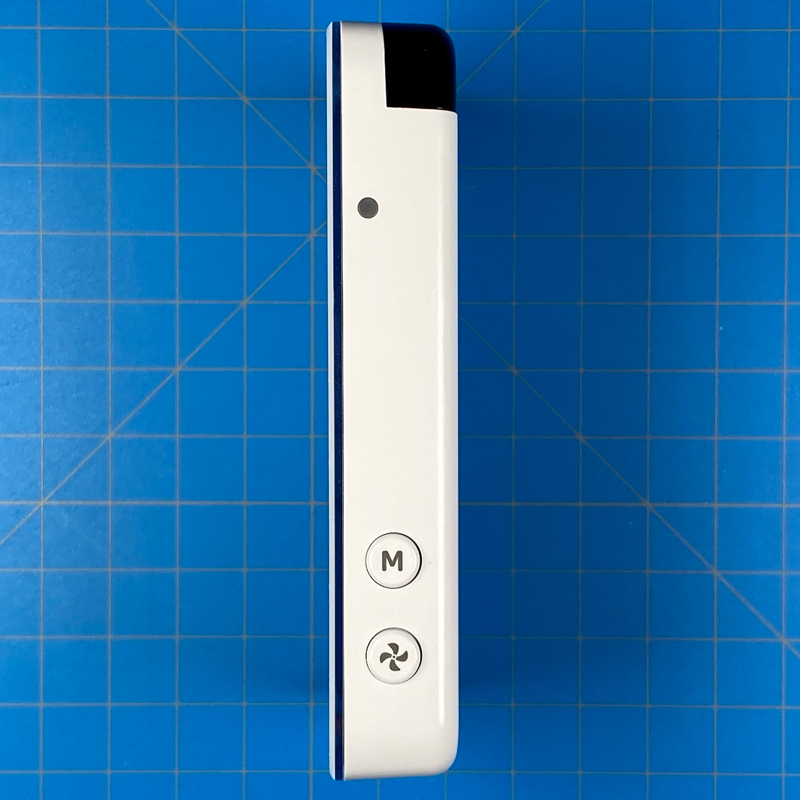
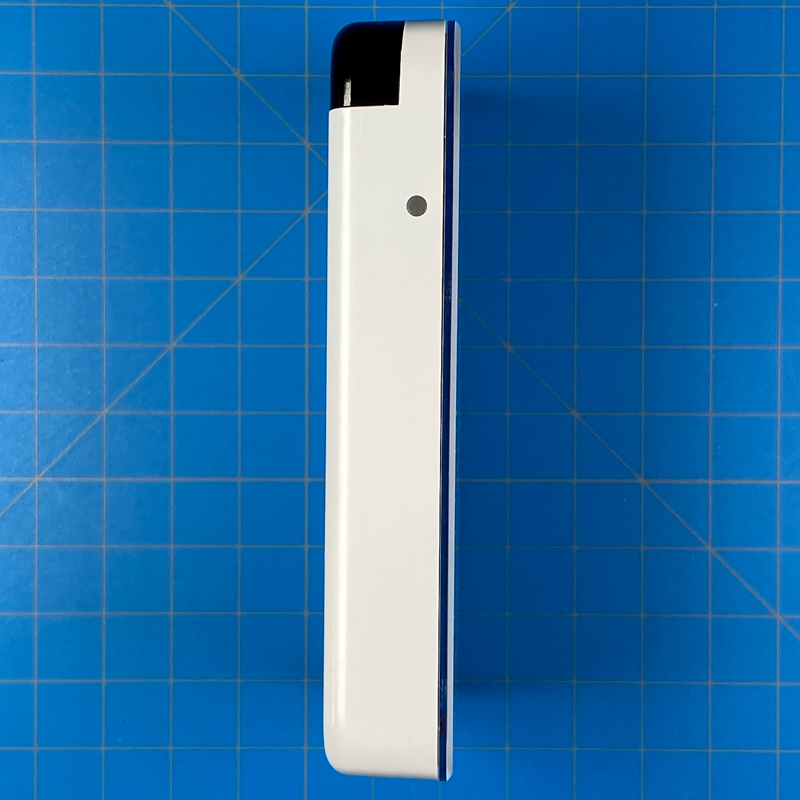
Both sides of the Mysa feature a circular dot that houses a multicolour LED, whilst one side is also home to a couple of buttons – the Mode button, and the Fan Speed button. The LED will flash in a different colour depending on the mode it’s set to, before eventually stopping and turning off. Depending on the modes your AC is capable of, you may see the following colours;
Blue for Cool mode
Orange for Heat mode
Green for Auto mode
White for Fan only
Yellow for Dry or Dehumidify mode
Red for Off
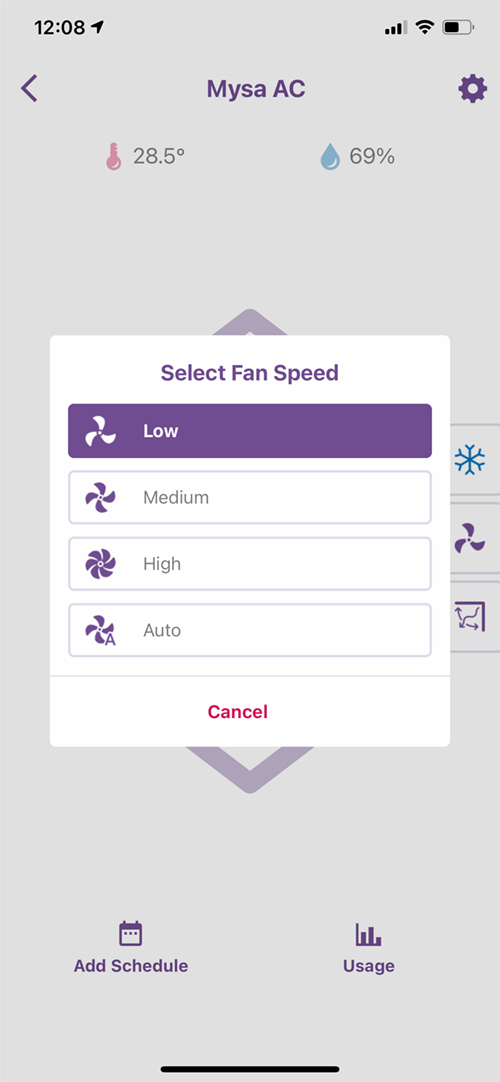
Both of the side buttons simply cycle through the available settings, so the fan speed button cycles through low, medium, high, and auto speeds, whilst the mode button cycles through the modes listed above, although your AC may have more or fewer modes than are listed here.
The included stand is a nice extra, and whilst you might think that it would be a bit of an afterthought, made using cheap plastic, you’d be very wrong, as it’s tough, nicely finished, and with some weight to it, that fits into the Mysa quite snugly. The base is rubber, with the Mysa logo imprinted, and allows the stand to not slide around, although it should be noted while this works for tapping the touch-sensitive touch surface on the front, it’s not as effective at keeping the Mysa in place when pressing the side buttons.
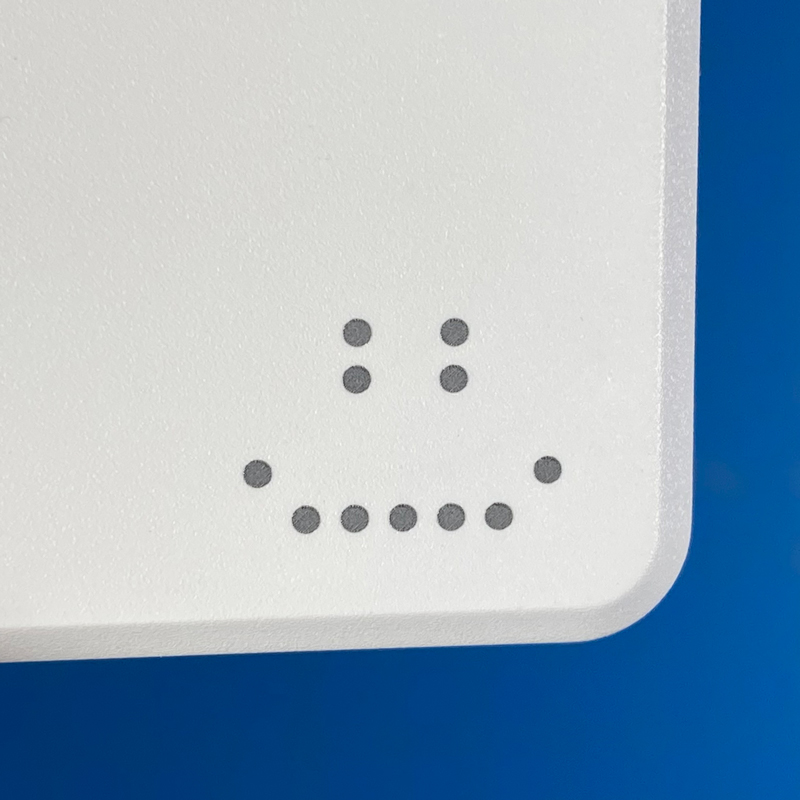
As with the stand, the provided USB plug doesn’t come across as an off-the-shelf, mass-produced piece of equipment, even though it may well be for all I know. either way, it is once again fairly decently put together, and even features Mysa’s smiling face graphic.
The remaining parts of the package are the USB cable and some adhesive strips to affix the Mysa to a wall, as well as a few clips to hold the power cable neatly in place. Unlike the strips you might see in many other products that need such things, these come as single-sided adhesive strips, with the other side using Velcro. The way it’s designed to work is that you use two of the strips on a wall or other vertical surface, with the velcro side facing outward, with the other two strips stuck to the back of the Mysa, with the velcro side once again facing outward. The velcro parts on the wall and Mysa cling to each other, but also allow the Mysa to be removed without needing fresh strips, should you need to clean the unit, or otherwise take it down for whatever reason. It’s a good idea, but standard double-sided adhesive strips are cheaply and readily available, so I’m sure it’s that much of a big deal.
INITIAL INSTALLATION
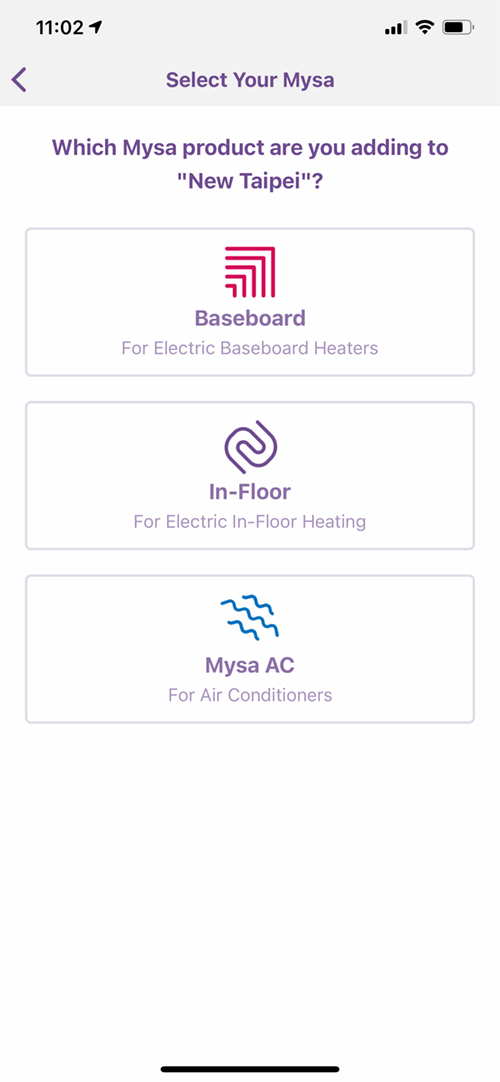
I generally advise setting up a device in the company’s native app if there are specific setup procedures that need to be followed, and AC controllers are one such device, as the steps required to teach it your AC remote isn’t something you’re able to do in the Home app. So, even if you were to add this to the Home app first, you’d still have to go through this same procedure to finish the installation.
Sign up/in and select ‘Add a device’
Select the model you’re adding
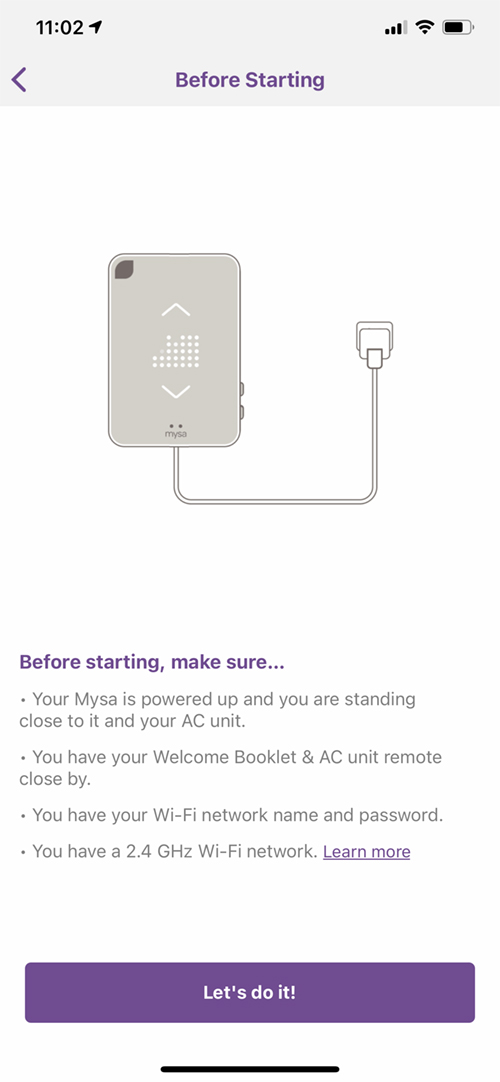
Ensure the device is plugged in and powered up
Make sure you’re on the same 2.4GHz WiFi network that you plan to add the device to
Wait for the screen to show the pairing icon
Select HomeKit pairing
Select your HomeKit home
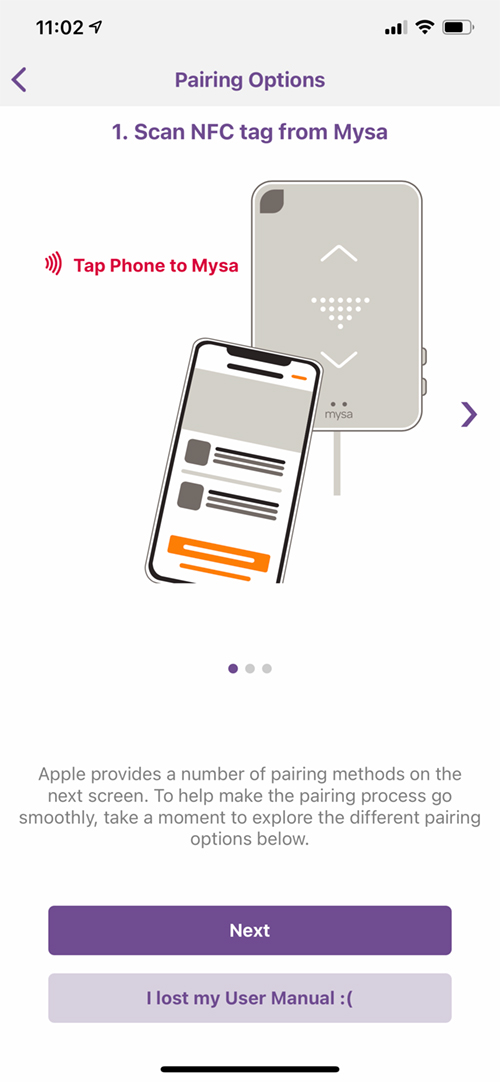
Whilst the device can be added to HomeKit using the HomeKit code, it’s even more convenient to scan using the NFC capabilities of your iPhone, as long as it’s capable (iPhone 7 or later);
tap the bottom right corner of the device
HomeKit will identify the accessory type
Click Add to Home
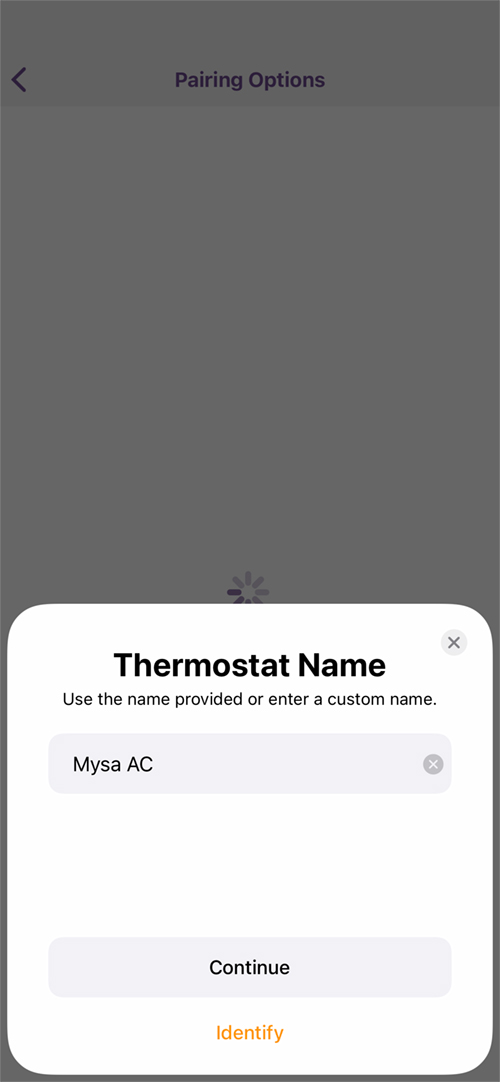
Once added just add it to the relevant room
name the device
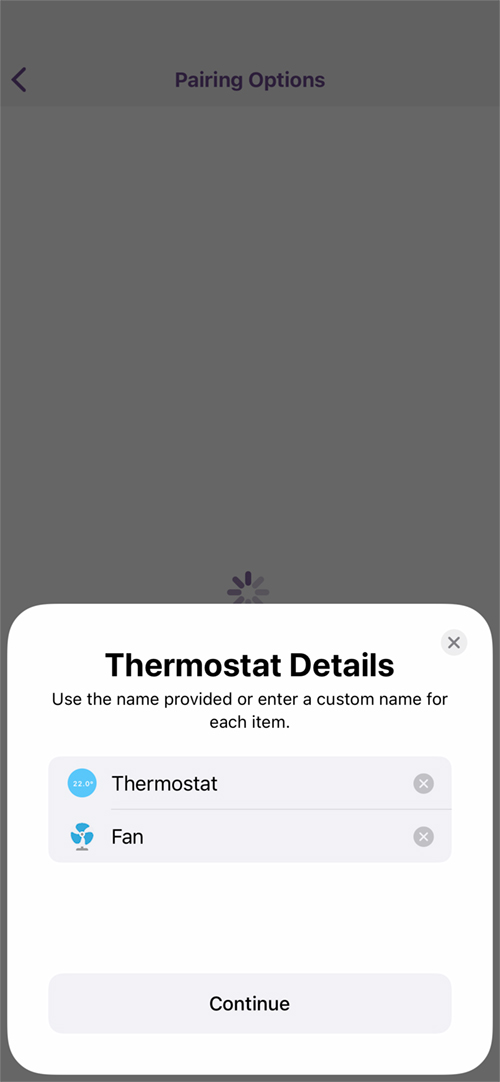
The details for the device will show up, allowing you to also rename them if necessary
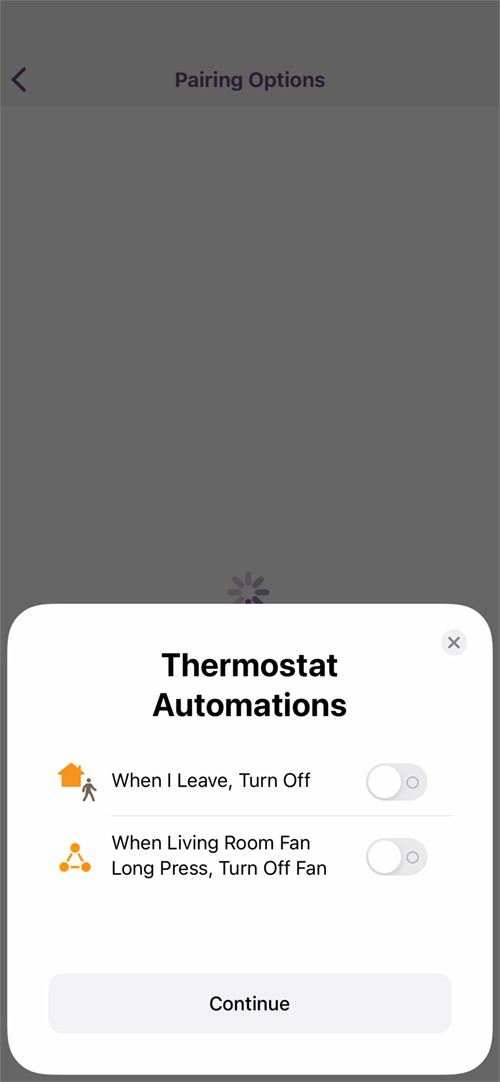
Automation suggestions will show up if you want help with that
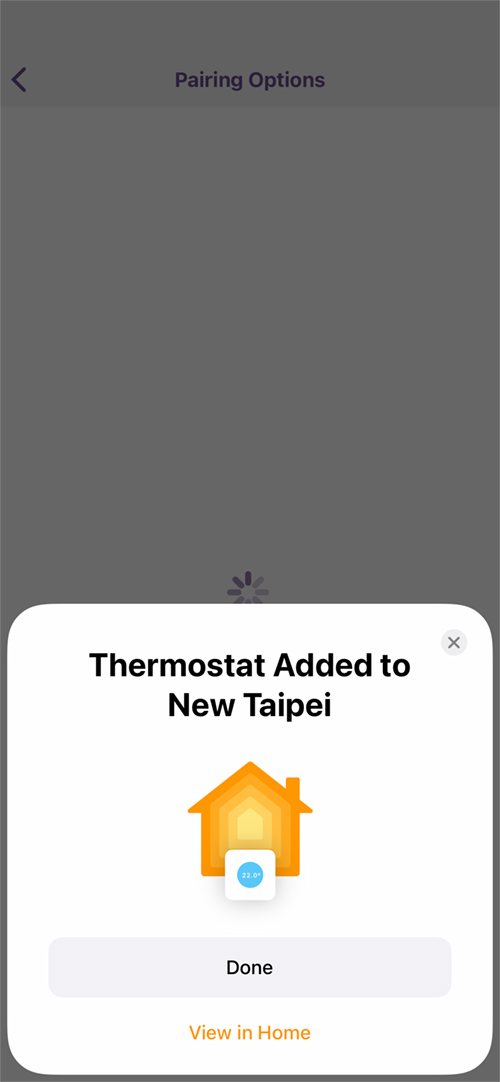
and after pressing Continue, you’ll see that the device has been added to HomeKit and your Home
Click ‘Done’
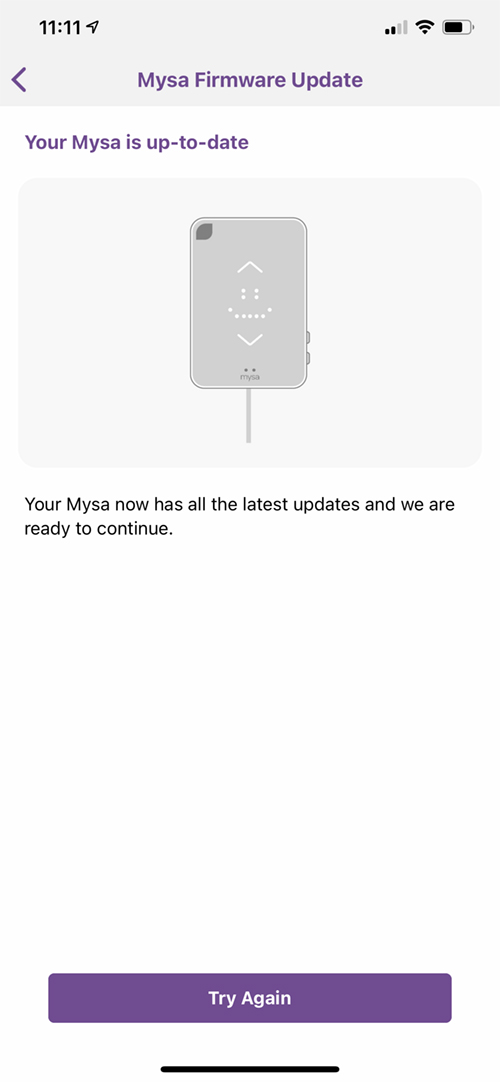
You’ll then return to the Mysa app, where you’ll go through the process of looking for any firmware updates.
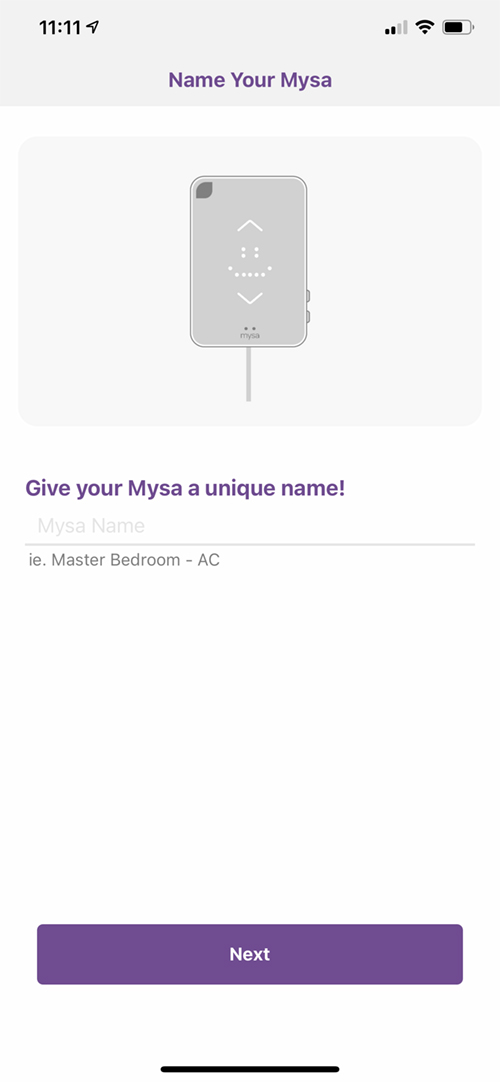
Once done, you can then proceed with the final setup
Name your device. This is separate from the HomeKit/Home app name, although it can – and probably should – be the same
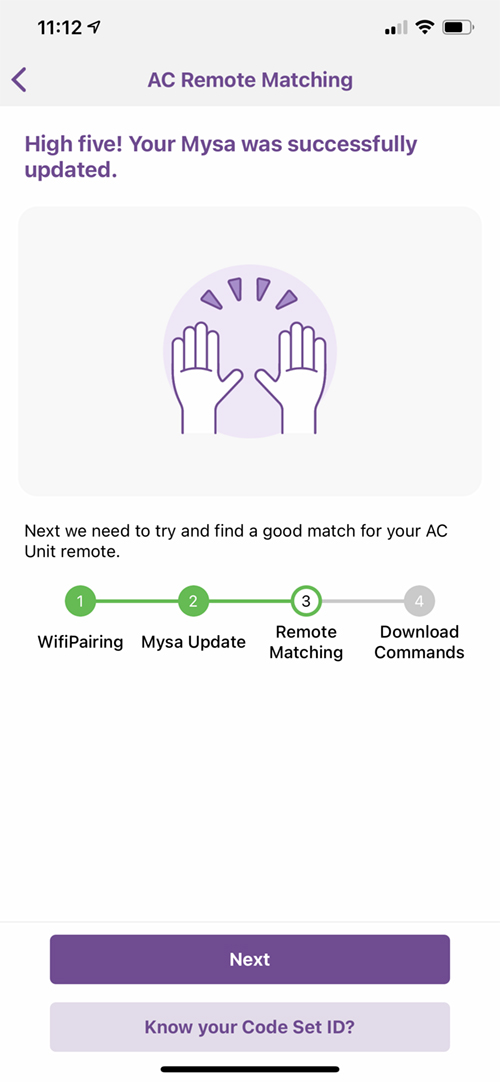
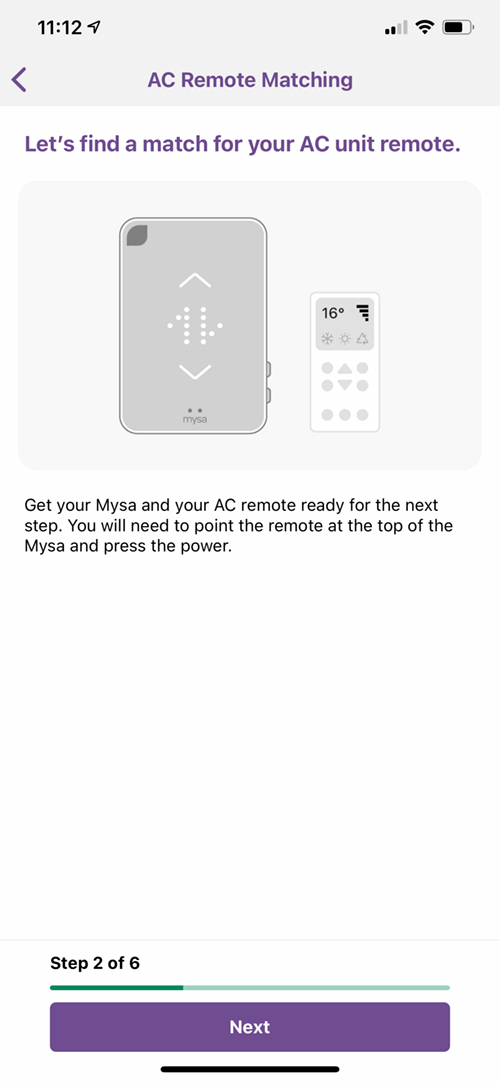
You then get to the stage where you need to teach the Mysa your AC remote it’s codes
once ready with the device and the remote, press next
aim your remote at the top of the Mysa and press the power button
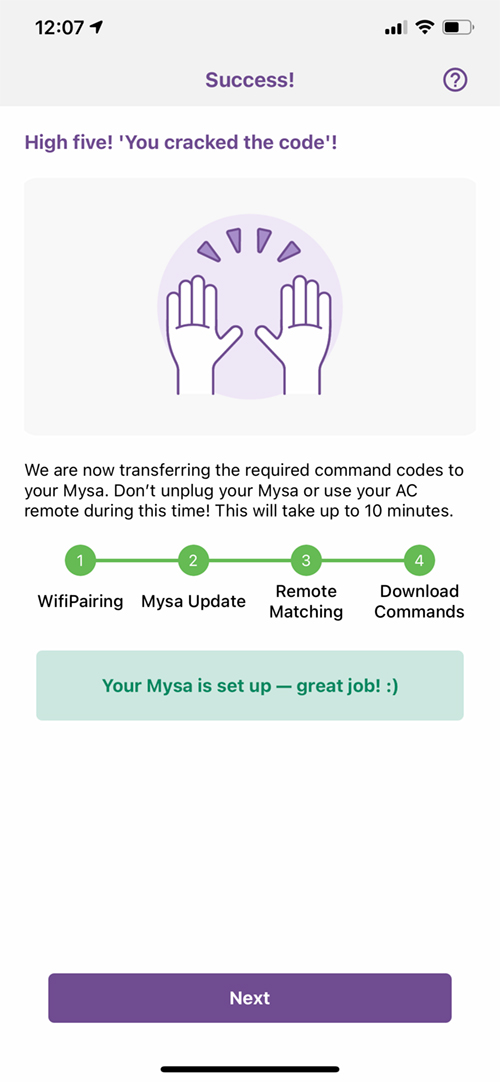
The app will identify your AC based on the remote signals, and download the codes for your AC
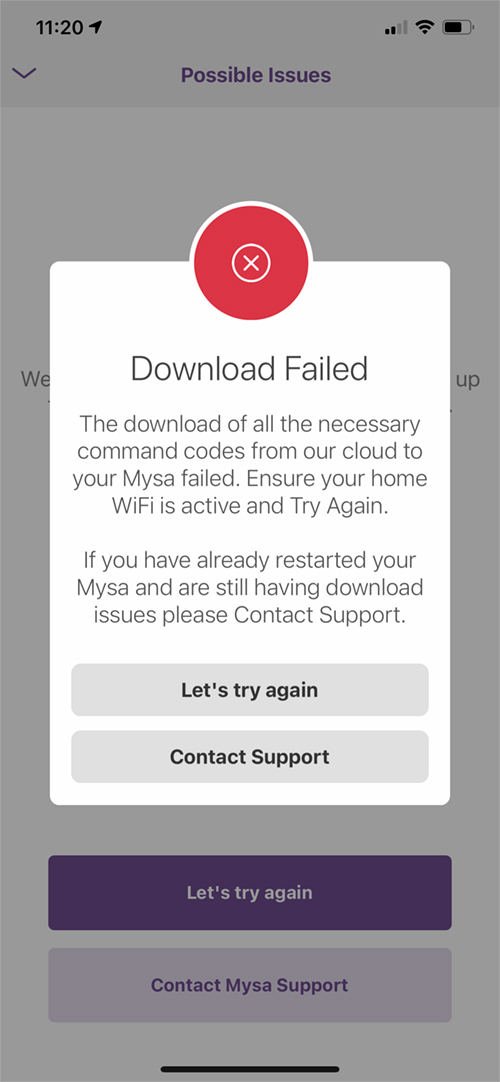
Unfortunately, with one of my ACs – a model by Hitachi – although it found the codes, it failed to download them – repeatedly
When I chose the Daikin AC in our bedroom, it ID’d the AC and downloaded the codes without any issue
Why the Mysa (or the server) couldn’t complete the job for one of my ACs, I’m not sure, but it has yet to be solved as of writing this review, so currently it’s working with the Daikin mentioned above. It’s something to bear in mind when choosing any AC controller though, not just the Mysa. Still, it’s working with the Daikin AC at present and works well. There are no disconnections from the WiFi network, and is responsive at all times, either via the Mysa or Home apps, or via direct control.
APPLE HOME APP
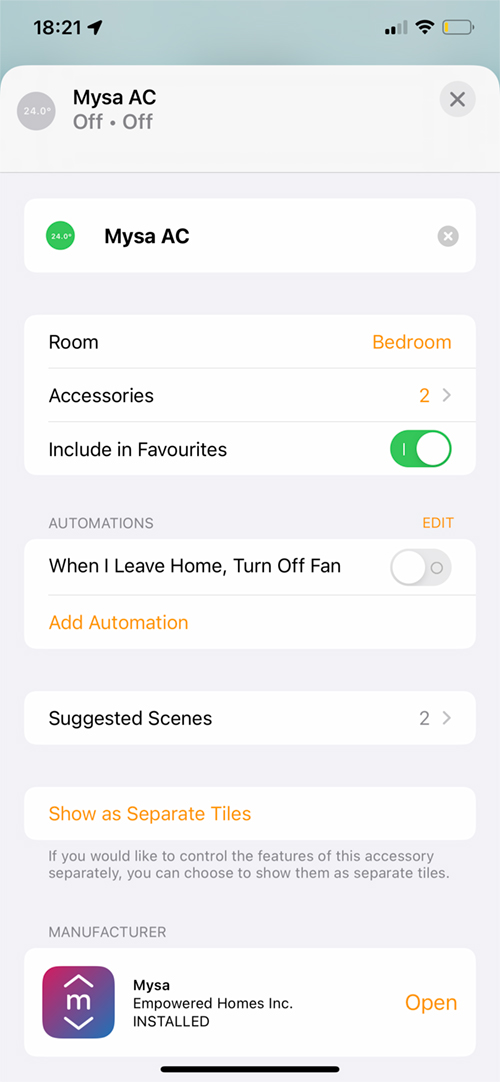
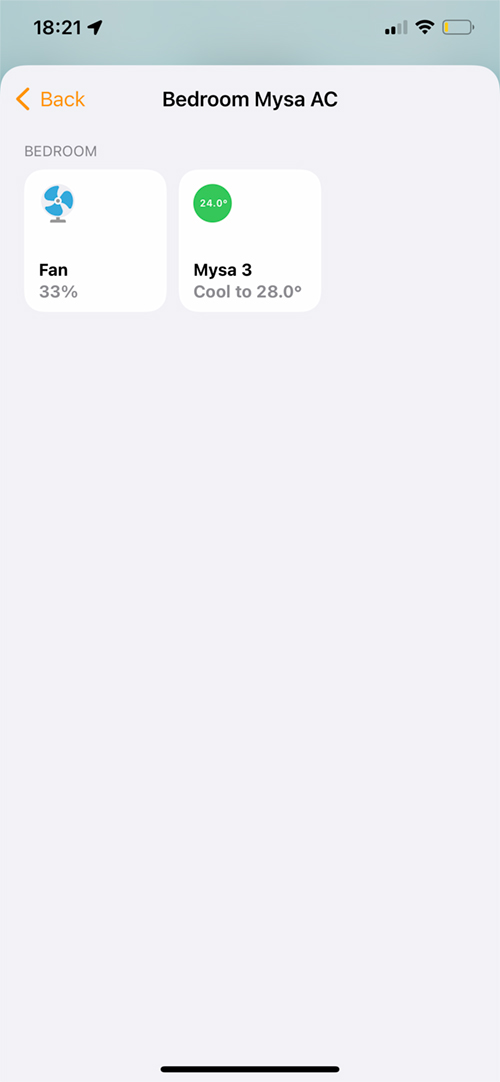
As with most devices in the Home app, the Mysa selects from a fairly standard set of options exposed to HomeKit, although in the case of the Mysa, you get two services – a fan and the thermostat. I’ve got them all under one tile here, but they can be split up and shown separately, although as the app uses what looks like a standing fan, it could be a bit confusing as to the type of fan it is.
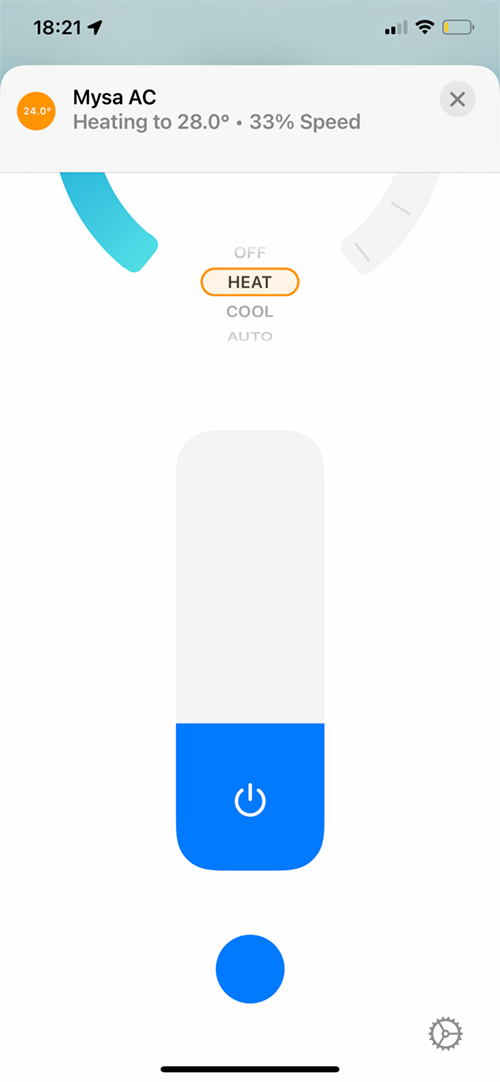
You get the standard dial to control the three available modes – heat, cool, and auto (plus off), along with a slider to control the fan speed. This controller is one part that not all ACs expose to HomeKit even though it’s possible. The bottom of the slider also has a circle that, when activated, sets the fan speed to auto (not the mode, just the fan). It’s all fairly basic/standard stuff, but it works well enough.
THE MYSA APP
The Mysa app lists all of your Mysa devices, so it’s a standalone app, as opposed to a HomeKit app, like Controller or Home+, for example. As I’ve only got the one device it only shows one tile, and pressing on it reveals the UI that resembles the front of the device itself to a large extent.
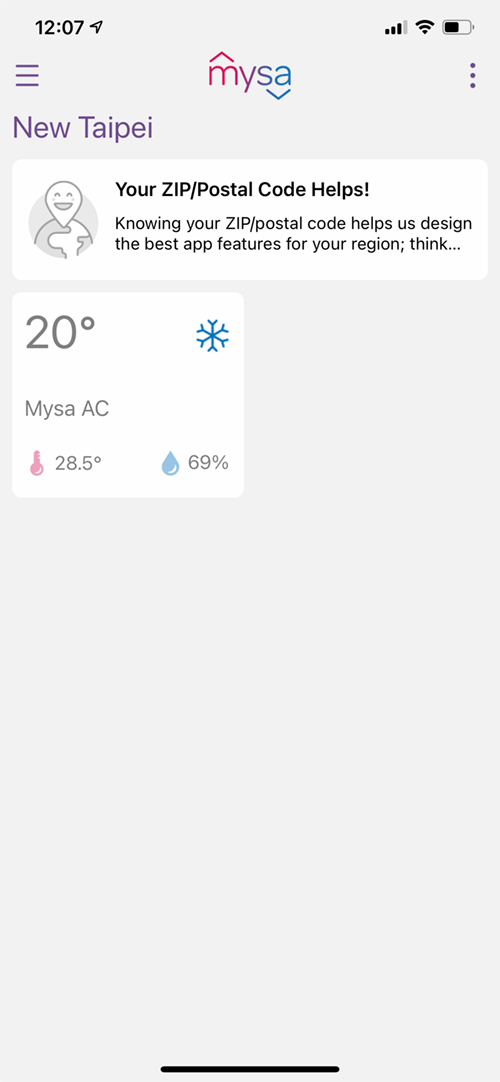
You also see the top of the main screen state “Your Zip/Postal Code helps!”, which is designed to make the app more customisable for the area you live. I’m only guessing, but maybe certain modes – like ‘Heat’ – are disabled for regions where it’s generally quite warm, like Florida for example.
This brings us to an important point if you’re thinking of buying this but don’t live in Canada or the United States. First of all, whilst the device will actually work anywhere, the app itself, which is needed for setup at the very least, is only available on the US and Canadian App Stores. That’s an easy one to circumvent of course but add to this any warranty would possibly be void if used in areas they don’t support, then you may want to think of options available in your region first.
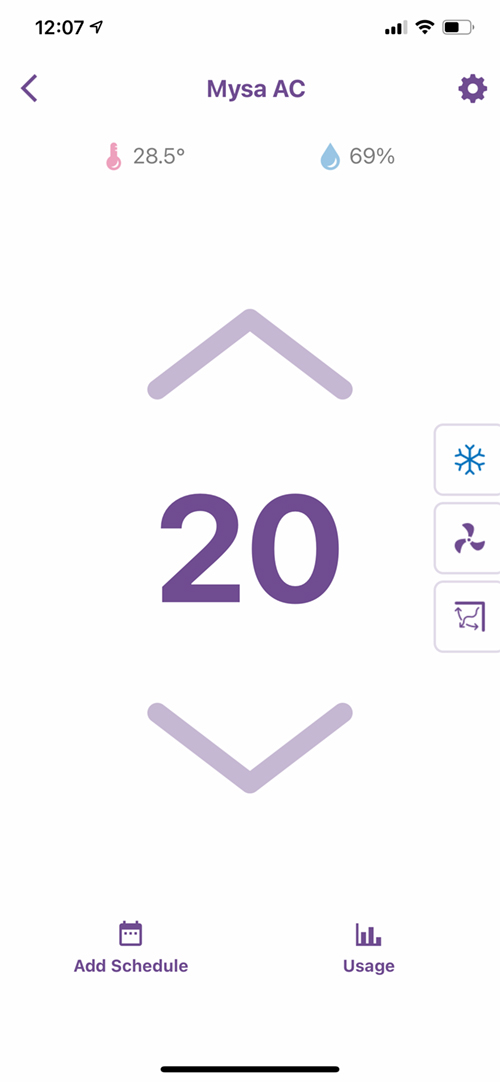
This interface has up and down arrows to adjust the temperature, with separate side buttons to control the fan speed, the oscillation control (for the blades that go up and down on some AC units), and mode selection. AS you can see in my case, the Daikin is capable of not only the standard cool, heat, and auto modes, but also dry, and fan only. You also get access to the four fan speeds – auto, low, medium, and high.
Unlike Sensibo and Tado, there’s no paid monitoring or usage service that goes beyond the basics here, so what you get is the option to monitor your AC usage by day, week or month, with no real frills – but free nonetheless. There’s also a schedule section, which has the option to set schedules manually, whilst also offering a ‘wizard’ to set up your schedules based on a series of questions.
Finally, in the settings panel, you have an extensive set of tools to adjust most aspects of the Mysa, which includes the basics like changing the name of the device, to changing the timezone, as well as resyncing the AC if someone inadvertently changes the AC settings with the original remote. You can change the wake and sleep brightness of the display from 0-100%, and you even have the option to lock the side buttons.
All in all, the Mysa app is pretty decent although the setup process can be hit and miss with the app having frozen or crashed at times when I struggled to add the Hitachi AC. These things can usually be ironed out, and as such, as long as the device itself functions, there’s little to complain about.
IN USE | SUMMING UP
I’d long anticipated this device, not because I particularly needed it (I already have enough AC controllers), but because I’ve always liked the design of their other thermostats, and as this uses the same basic design/format, I was sold on it immediately. The plusses for me, are that it has an always-on display, unlike the Tado, which only shows any readings if you tap the screen. Add to this a more than decent desktop stand, and there’s little to complain about. It has been 100% solid so far, in the couple of months I’ve had it, both in responsiveness and its ability to stay connected to the network, and if it wasn’t for the fact it won’t play nice with my Hitachi AC (other AC controllers have no problem with it), this would quite easily score higher than the other controllers I have.
I do hope they will activate the proximity and ambient light sensors sooner rather than later, as having the two little ‘eyes’ at the bottom of the unit staring at me without a function is a tad frustrating! At this time, If I want to see the temperature displayed in the daytime/evening, but have the display off at night, I have to go into the app and adjust this accordingly, which is a drag. It wouldn’t be so bad if the display brightness was exposed to HomeKit (not necessarily the Home app but for 3rd party HomeKit apps), so I could automate it, but alas that’s not the case.
All in all, it has been a very good device, and I would recommend it to any of our readers in North America, as the Tado Smart AC Control V3+ isn’t available there, the Sensibo Air is a bit on the pricy side for what you get, and the Aqara P3 simply isn’t designed for use outside of China.