Any mildly experienced smart home fan can tell you that motion sensors – either the infrared kind (PIR) or even pixel-based (found in cameras) are easy to come by these days (how things have changed…). Presence sensors on the other hand are still a pretty rare beast right now. There are devices labelled ‘Occupancy Sensors’ which, from my understanding, rely on a combination of sensor data to determine if a room is occupied – using motion and sound for example. PIR Sensors are great at detecting movement, but you only have to keep still for a short period of time, and according to the sensor, you’re no longer there. These are better than nothing, but what are presence sensors then? Well, as the name suggests, they should be able to determine if there’s a presence in the room being monitored (i.e. there’s actually someone in the room), regardless of whether they’re actually moving. Currently, there are so-called presence sensors on the market that work with Apple HomeKit; The Aqara FP1, which is currently only officially available in China, and today’s product we’re reviewing, the LifeSmart Human Presence Sensor. I also have the aforementioned FP1, so it’s a good position to be in, regarding how well the lifSmart offering has worked out. If a presence sensor is something of intrigue to you, read on…
PACKAGE/CONTENTS
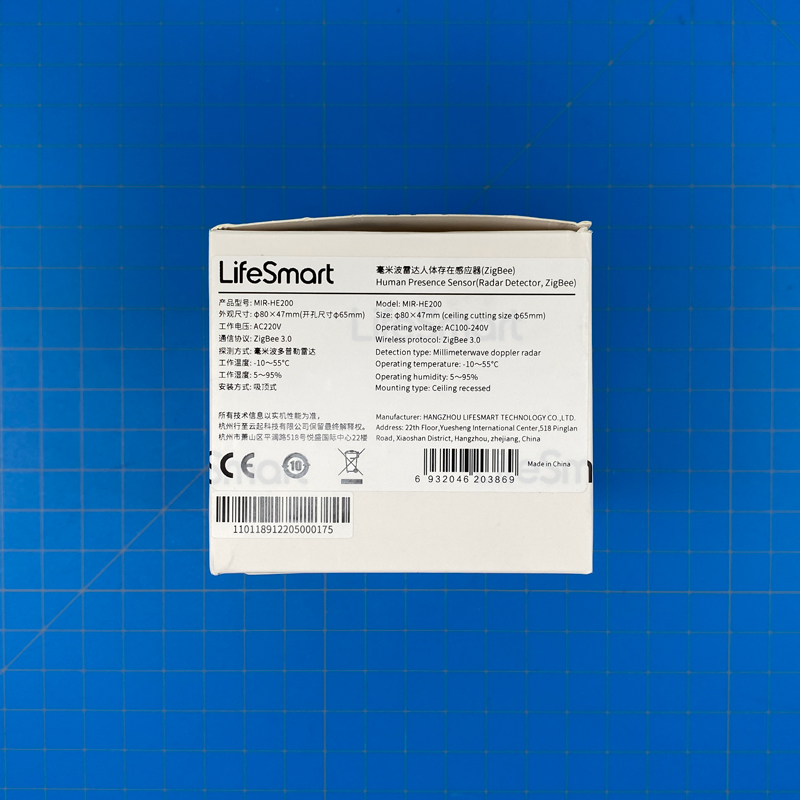
Having received the package – which also included the company’s HomeKit compatible Zigbee hub we’ll see later – it did come across that this product is/was originally intended for installers only, as it’s not retail packaging as such. No matter, but also of interest is that despite LifeSmart selling this only in China at present, the specs are also listed in English on the side of the box which gives rise to the hope that this will start to filter to Western outlets at some point;
Model: MIR-HE200
Size: $80 × 47mm (ceiling cutting size $65mm)
Operating voltage: AC100-240V
Wireless protocol: ZigBee 3.0
Detection type: Millimetre-wave doppler radar
Operating temperature: -10~55°C
Operating humidity: 5~95%
Mounting type: Ceiling recessed
As you can already gather from the specs above, this is a Zigbee 3.0 device, which is why I was also sent the LifeSmart Smart Station, and whilst it uses Zigbee for communication, the method used for detection is something called mmWave (Millimetre Wave) technology, which is a form of radar I’m told, the source technology of which is actually a lot older than you might realise (EHF – Wikipedia). As it can use 100~240V AC, it’s also suitable for anywhere where there’s electricity!
CONTENTS
There are only two things in the box; the Human Presence Sensor itself (referred to forthwith as the HPS), and the manual, in English and Simplified Chinese.
The manual, although small (with correspondingly tiny print…) goes into great detail on the product and what it’s capable of, which is somewhat of a rarity I’ve found.
THE PRESENCE SENSOR
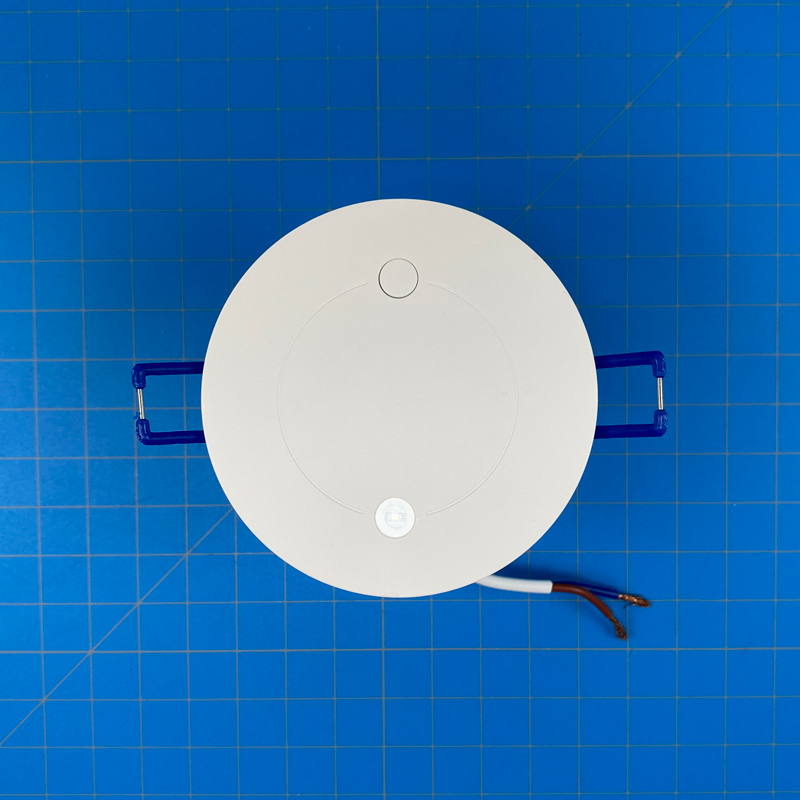
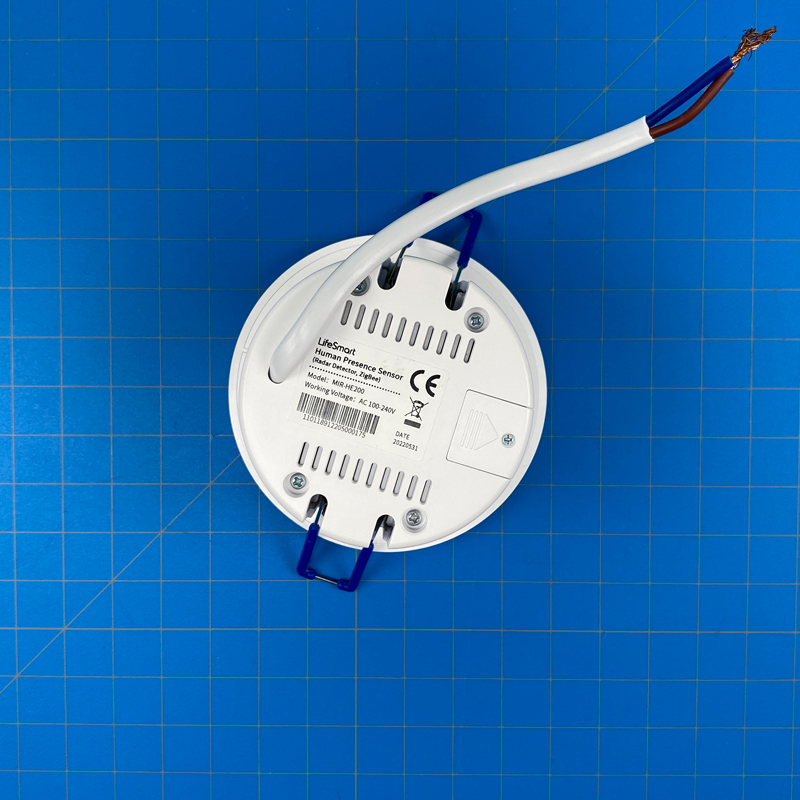
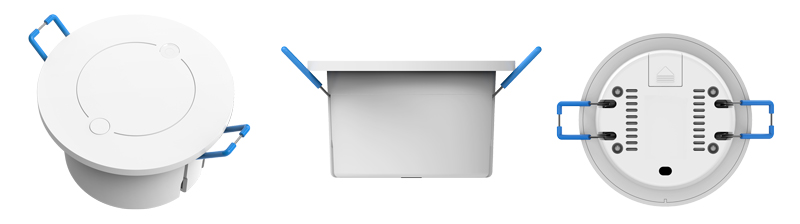
The HPS takes on a similar form to a downlight in that the body fits through a hole in a ceiling, with only the front-facing portion being visible, and almost flush with the ceiling. This is going to be an issue with some users of course, but if you do have recessed lighting of similar dimensions, and can afford to remove one of them in place of the HPS, you should be ok, especially given that the wires can just be hooked up to existing ones with very minor adjustments.
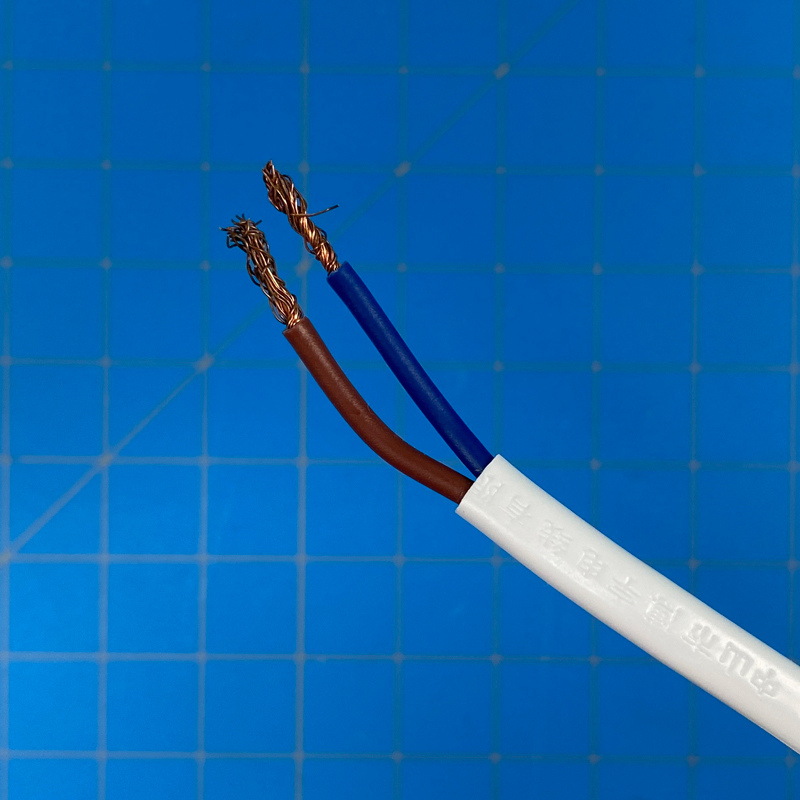
Whilst the FPS has two wires for permanent power (no batteries), there is a small compartment secured by one screw that contains receptacles labelled A and B, I assume, for two wires. There’s no mention of this part in the manual, but I’ve seen something similar with an Aqara Gas Leak Sensor. If anyone has an idea what these are for, let me know in the comments!
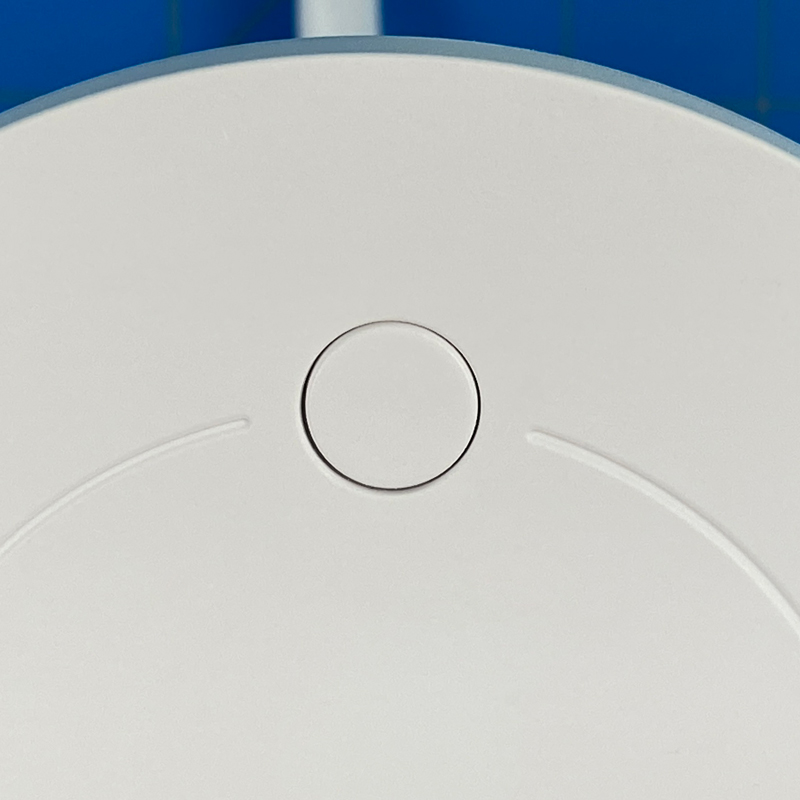
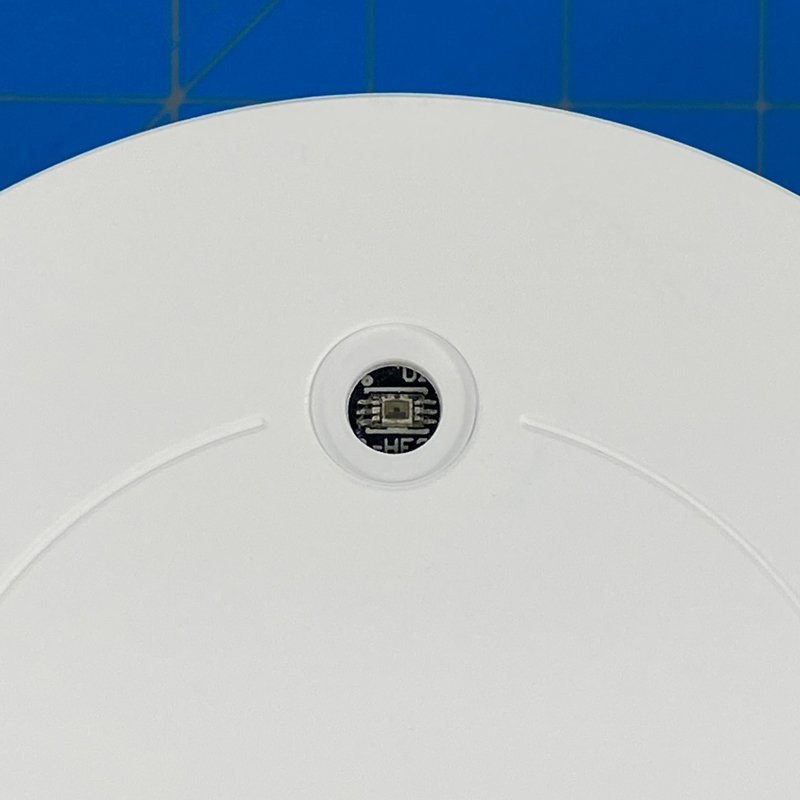
Other than the two spring-loaded handles, there’s only the front-facing portion that has anything of note; for the most part, the sensor is quite minimalist looking, with a flat face punctuated only by a couple of circular devices – a pairing/reset button, and an ambient light sensor. Yes, the HPS also includes a light sensor, and better still, it’s also exposed to HomeKit. Just below the pairing button, there’s a hidden red LED that you’ll see when pairing, and when the device is set up and detections motion.
A QUICK LOOK AT THE ZIGBEE GATEWAY
The LifeSmart Smart Station comes in more standard retail packaging (I forgot to photograph it…) and contains almost everything you’ll need to get set up.
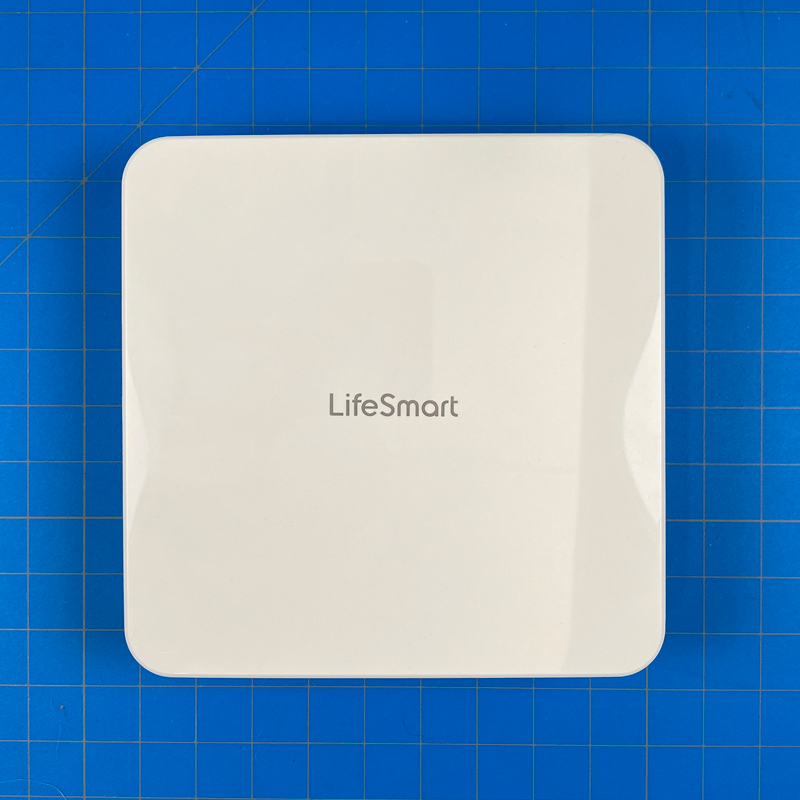
The gateway itself is a fairly plain box with just the LifeSmart logo on the top, a small reset button on the back that accompanies an RJ45 port, and a coaxial port for power.
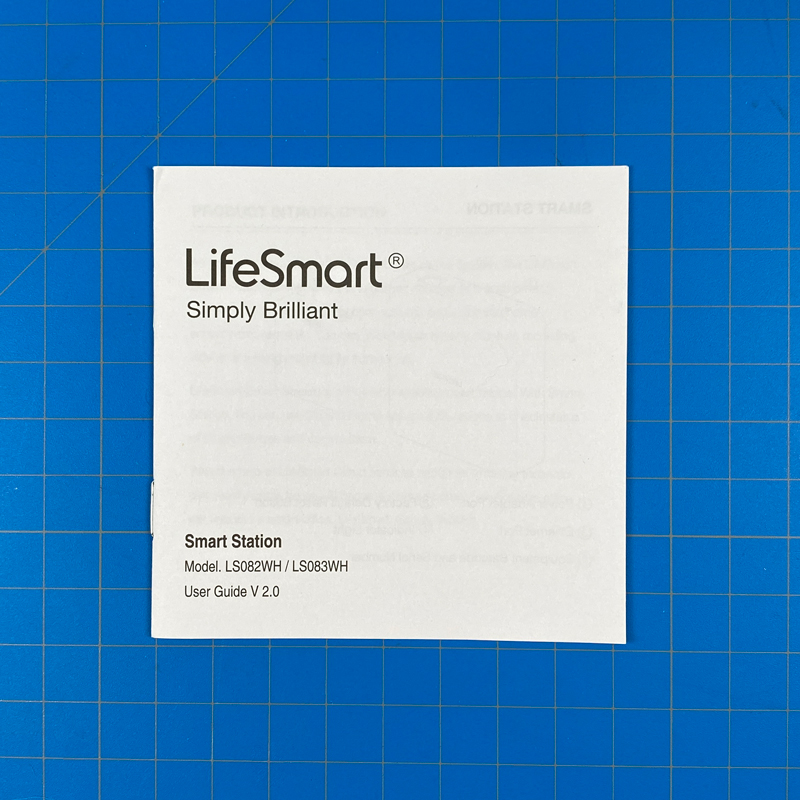
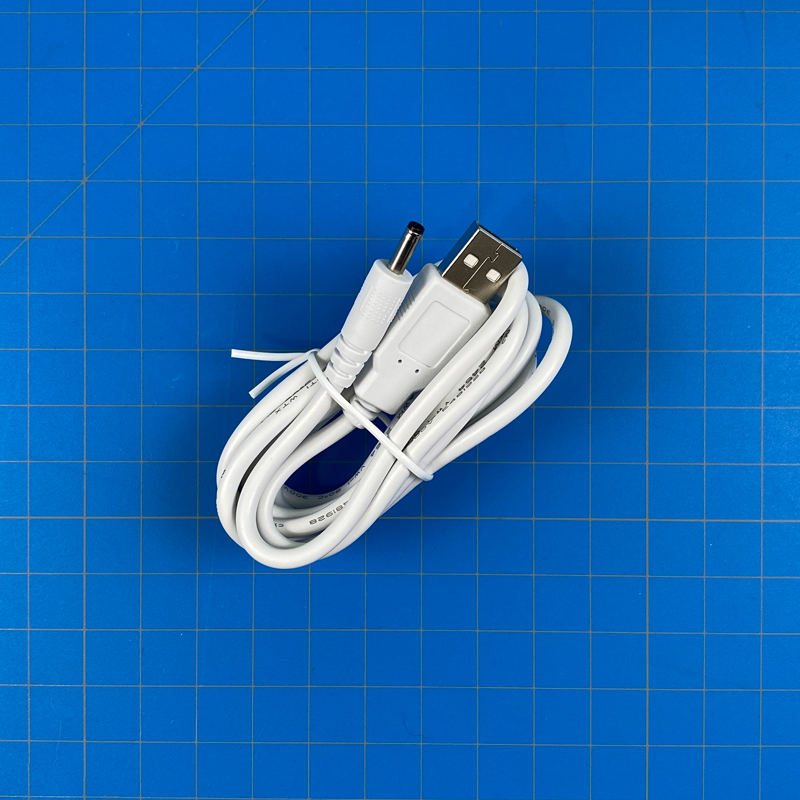
To power the gateway, there’s a USB-A to coaxial power cable, although they don’t provide a USB plug, which has become ‘de rigueur’ across the tech industry. You do get an ethernet cable, however, as the gateway can only connect to your network via a modem, router or internet switch, as there’s no WiFi capability. Finally a manual in English is provided.
As with practically all hub-based setups for HomeKit, you add the gateway to the LifeSmart app, which also includes scanning the HomeKit QR code (found on the inside lid of the box and the base of the gateway) to get it exposed to HomeKit. Once that’s in the bag, any compatible devices added to the gateway are then exposed to HomeKit. This is exactly the case with the HPS.
THE HPS IN HOMEKIT
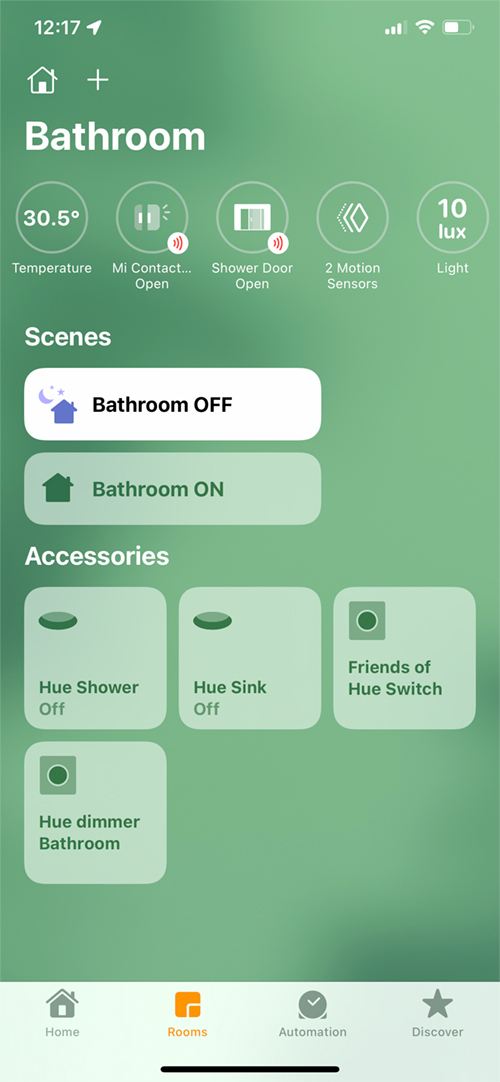
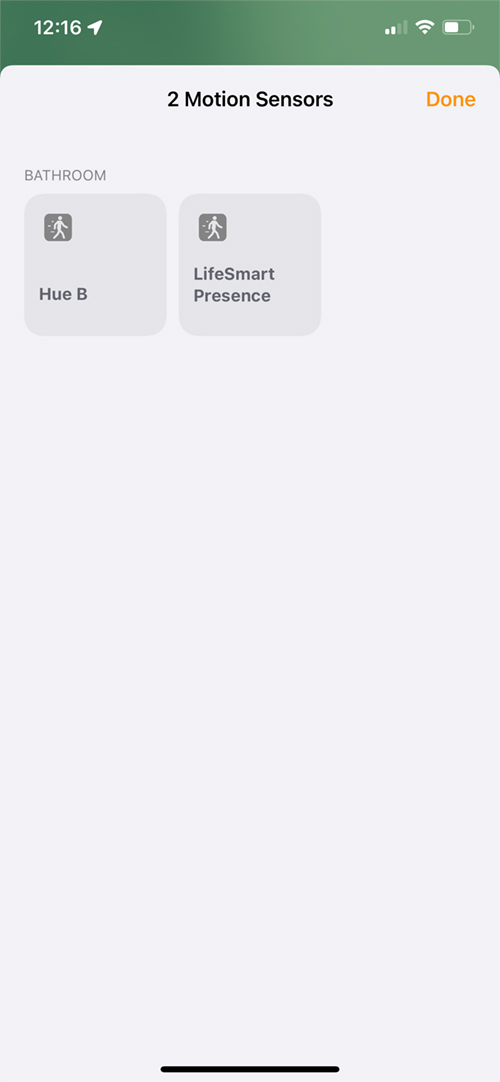
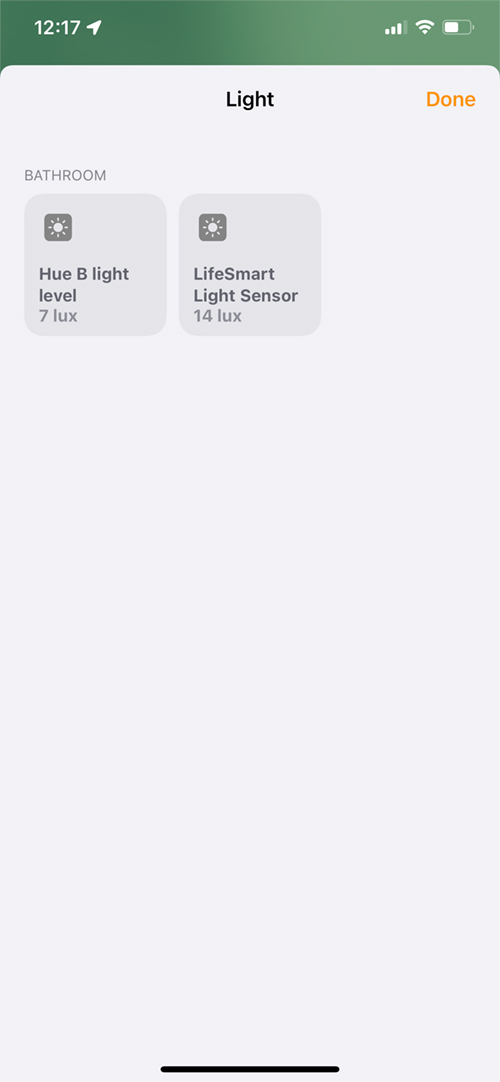
As the HPS is ‘all sensor’, In HomeKit/The Home app you’re no going to get a tile to represent it, so it’ll appear at the top along with other sensors. As it also has an ambient light sensor, this also means these two sensors are located in different places. The light sensor appears in the bathroom alongside the light sensor within the Hue Motion Sensor. Just a side note: the reason for the different readings is that the Hue Motion sensor is pointed more towards a window, whereas the LifeSmart one is pointed towards the ground.
You may also notice that whilst HomeKit has separate categories for motion and presence/occupancy, for whatever reason, the LifrSmart offering has been assigned to the standard motion category. This could be an error on the company’s part, although as the device is able to detect motion as well as presence, it sort of makes sense to include it. It doesn’t affect the usefulness or functionality of the device at all, as automation options for occupancy/presence and motion appear to be the same in HomeKit.
THE HPS IN THE LIFESMART APP
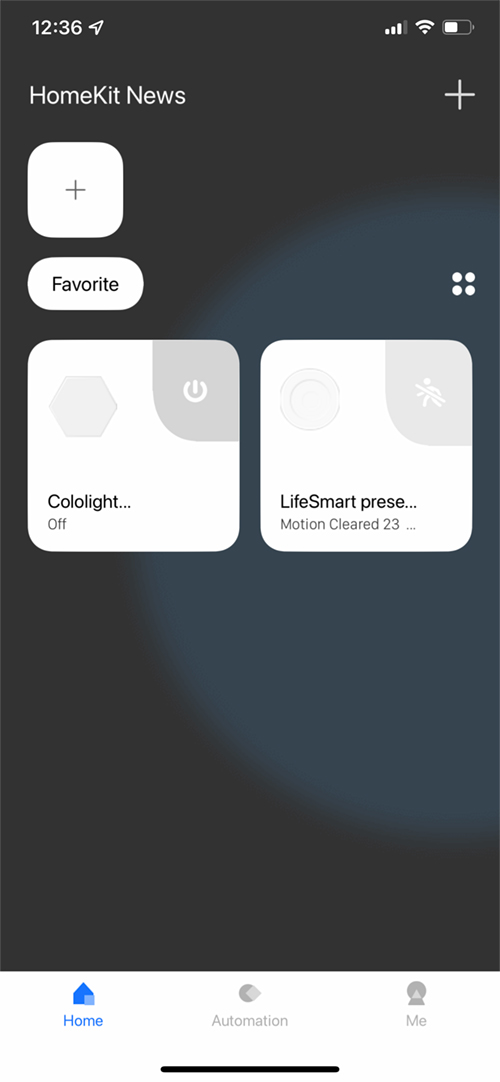
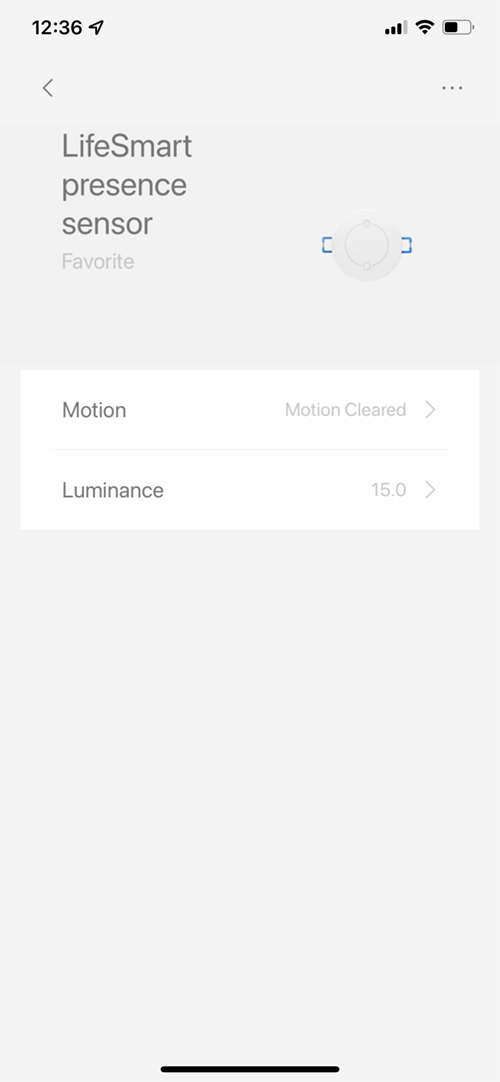
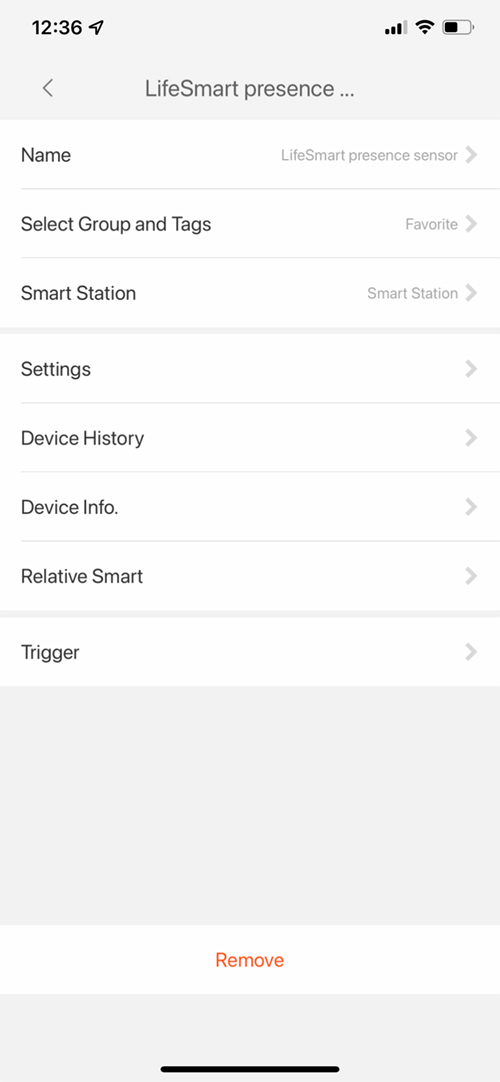
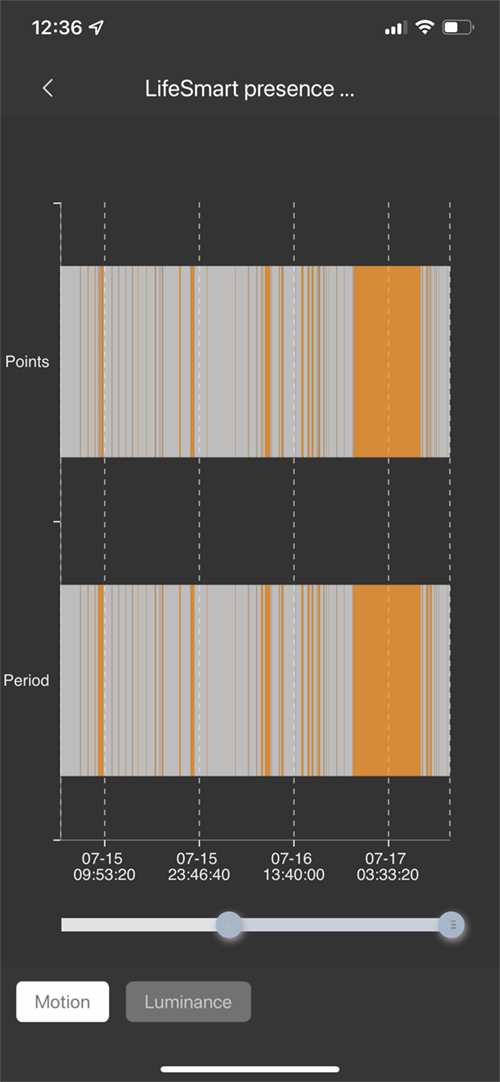
I actually started using LifeSmart products back in 2017, as was a contributor to this site – Kevin Patenaude. In that time, I’ve seen the LifeSmart app change quite a few times, and I’ll be honest and say that whilst the UI has improved, when it comes to automations, it’s far too complicated. That said, as I’ve only currently got a set of LifeSmart ColoLight Plus tiles running in HomeKit, there’s not a lot of need for automations in the LifeSmart app. The HPS has its own tile, and once pressed, reveals a small section with tabs for Motion and Luminance. These take you to the relevant sections that record data for each sensor. Pressing the three dots in the corner takes you to the Setting page.
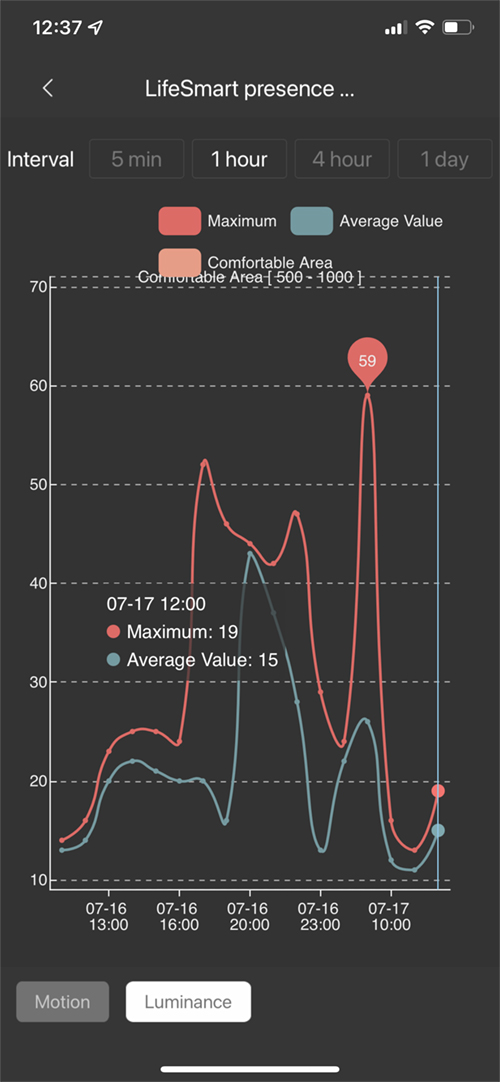
As mentioned, the separate tabs take you to the relevant pages that reveal data for both motion/presence and luminance. For both of these there’s a wealth of information available, with the overall layout of them appealingly designed (in my opinion). Whether this kind of data is of importance to you is another thing, but it’s good to have it if needed.
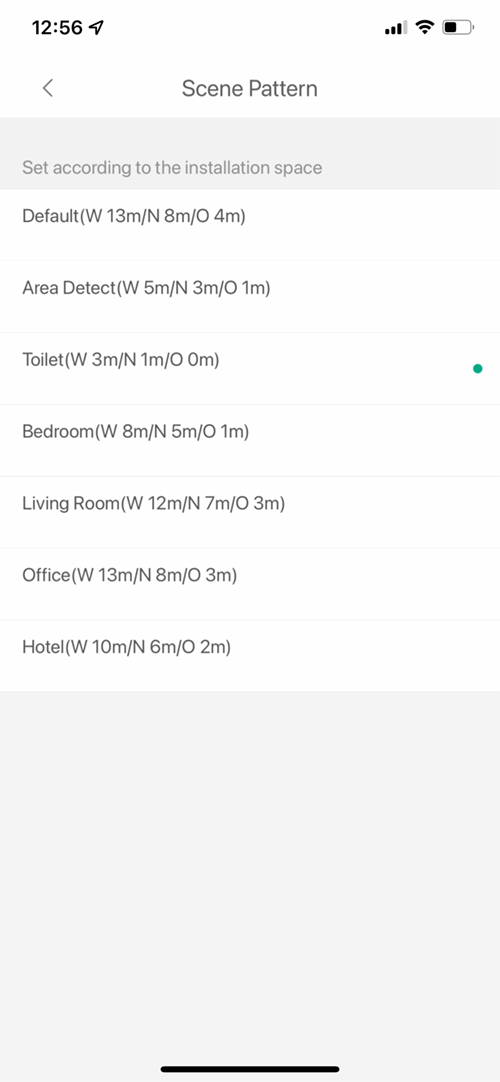
If you click on the ‘Settings’ option within the ‘Settings’ page (…!) you get access to two further options – Sensitivity, and Scene Pattern. The former is fairly straightforward and allows the sensitivity of the ‘motion detection’ functionality of the HPS to be adjusted. The Scene Pattern option is where things get a bit more interesting, as it allows the presence sensor to be adjusted for various preset types of scenarios;
Default
Area detect
Toilet
Bedroom
Living Room
Office
Hotel
If you look at the third screenshot above, after each preset there are three variables – W, N, and O – each followed by a number that differs depending on the preset. According to the manual, the HPS has three detection angles, a Wide angle (W), a Narrow angle (N), and an Oblique angle (O). The numbers themselves refer to the diameter of the detection range.
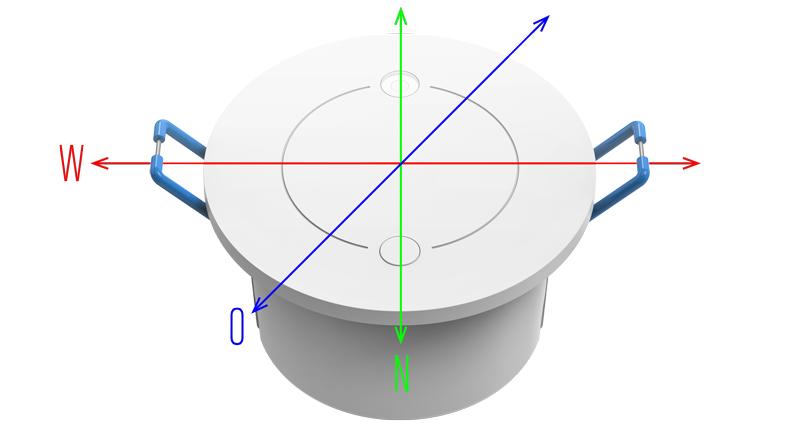
If you imagine the detection area of the HPS to be an oval, the Wide and Narrow Angles refer to the widest and narrowest areas of detection. In the image above, the arrows refer to these detection angles, so the placement of the sensor is actually just as important than just the location. What purpose do these detection angles serve, you may wonder. Well, as far I’ve been able to make out from the manual, different areas might have specific requirements as to how far the sensor can detect. For example, the bathroom I’ve got it temporarily set up in, it’s quite small, but the bathroom itself has a sliding door that’s usually open. This means that it’s possible for the HPS sensor to detect initial motion beyond the confines of the bathroom. However, by placing the HPS so that the ‘Narrow’ detection angle is positioned so that it’s aimed toward the bathroom doorway, I can eliminate this problem. So going back to the presets and the numbers that follow them, you can see the different presets offer different detection ranges, depending on your needs. It would seem that these detection ranges cover the motion detection range only, with the presence (or Static Detection Range, as it’s called in the manual) being the same for all presets, which is W 4m | N 3m | O 3m. The manual also states that there’s a distance tolerance of ±0.5m.
So, it would seem that for the best results, generally speaking, you would need to place the sensor according to the relevant dimensions of the room it’s placed in, with the Narrow angle covering the narrowest part of the room – unless it’s perfectly square of course! One other use case for these different detection angles is that due to the nature of how mmWave works, it’s entirely possible that the HPS can detect presence through low density materials. If for example you have this set up in a small room that has been annexed from another room with plasterboard, it may well detect presence on the other side of that wall. It just depends on the wall’s materials. If it were a brick wall, it wouldn’t be able to penetrate past the bricks. the HPS can also detect presence through glass, so unlike a motion sensor that might not detect motion through the glass partition of a shower, the HPS is more than capable.
WHY A ‘HUMAN’ PRESENCE SENSOR?
According to the manual, the detection algorithm detects presence and determine whether that object is a human or not. This may be based on the shape, size and height of the object, as adult humans generally don’t walk on ‘all fours’ like a dog or cat would. As an example, a dog would create a different detection shape and area, along with its height compared to a human in most cases. In my tests, which you can see in the video, when my dog walked into the bathroom, the Hue motion sensor was triggered, but not the HPS. As soon as I walked in, the HPS was triggered.
Assuming this works well and is accurate for most of the time, this could really make the difference when detecting between an intruder and a pet, if you’re away from home. That said, some non-human devices like standing fans or otherwise moving objects like AC units can create false triggers, so once again, placement is really important.
HOW DOES IT COMPARE TO THE AQARA FP1
This is in some ways a bit tricky to answer. As presence sensors, they both work really well, and will know whether you’re really in a room or not, even if you fall asleep. They both have different plus points however; For example, the FP1 has an option to map out the room it’s monitoring, with the ability to create sections that it can ignore for the purposes of detection. So if you have a fan that’s on for most of the time, sat in one corner, you can select the region of the room layout in the Aqara app and set it as a non-detection area. This is quite handy, although actually mapping out your room is a bit of a thankless task, when you try to work out the edges of the detection range. The FP1 also has other functions that are supposed to detection the direction in which an object is moving. Unfortunately, in practice this simply doesn’t work most of the time, at least in my experience. It does have to be permanently powered, but as it comes with a USB-A plug on the end of a fixed cord, it’s probably more convenient to place this than the HPS.
The HPS has the presets, which seem to work well, but what really pushes it forward compared to the FP1 is that it is consistently able to detect motion as fast as a standard Zigbee PIR motion sensor (fast!). The FP1 generally takes around 5-6 seconds to detect motion, although to be fair, you can set motion detect to be much faster, depending on the type of detection option you select in an automation. This is only an option in the Aqara app, and therefore can only be used to trigger other Aqara devices, so in HomeKit, motion detection is stuck at 5-6 seconds, which is far too slow, so you’d have to use the FP1 in conjunction with an Aqara motion sensor perhaps if you want to trigger other non-Aqara HomeKit devices in a HomeKit automation. Not so with the HPS.
The downside to the HPS when compared to the FP1 is that the time the HPS takes before it resets to ‘no presence detected’ is anything between 75-100 seconds. The FP1 on the other hand, can detect the lack of presence within a few seconds.
WRAPPING UP
I originally started using LifeSmart products back in 2017, along with another contributor to the site, namely Kevin Patenaude. At that time the original LifeSmart Smart station wasn’t officially compatible with HomeKit, but the app had this sneaky little ‘beta’ feature that allowed the app to generate a HomeKit code, which would then allow the gateway to be added to HomeKit (non-certified of course). This allowed a lot of its other child devices to also be exposed to HomeKit, which back in 2017 was great, as there wasn’t the abundance of devices for HomeKit like there is today. As the amount of compatible devices grew, and once Aqara came on the scene, , my LifeSmart device got less and less use, so it’s a bit strange to be revisiting the company again. What’s great is that in doing so with something fairly unique right now, and something that does what it needs to without any problems to date.
All in all, I’ve been pleasantly surprised at how well it works, especially since the FP1 failed on many of the extras it offers, so it’s hard to fault it. As previously stated, the fact that it’s ultimately better to have this ceiling mounted (you can work around it, but it looks odd) is going to put some people off, and as it can’t just be magnetically mounted anywhere like the FP1 can, does present a challenge. That said, if you are ceiling mounting this, you’re unlikely to be moving it around, so mobility isn’t such an issue.
With the addition of the light sensor being exposed to HomeKit to make even better and more intricate motion/presence based automations, it’s actually a really decent device to have. LifeSmart aren’t as easy to find in the West, as say Aqara, but the company are working on that, and if their Cololight Strip and tiles are anything to go by, they’ll achieve this without many issues. Recommended.
Full disclosure: LifeSmart provided HomeKit News with LifeSmart Human Presence Sensor for the purpose of this review. No other compensation was made, requested or has not in any way influenced our opinion of this product.