Smart locks are abundant for most HomeKit users compared to a couple of years ago, although when it comes to mortice type locks that you find used in Europe and Asia, they’re still less common than deadbolt type locks. One typical solution for mortice lock users is with retrofit devices that sit over the key on the inside half of your lock, thus taking control of the key itself, and therefore the lock. The Nuki Lock (v2.0 and v3.0) and more recently the Yale Linus are two such products. The alternative to this option is with locks found in Asia, where the whole lock and handle mechanism are all replaced with one that typically has a fingerprint sensor, keypad and NFC functionality, as well as even more exotic options, like a peephole camera, for example. This can usually require a lot of work put into altering the door, so drilling is usually involved. The installation for the Aqara A100 Zigbee, that I reviewed not too long ago required two installers to make considerable adjustments to the door in order to install it, and that was even with a mortice lock already in place before. Luckily, the lock we’re reviewing today – The ZemiSmart Zigbee Smart lock – typically requires fewer adjustments to your door (assuming you’re replacing a mortice lock), due to its smaller overall size, and generally fewer parts.
PACKAGING | CONTENTS
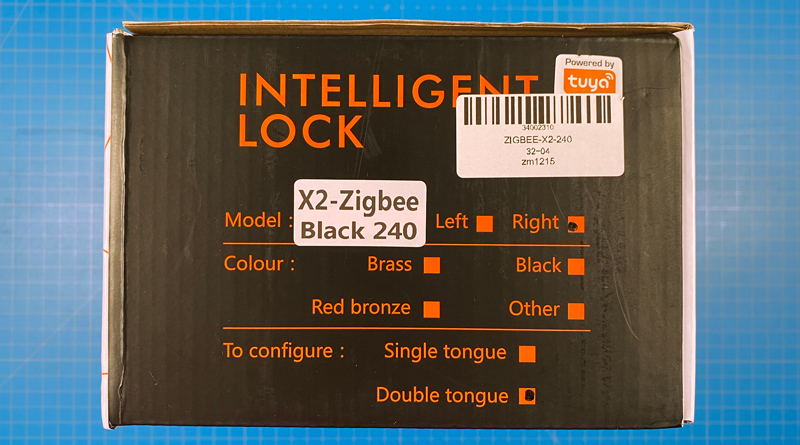
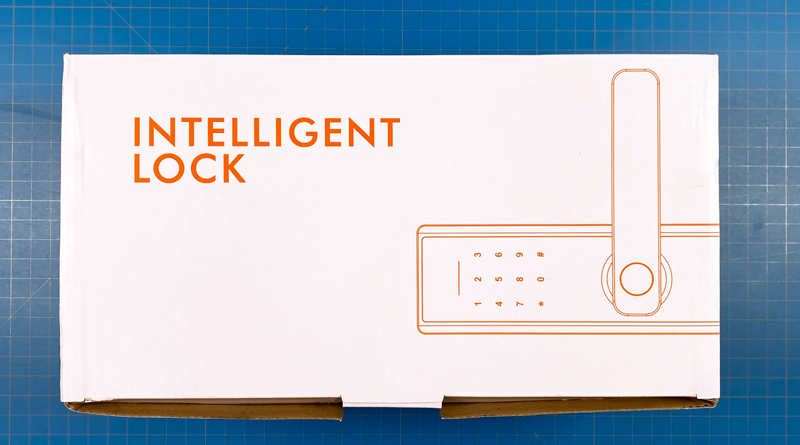
Not to put too fine a point on it, but if you’re new to ZemiSmart, you may find some of their products come in pretty generic packaging, with the company logo missing on some of them. This seems to be that the products inside are themselves white label manufactured products (or ODM), so you may see some of the same products with a different brand on the front. This doesn’t apply to all of ZemiSmart’s product lines, although in the case of this lock, it would appear to be the case. as long as it works though, that’s the main thing, and as for the box, it protects everything really well. Good enough for me.
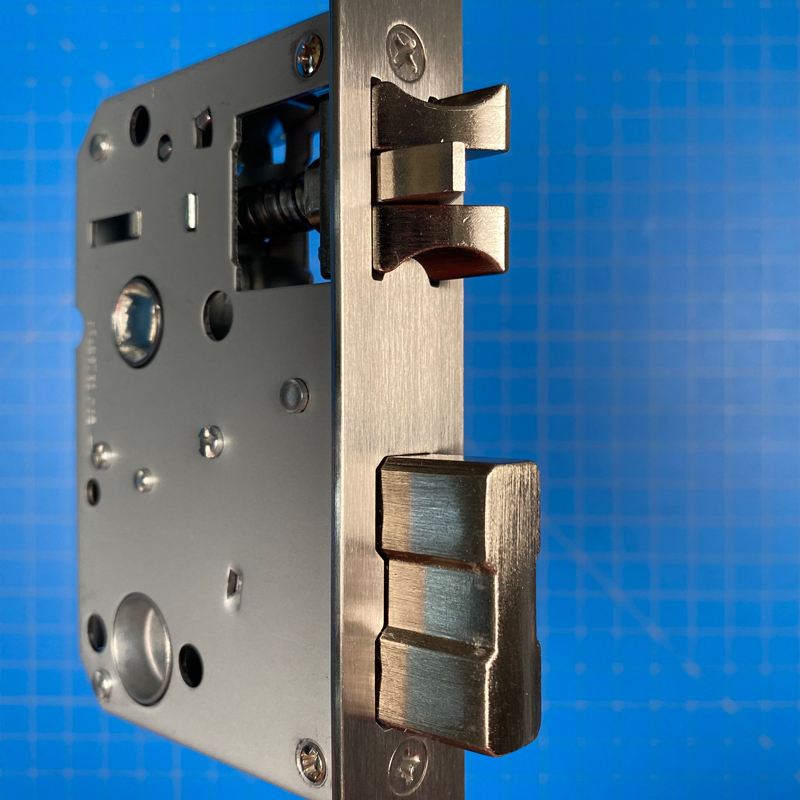
It should be noted that whilst the lock states ‘right’, as in the lock is designed for a door that opens from the right on the outside, the lock can actually be set to open either way, which I’ll explain later on. It also mentions ‘double tongue’ which means the lock comes with a latch bolt and a mortice bolt. Some locks the company manufacture are just latchbolt locks.
The box has the two parts of the lock you come into contact with (ie the handles), the manual (in English), the mortice lock that sits inside your door, and a bag full of small bits and pieces – a strike plate with plastic recess, some screws and bolts to fit the two halves of the lock together, a couple of standard keys, and two IC cards for keyless entry.
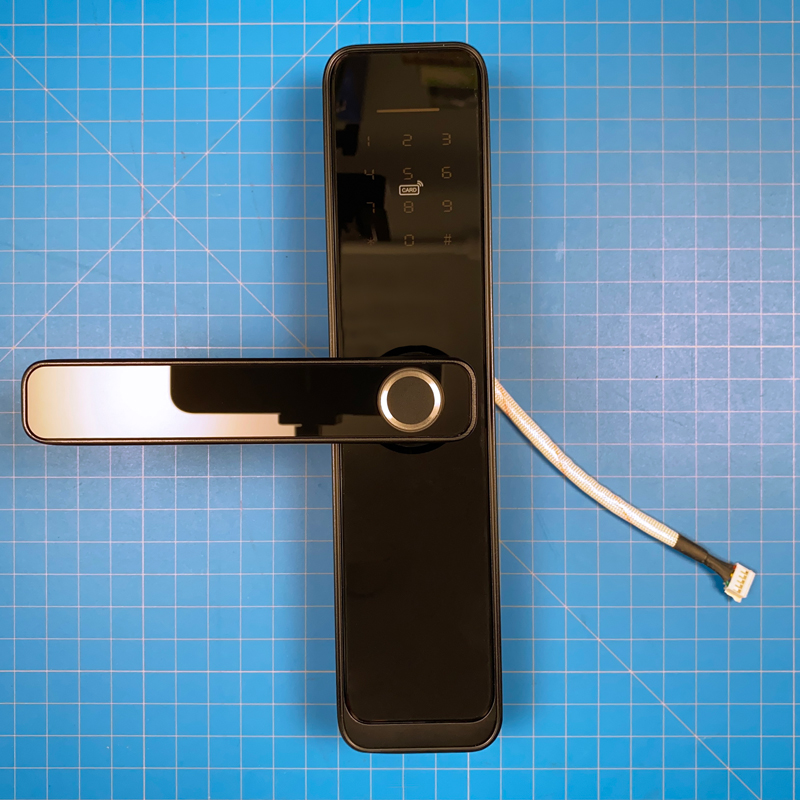
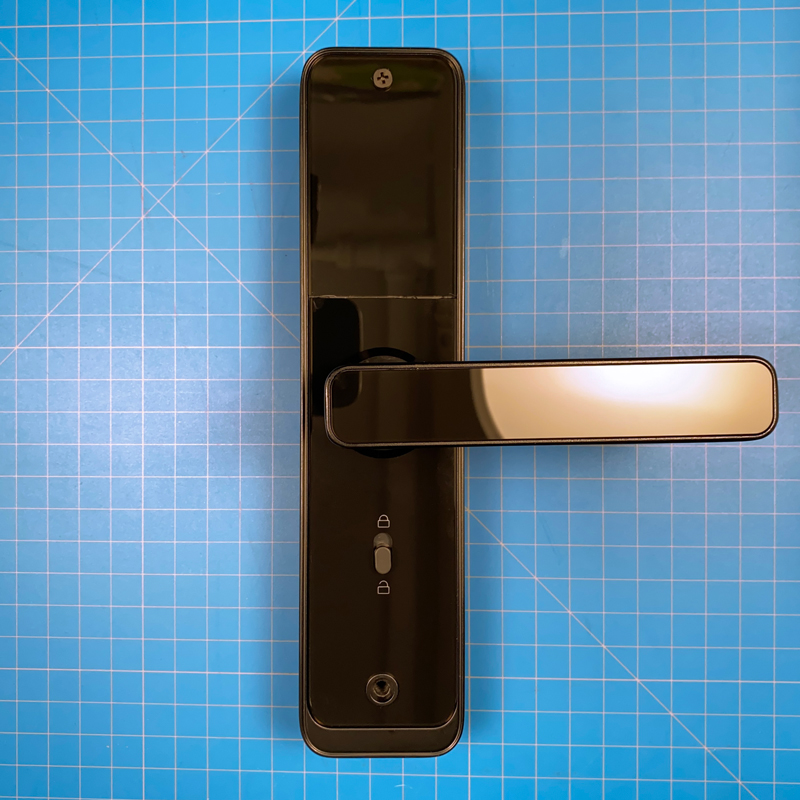
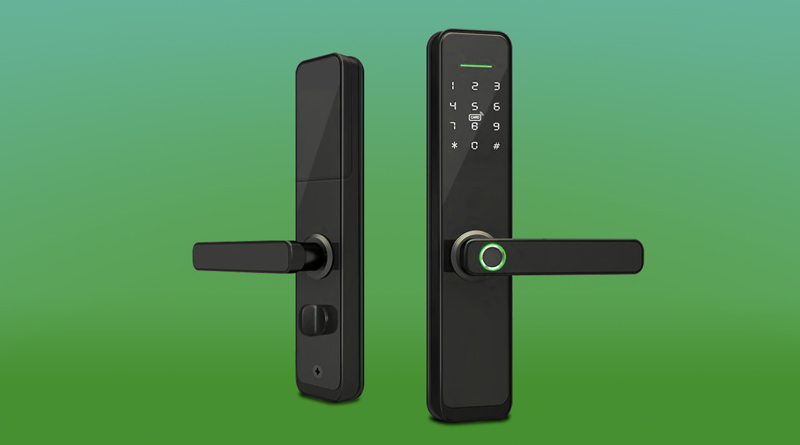
The two parts of the lock you come into contact with on a daily basis are, of course, the handles. These seem to be made of some kind of metal for the main frame, and glass or perspex for the fascia, to give it a more premium look and feel, whilst also allowing the keypad to register touch.
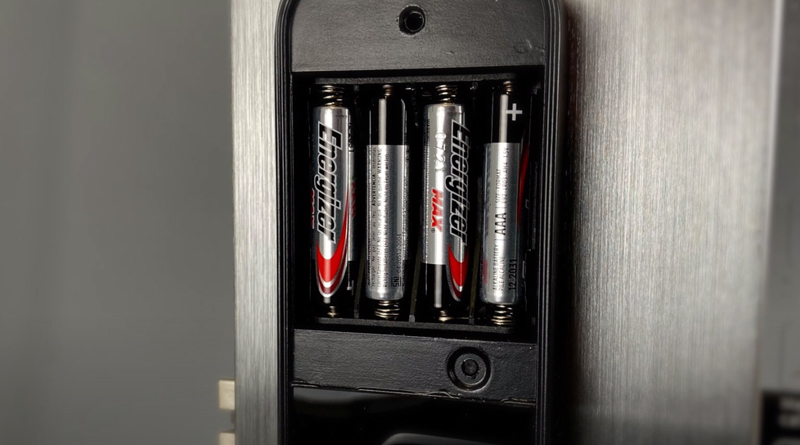
The top part of the interior section of the lock is home to the battery compartment, with the lock requiring four AAA batteries, with the company stating that they should last anything from between two to five months, depending on usage.
THE LOCK
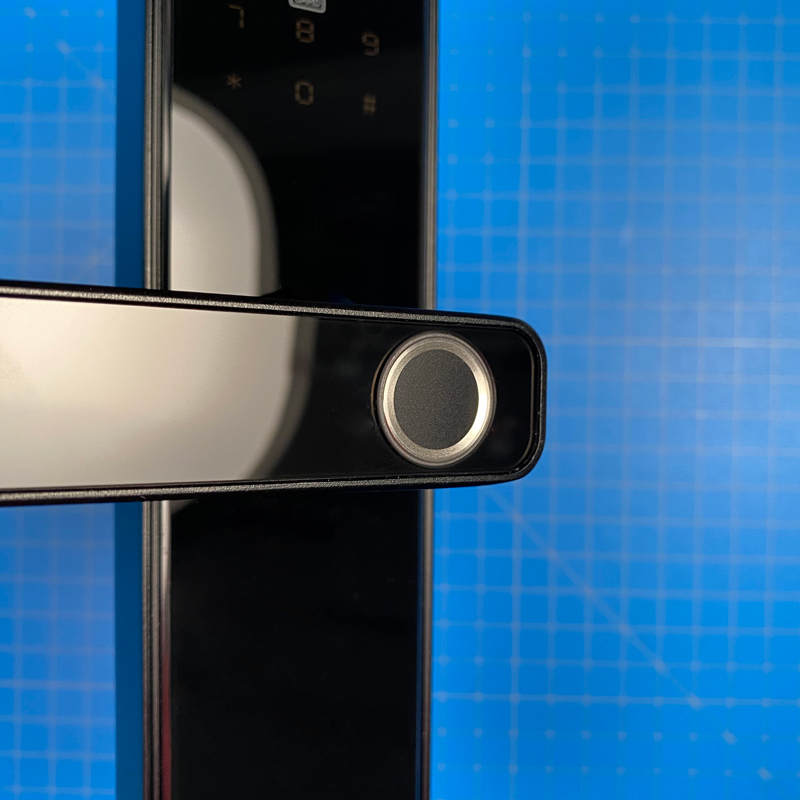
The exterior has a fingerprint sensor built into the hand, along with the aforementioned keypad that also acts as a doorbell when you press the # icon. The keypad is designed to accept passcodes for entry, but is also designed to work with the two included IC cards mentioned earlier.
These key cards use Integrated Circuit technology as opposed to the more prevalent NFC, but they seem to work just as well, and just as fast, so it shouldn’t really matter. You simply place the card close to the centre of the keypad, and the lock automatically disengages. What isn’t mentioned in the manual is that NFC cards can actually be used, although despite what I’ve seen demonstrated on one of the ZemiSmart videos, only blank writable NFC cards can be used, not credit and transit cards. Non-Apple phones with NFC can also be reported to be, although my attempt at using an Android phone with NFC failed. iPhones can’t be used, as Apple restricts the use of NFC in their products.
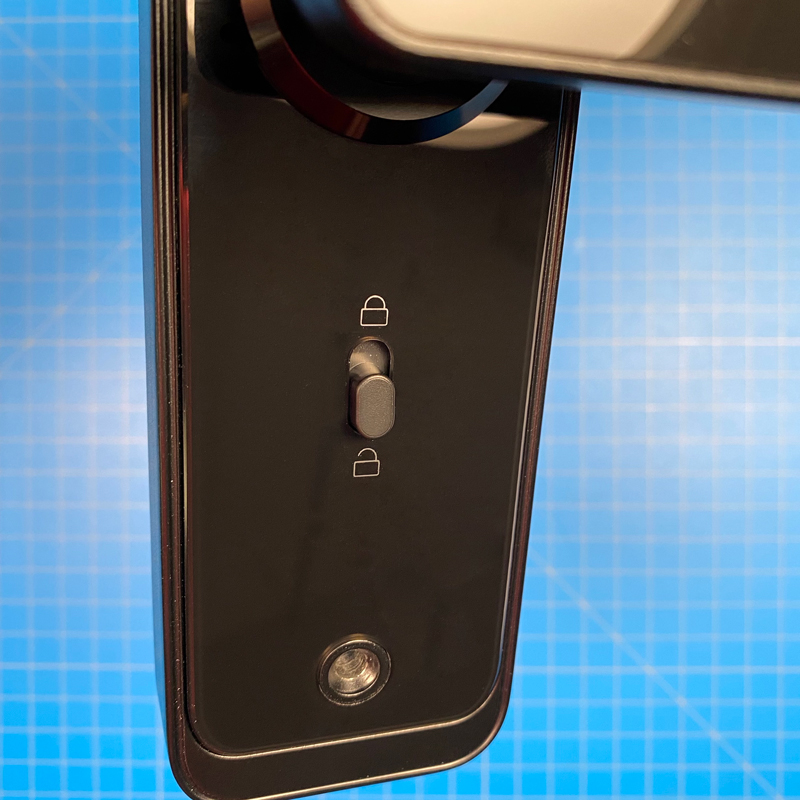
On the interior half of the lock, there’s a simple deadlock toggle switch. When set to the locked position, this will stop any use of the unlock attempts, registered or otherwise, from unlocking the door. So fingerprints, passcodes, IC cards etc will not work when this is engaged, including any admins. The only method of unlocking the door when this is engaged is with the physical keys.
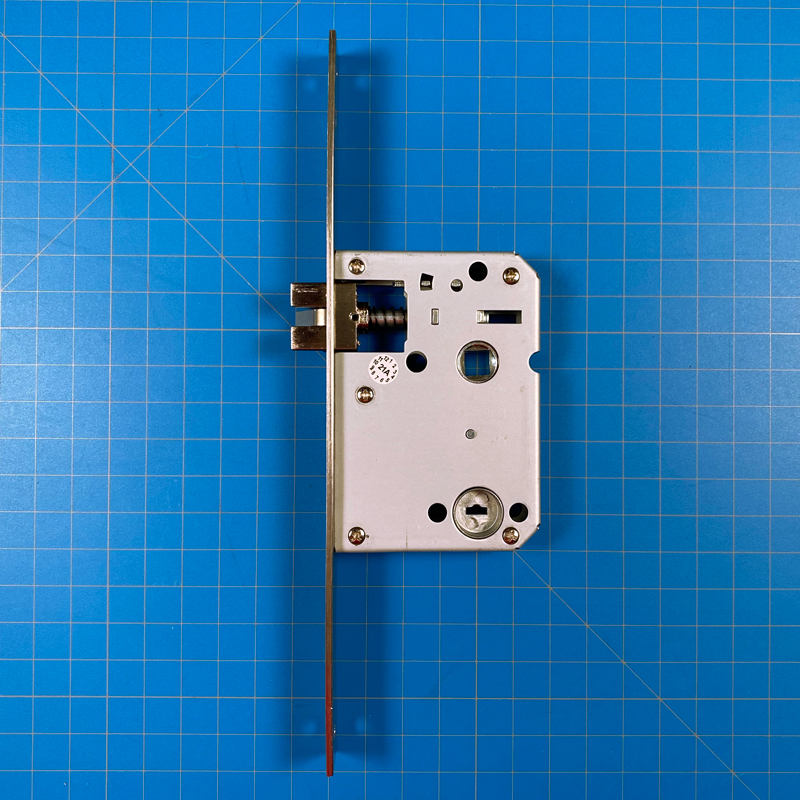
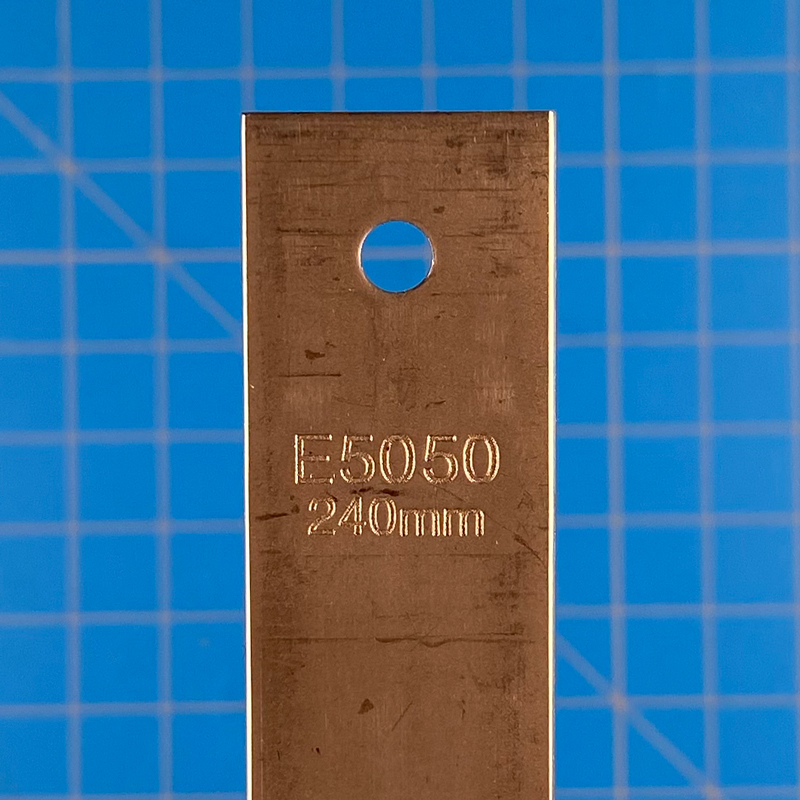
The lock comes in just the type, but is available with a choice of six different faceplate lengths, with 240mm being the largest.
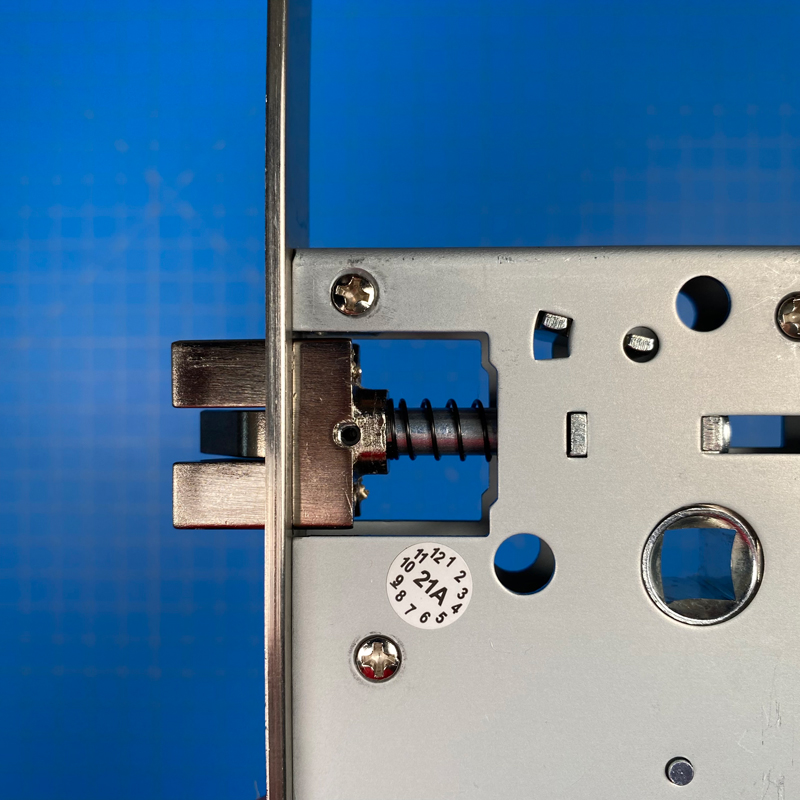
Of the two locks, neither actually have motors that move them into a locked position as such. The mechanics inside the lock body are disconnected from the lock under normal conditions, and only connect with them when you use one of the methods of entry. So, once you tap in your code, or use your thumbprint, the mechanism inside connects with the latch bolt (and the mortice bolt if it’s in the locked position), allowing the handle to retract them, before disconnecting, and leaving the locks unable to be controlled again until you use it again.
If the lock is set to open the opposite way you need it to, it’s simple to fix. The two handle sections each have a screw, that when loosened, will allow the handles to rotate 180º, so they’re facing the right way. The latch bolt has a small internal catch, that when lifted, allows the latch bolt to be pulled in and swivelled to face the other way.
Even though I was unable to install the lock on my front door, I was still able to install it on a demo door and use that for testing over approximately 2 weeks. I originally intended to install the lock before my Aqara A100 Zigbee lock arrived, but installing the ZemiSmart lock would have left long thin holes where it didn’t quite cover where the original lock would sit, so it wasn’t an option to have it installed this way, even if it’s very secure where we live. Still, I was able to test the connectivity of the lock to the Zigbee gateway (more on that later), as well as test it with automations, and test the speed responsiveness.
ONLY ZIGBEE AND NO BLUETOOTH?
What’s interesting about this lock, unlike pretty much most other HomeKit locks on the market, is that it doesn’t use Bluetooth as its primary connection method – in fact, it doesn’t have Bluetooth at all! It solely relies on Zigbee (to the hub, and on to HomeKit) for connectivity. This means there’s no direct connection method between the lock and your phone (which is why Bluetooth has been used so far). This may at first seem strange, but in actual fact, due to the various methods available to you that don’t even require a connection to the hub – i.e. fingerprint, passcode, IC card, key – there’s really very little to worry about in terms of being unable to unlock your door. Even if every one of these methods fails, you still have a key as the ultimate backup. The only thing you do lose – if you can’t connect to your home network and the ZemiSmart gateway – is the ability to unlock the door via your app, either when you’re at home or remotely. This could just as well be the case with all other locks in terms of remote access of course, so this lock is no more vulnerable in this respect, and a direct Bluetooth connection is irrelevant for remote access.
INSTALLATION (VIA APP)
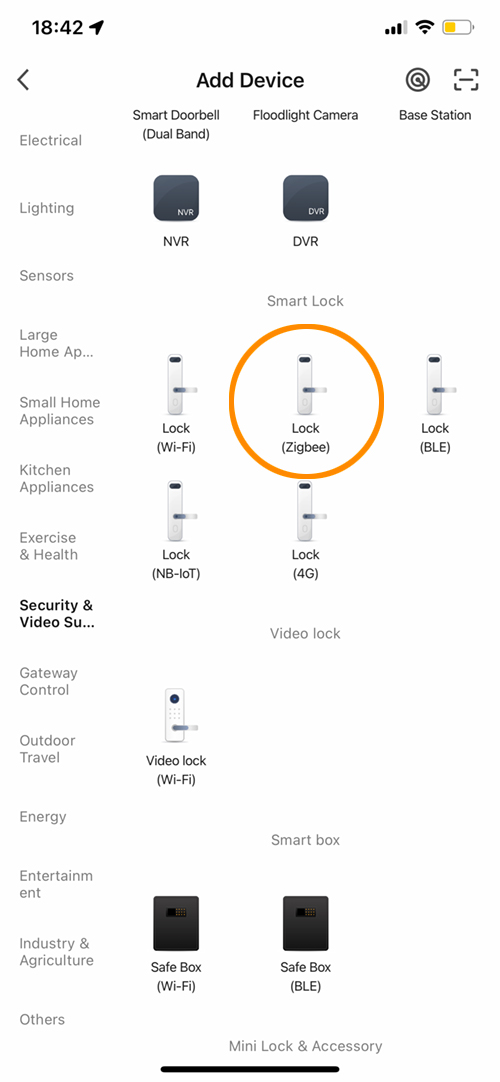
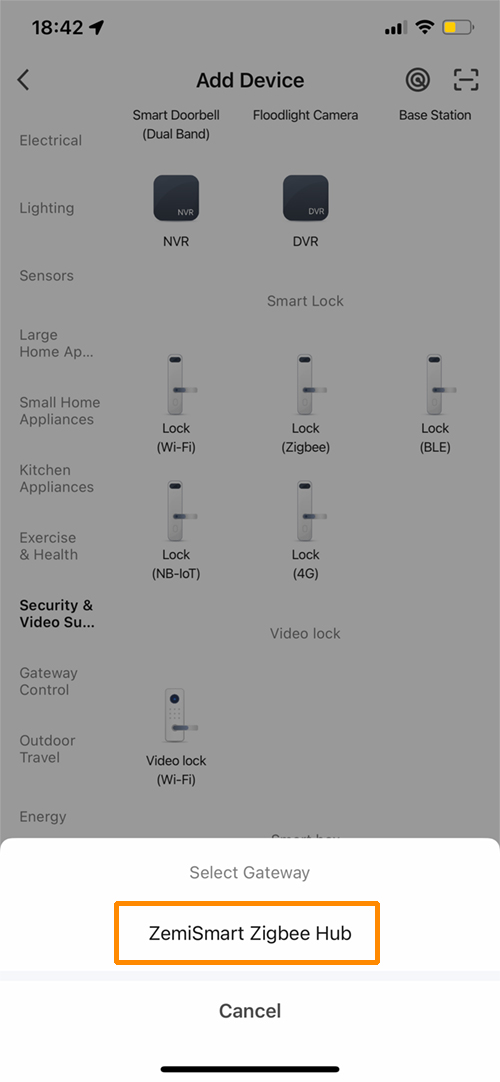
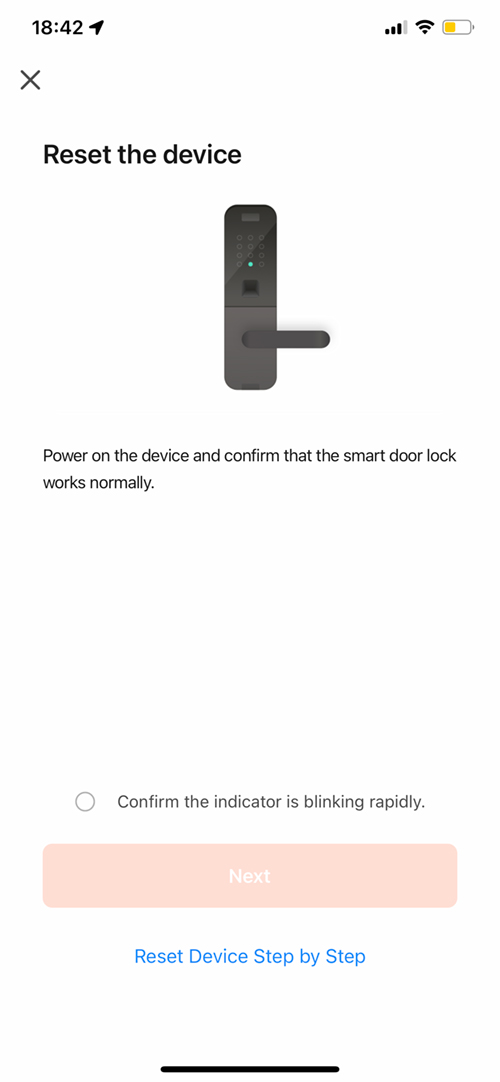
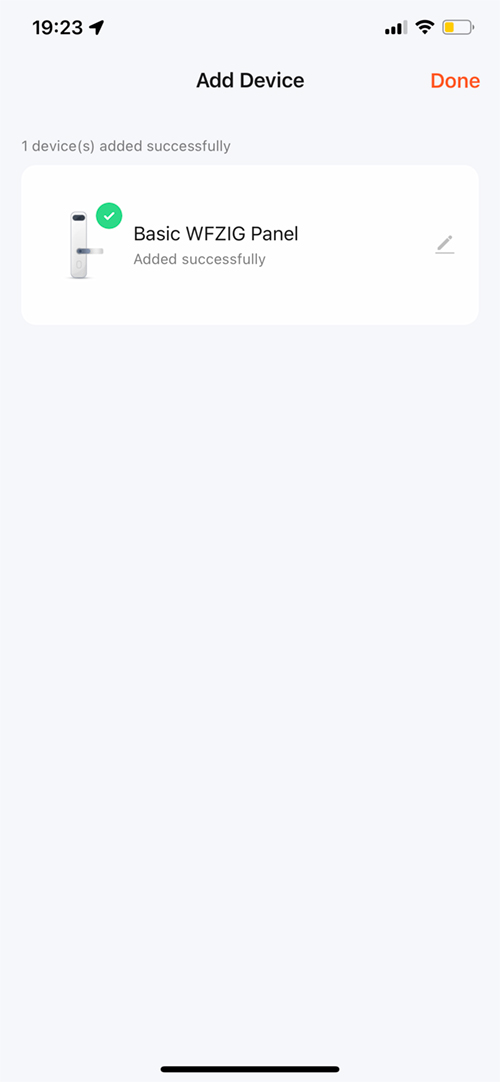
In theory, the lock could be used without any need for smart connectivity at all, because adding codes, fingerprints, users, and setting up the IC Cards is all done on the lock itself via the keypad. Still, I’m going to assume that if you’re reading this, it’s likely you’ll want it to be a ‘connected’ device, even if it’s not connected to HomeKit. For the smart connection, you need to do it through the Tuya Smart app, which requires you to set up an account. Assuming you’ve done that and you already have your ZemiSmart hub set up, you simply need to select the plus icon on the home screen to add a device, scroll to the ‘security’ section and select the Zigbee lock. You then select your hub, and you’ll be presented with a screen asking you to reset the device.
This is where you need to have read the instructions, as resetting the device isn’t going to be very clear with the onscreen ‘reset device step by step’ link, as the instructions are very generic, and don’t necessarily apply to this specific lock. To reset the device, you need to get into the lock’s menu system;
tap * and # on the keypad
tap in the default admin code, which is 1, 2, 3, 4, 5, 6, #
You’re then presented with four options;
tap 1 (admin settings)
tap 3 (network)
Once you do this, the lock becomes discoverable, you then select it from the list, and it’ll be added to the account and your app, as well as being bound to the ZemiSmart hub.
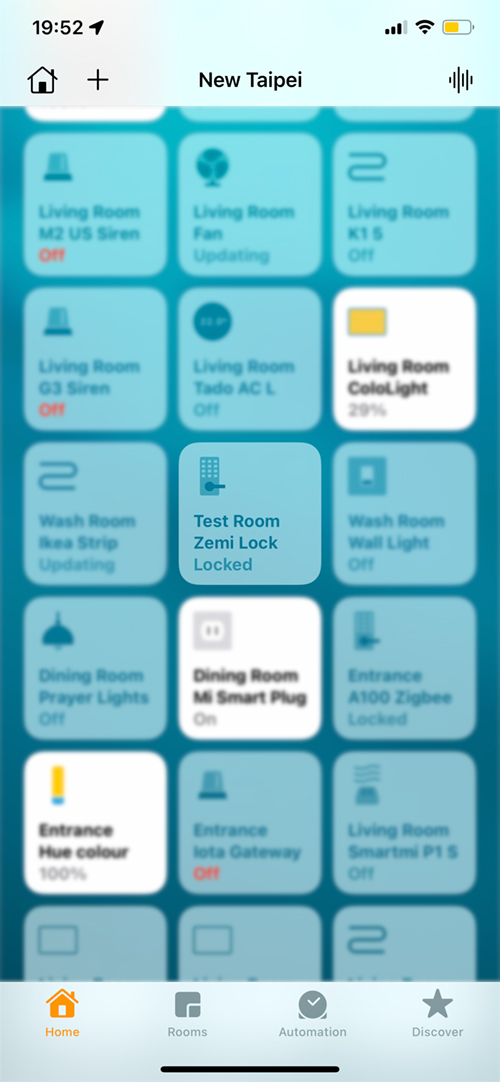
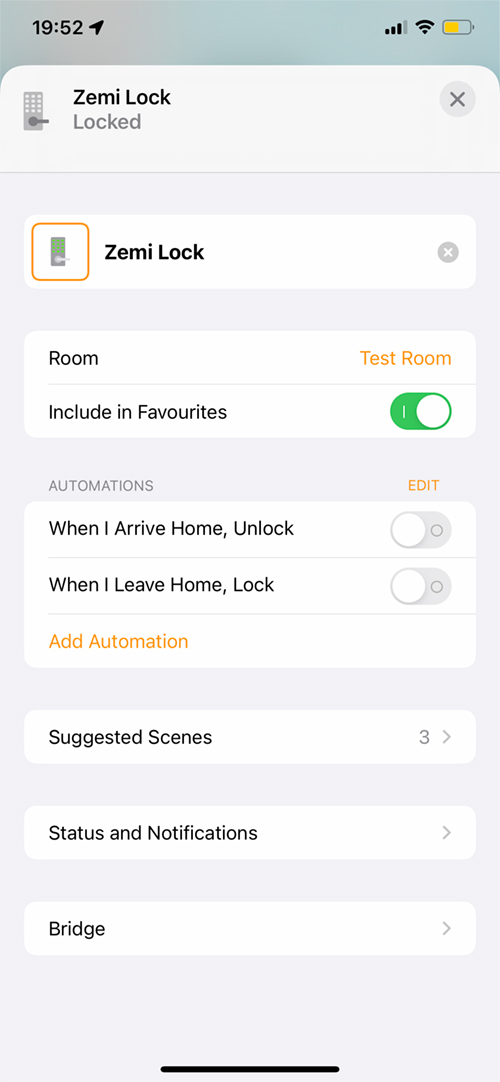
This also means it’s then automatically exposed to HomeKit and will appear in the Apple Home app too. In HomeKit the lock’s features are quite basic, with no options other than the essentials, although that’s much the case with many HomeKit compatible locks, to be fair. What is missing is any mention of battery levels. This means that there’s nothing really of note to report when it comes to the Home app and HomeKit in general, there are no extras at all. This means that other than automations triggered by, or including the lock, everything else requires the Tuya app or using the lock directly (adding users, codes etc). This, once again, is nothing new for HomeKit locks, as access and codes are usually done in the manufacturers’ apps. The only current exception to this rule is with the Schlage Encode Plus, which exposes a new HomeKit feature called ‘Guest Access’ that gives you a set of passcode features you’d normally only see in the manufacturers’ apps. As far as I’m aware, the Schlage is the only one that offers this feature.
FEATURES IN THE TUYA SMART APP
The Tuya app isn’t without some charm, as long as you know that it’s not a dedicated ZemiSmart app. It’s more akin to Xiaomi’s Mi Home app, where compatible devices from many manufacturers are able to work together. The difference here is that many of the devices you add are seen by the Tuya app in very general/generic terms, as opposed to something very specific to the device. This, as I mentioned when it comes to initially setting up the lock, can be a little frustrating, but it is what it is.
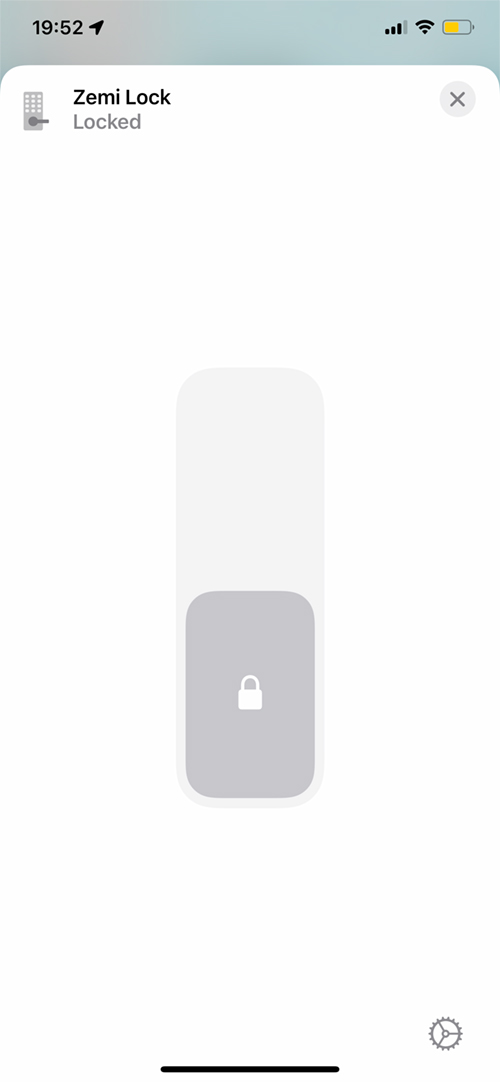
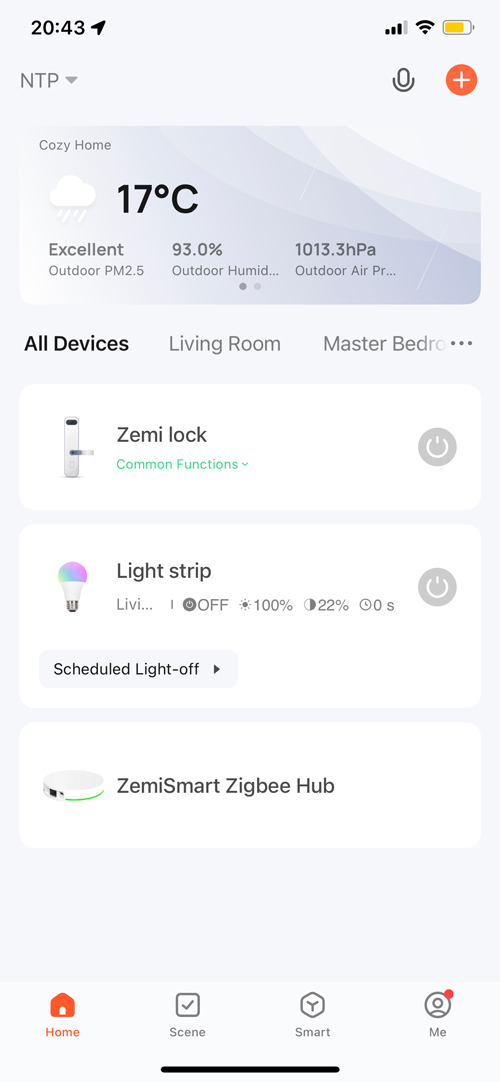
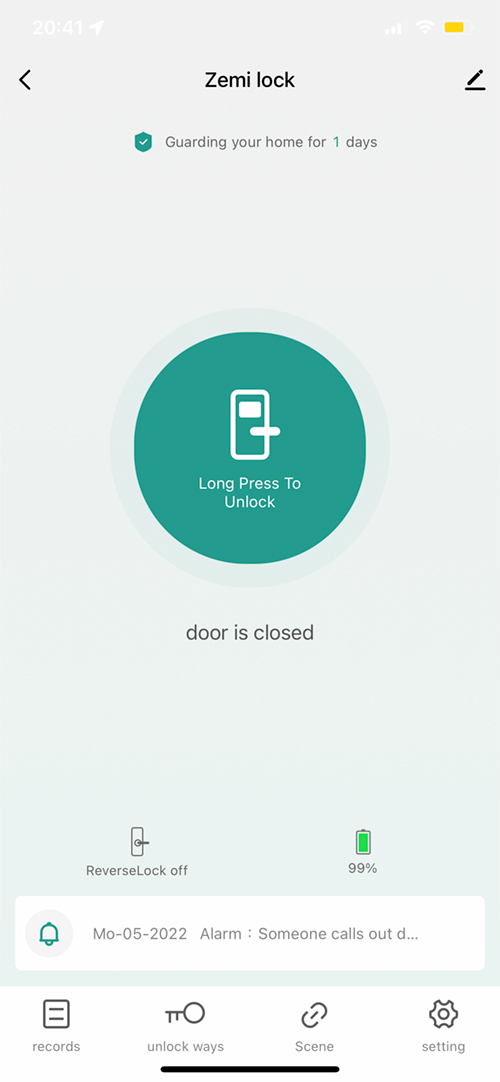
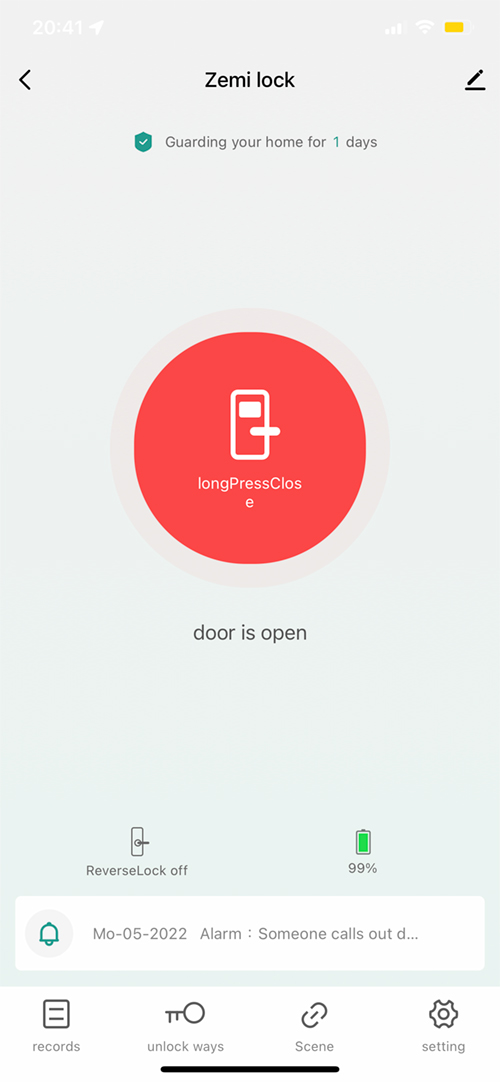
The lock appears on the home screen and allows for locking or unlocking the smart lock directly without opening the specific user interface for the lock. If you do go into the lock’s UI, you’re presented with a large button in the centre to lock or unlock your door. You get a battery level indicator as well as a bar that tells you if someone pressed the doorbell (yes, there’s a doorbell…).
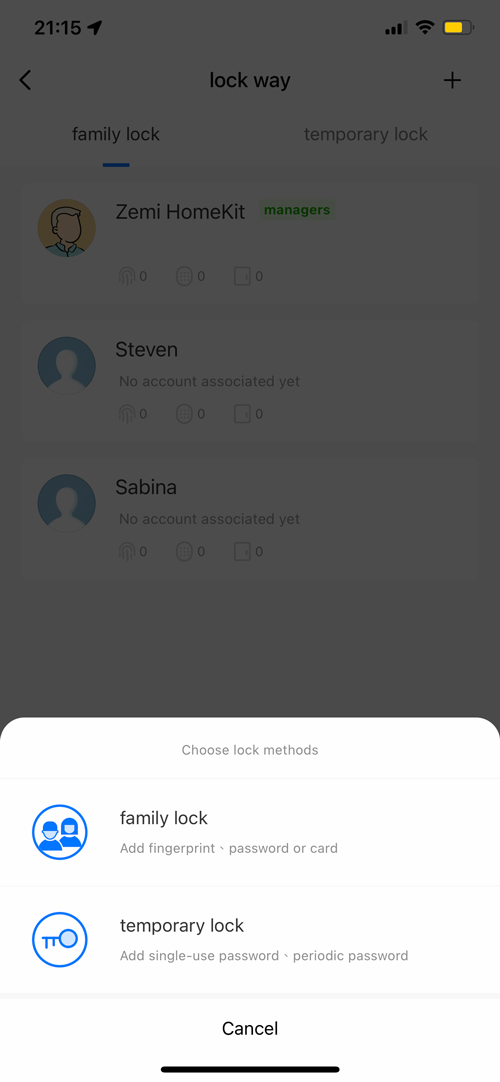
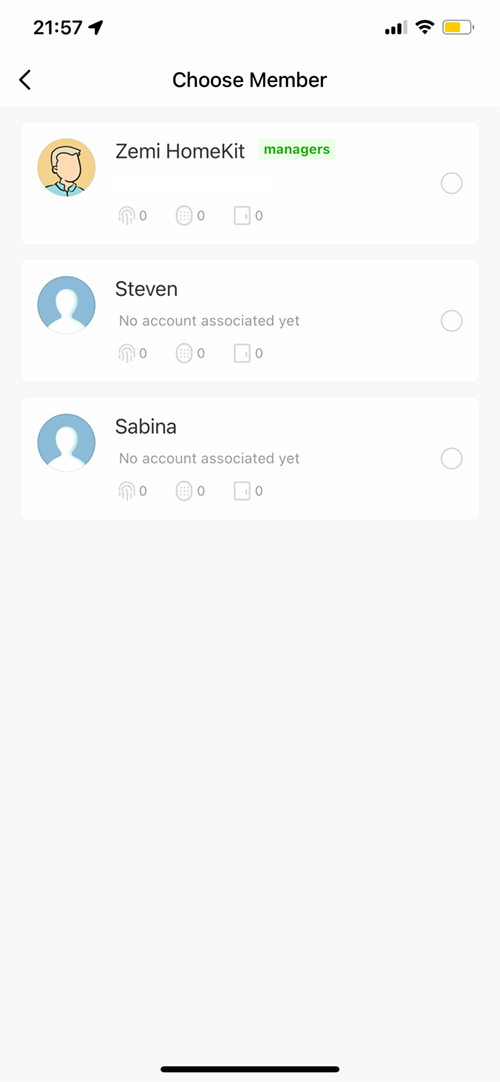
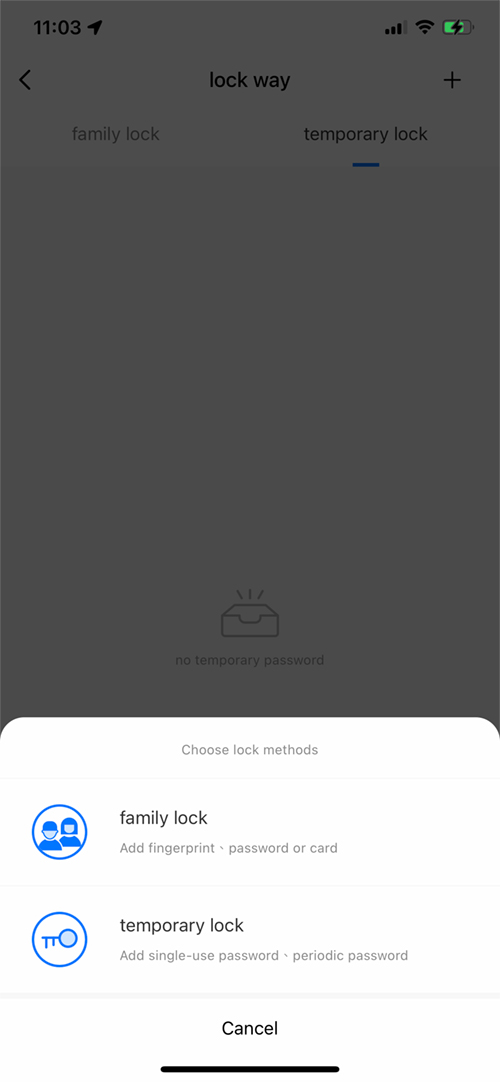
Below all that there are four tabs; Records, which tells you who has opened the door and by which method, Unlock ways Which initially shows users, but once tapping the plus icon, offers two options – ‘Family lock’, and ‘temporary lock’, which I’ll go into shortly, along with a Scene tab and a Settings tab.
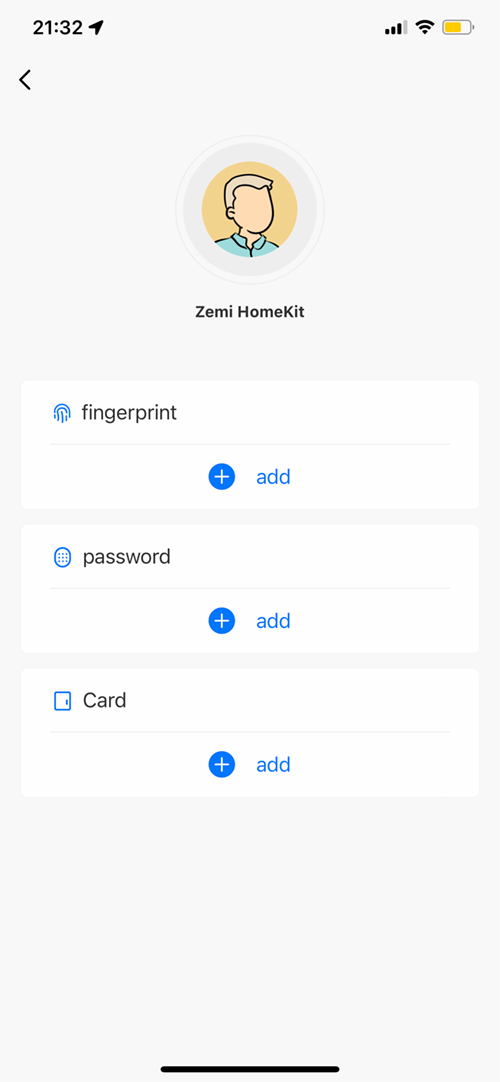
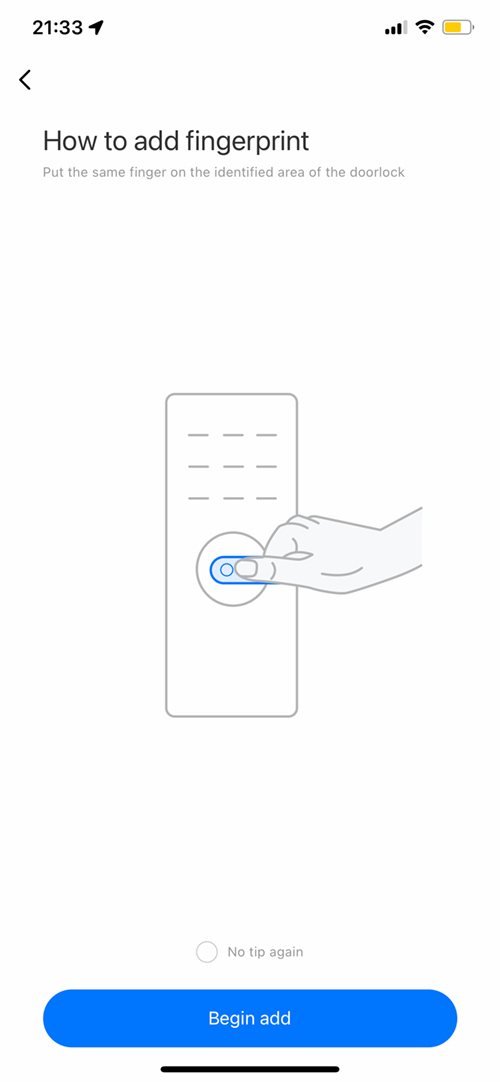
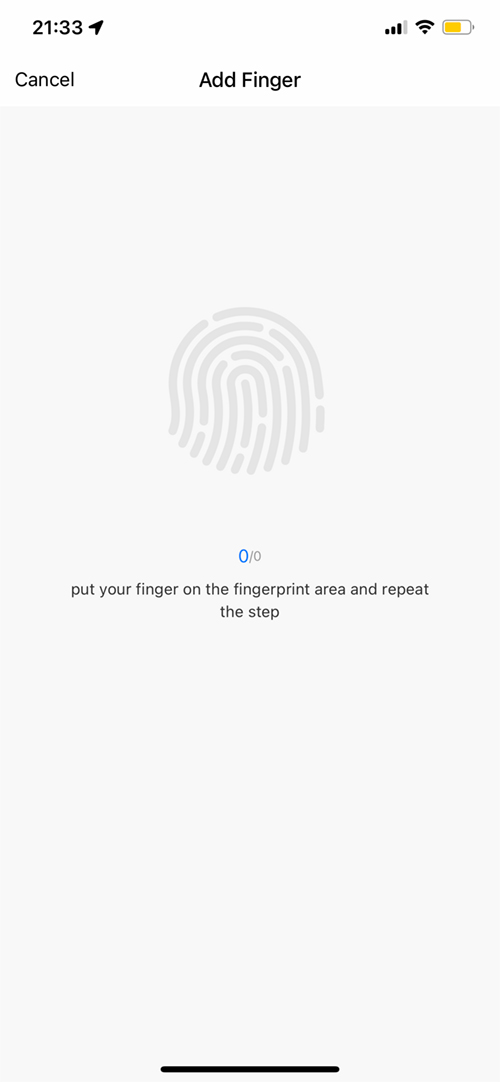
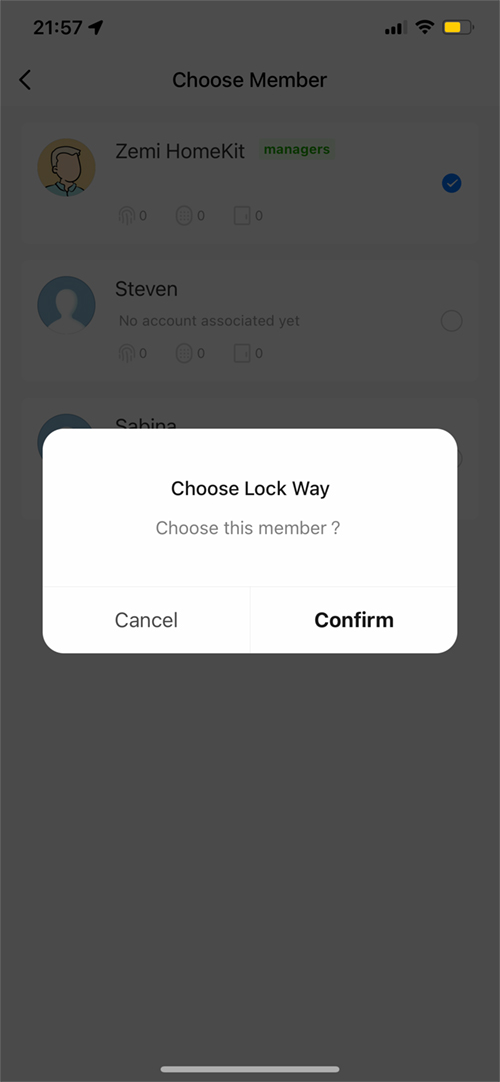
I mentioned in my video review for this lock that the app has some bugs, and one of them seems pretty big. For example, if you tap on a user as pictured above, you get options to add a fingerprint, password, or card. In this example, I selected fingerprint, and it then instructs you to place your finger on the sensor on the lock handle. You click ‘begin add’, and it then waits for you to add your fingerprint. It simply doesn’t work…
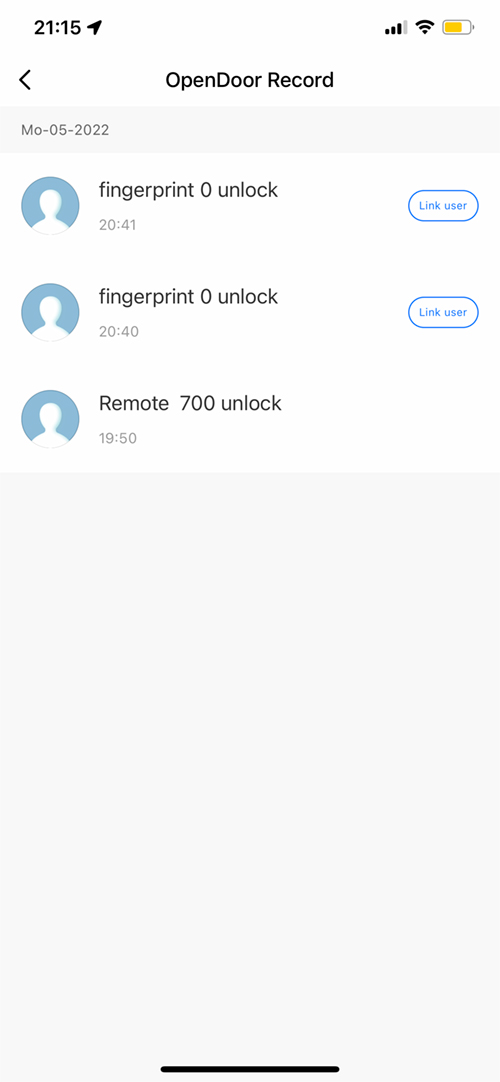
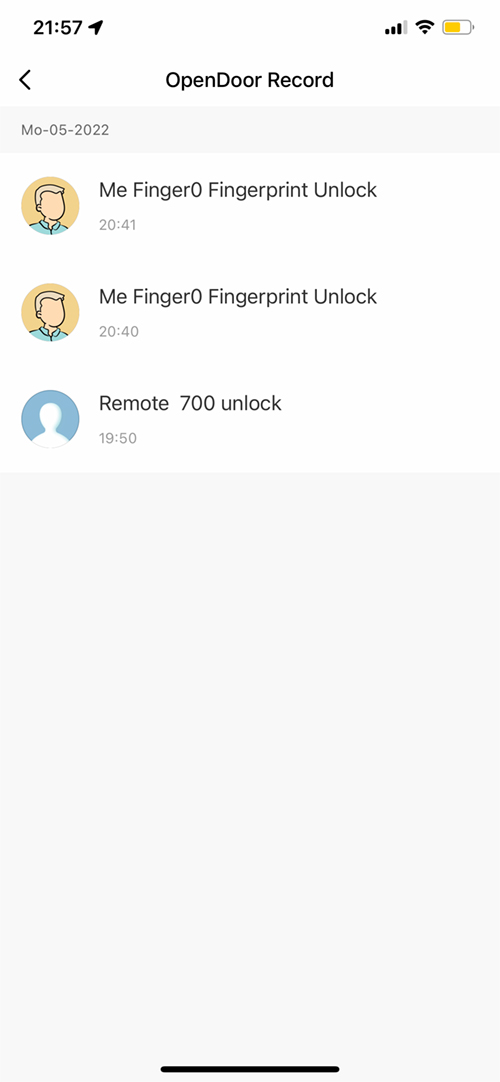
This is the same for passcodes and cards as well. At first, I thought the lock was screwed, but I eventually realised that – despite what the app shows – you have to add your prints, cards and codes all via the lock’s keypad, by going through its menu system as mentioned earlier, once signed in as an administrator. Once a code, card or print is used, it shows up in the logs. In the logs, each new unlock method has a ‘link user’ button. You tap on that, which then gives you the option to assign that code/print/card to a user. Once assigned, you go back into the logs, and they’ll update to show you the user is now assigned to that unlock method.
The only time you can’t assign an unlock method is when you unlock via HomeKit. In this case, ‘Remote 700 unlock’ will show in the logs, but with no option to assign it to a user.
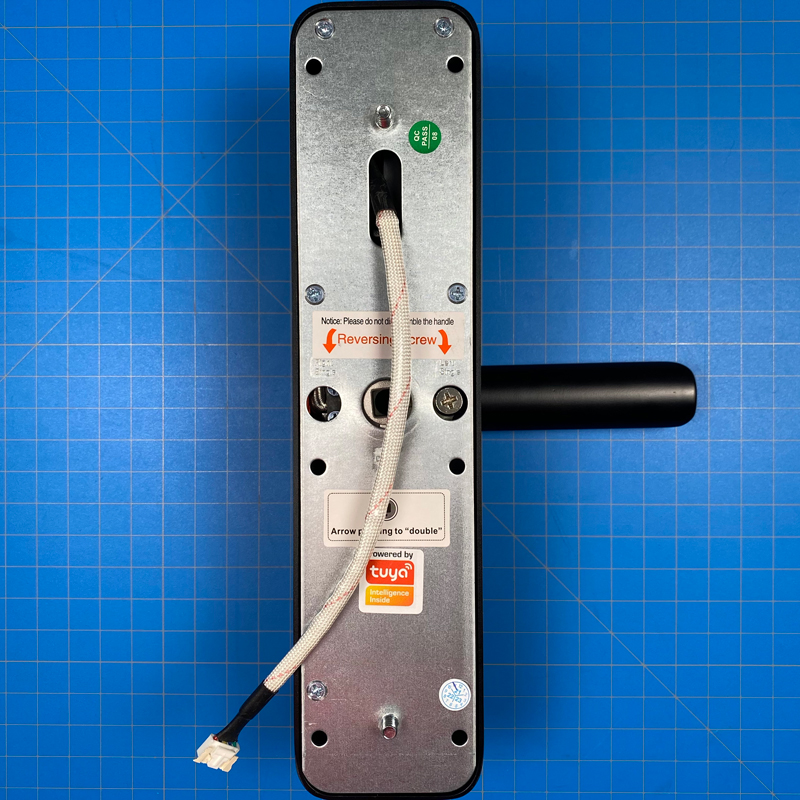
I also mentioned earlier, that the lock has a doorbell function, but before you get too excited, this is quite basic; if you tap the keypad to wake it up, you can then press the # icon, which will trigger a doorbell sound. This sound is only really for the benefit of the person pressing the doorbell to let them know they’ve pressed the right button, however, as the speaker is located on the underside of the lock.
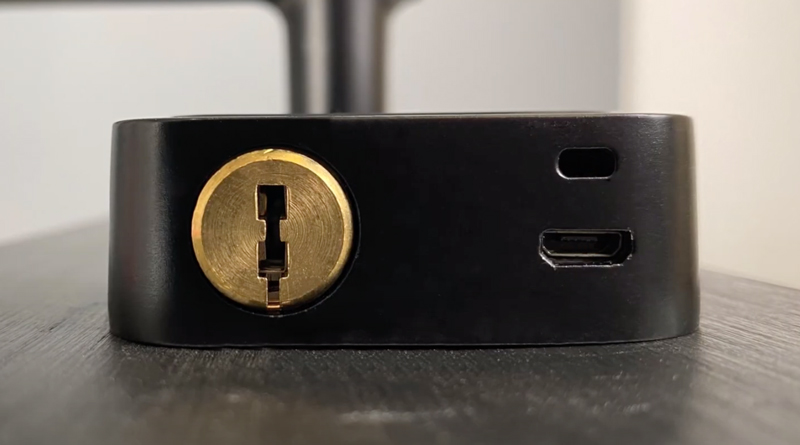
When the ‘doorbell’ is pressed, any registered user (as long as they’ve also set up a Tuya account) will get a push notification to let you know. The underside also features a keyhole, which I’ll mention more on shortly, along with a Micro USB port. This last item is for when the batteries unexpectedly die. You do need a powerbank or a phone capable of reverse charging, along with a suitable cable, but assuming you do, the lock can be powered up so you can in and set about replacing the batteries asap.
TRADITIONAL LOCK
The lock comes with two ‘traditional’ keys, although these don’t quite fit the description in some ways. These will fit into the keyhole, which you then need to turn 90º for them to work. However, when turning the keys, they don’t actually retract either the latch bolt or the mortice bolt – they simply allow these bolts to be engaged to the handle, which you then pull down in order to unlock the door. They’re still good for emergencies, so it’s all good.
TYPES OF PASSCODE
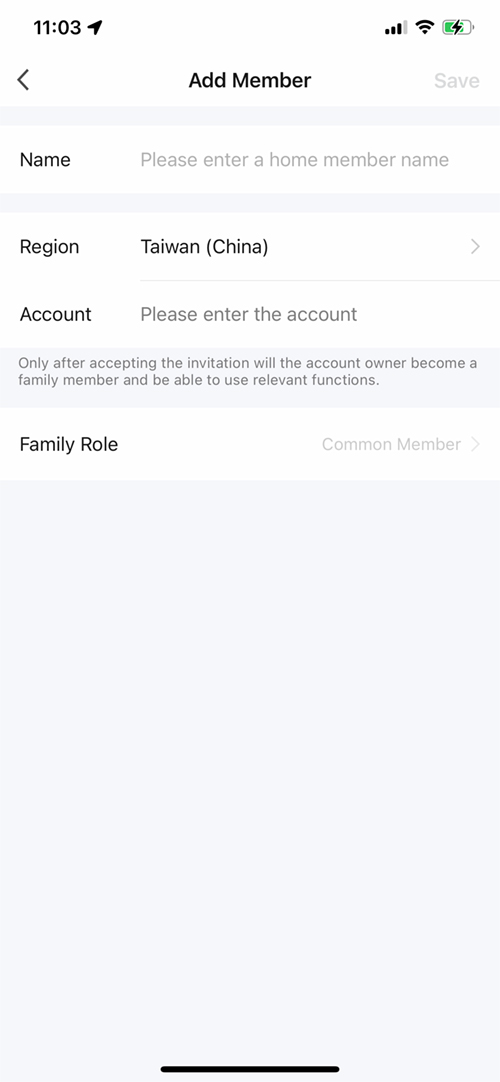
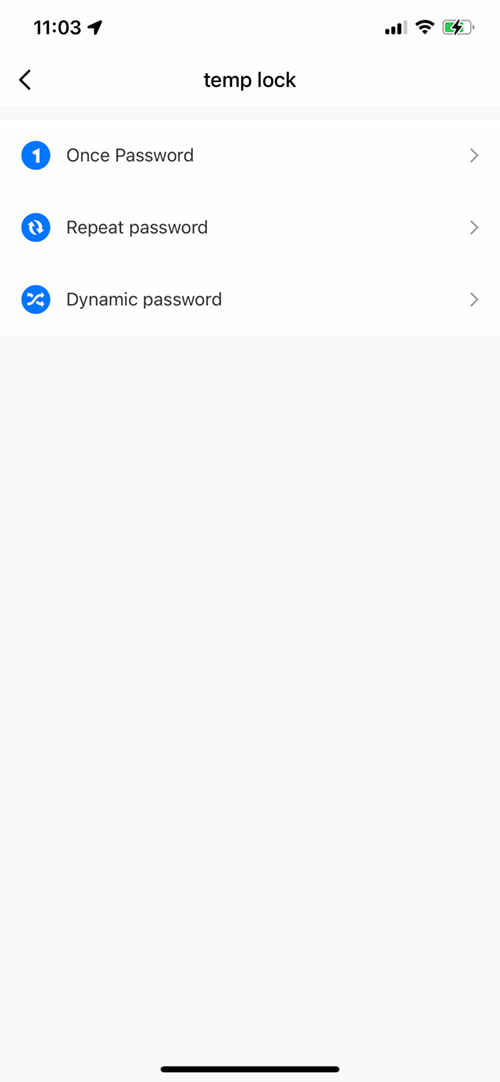
For users in your family, who are generally going to be using the lock on an ongoing basis, you can assign a fingerprint, a passcode, or register an IC card to them, but for times when you want to give access to people on a temporary or restricted basis, you only have the option to issue passcodes. For family members, as I’ve already outlined, you can add them to the lock without them needing to register an account with Tuya, or even download the app. The same applies to temporary passcodes of course, as only a code that they need to tap in on the lock’s keypad is required. For these types of codes, you get three options;
Once password
Repeat password
Dynamic password
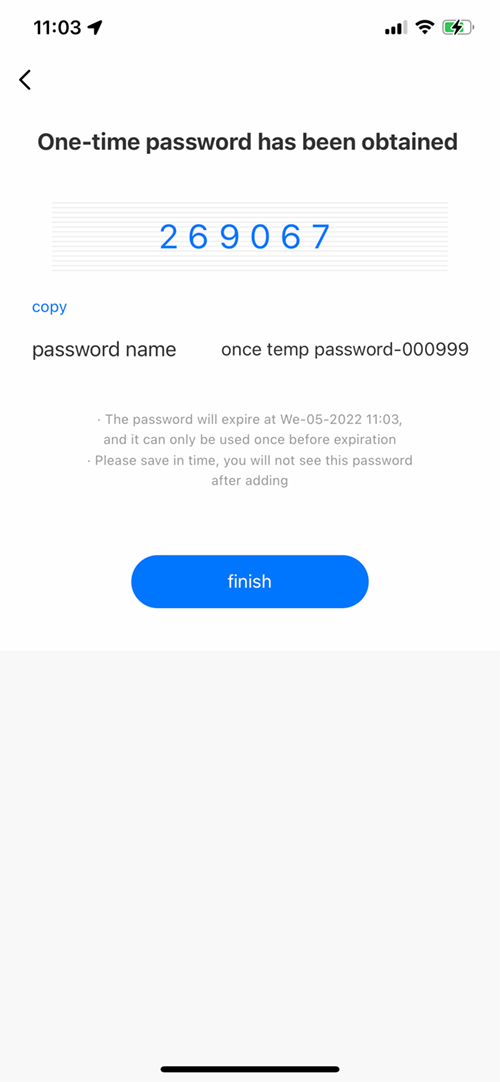
The ‘Once password’ allows you to get a randomly generated passcode that will last for 24 hours, and can only be used once. Once generated, you won’t be able to see the passcode again, so it’s best to copy it within the app and send it to its intended user via email or SMS etc.
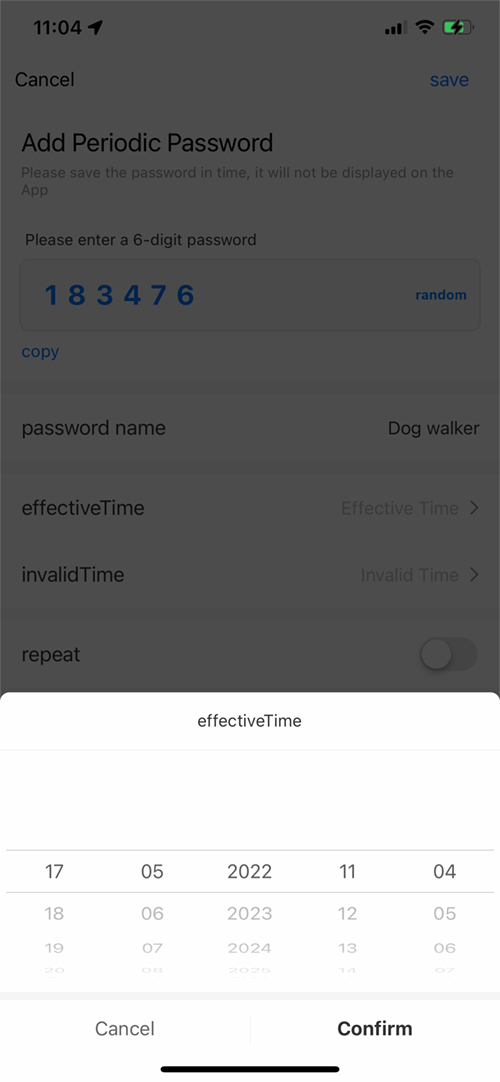
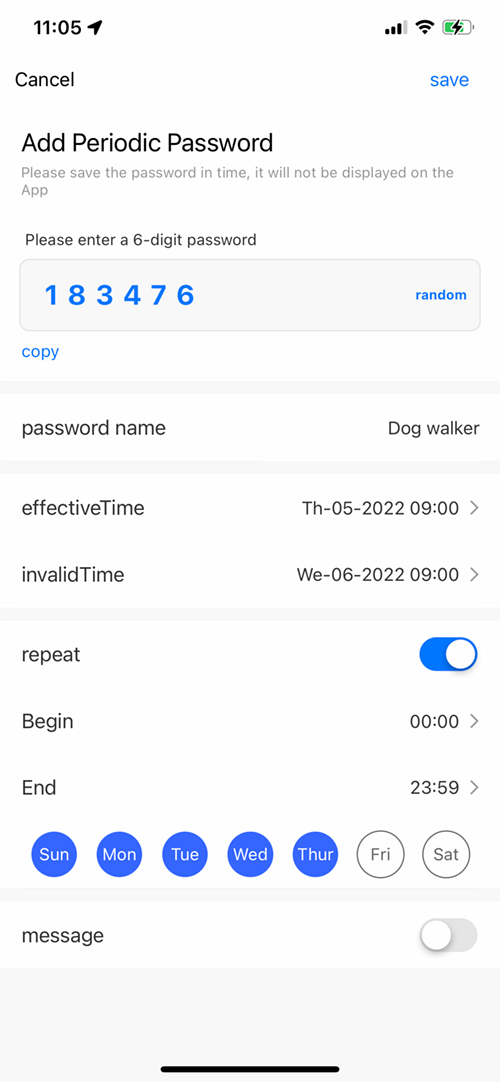
For Periodic passwords, you can create your own or once again have the app randomly generate a code for you. You can specify start and end dates, as well as restrict the code’s use to specific times of the day and days of the week. Unfortunately, you can’t leave the expiry date open, so if you have someone that requires limited access, you would have to either give them permanent access or set an expiry date at a much later date, which you can then change later.
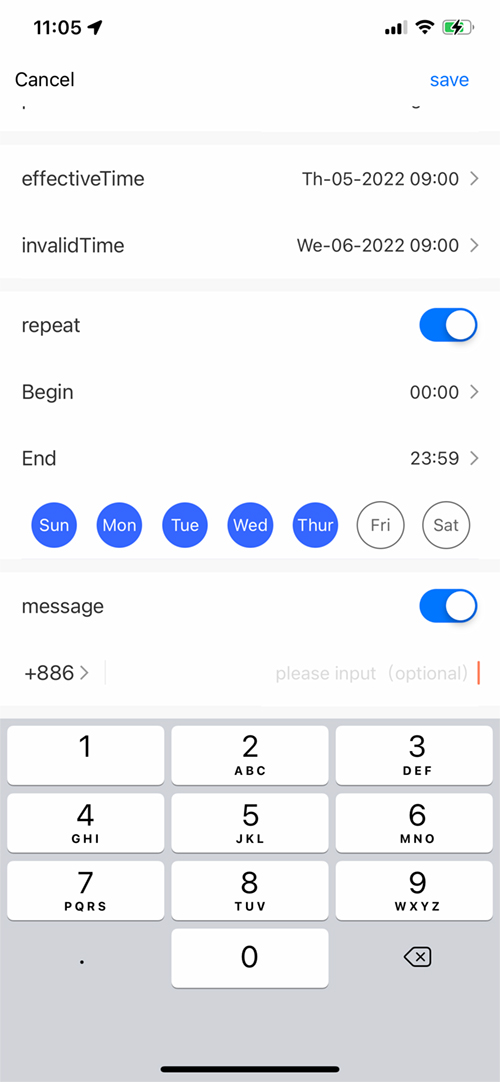
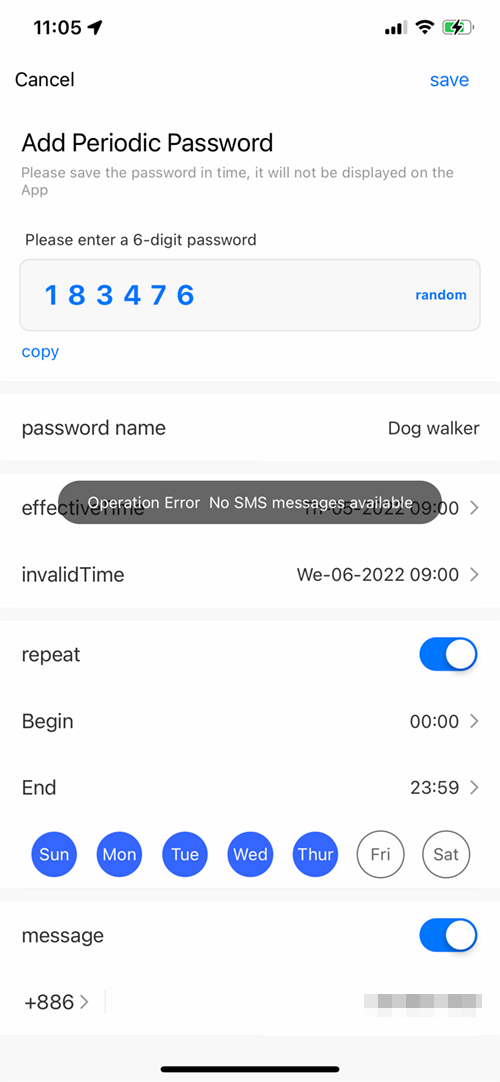
This option is also supposed to allow you to send this code via SMS, although when I tried it, it wouldn’t work. This would seem to be another bug unless I’m somehow meant to give it access, but I couldn’t see an option to do so.
the Final option, Dynamic Password, allows you to randomly generate a passcode that will last for 5 minutes, starting from the time it has been generated. This is of use if you’re away from home, and a package arrives, but you only want a one-off code that is just long enough for a delivery person to access your home to drop off a package inside the house. You could do the same with the ‘once password’ option, but as that lasts for 24 hours, there’s always the possibility that it doesn’t get used by the intended party, who could then end up sharing it with someone else who has 24 hours to use it for less than honest reasons, unlikely as it may be.
Despite this lock not really being in the same league as the Aqara locks, based on quality and craftsmanship, these unlock options are a lot better than those currently offered by the Aqara app.
EASE OF USE | WRAP UP
If you’ve seen my video for the Aqara A100 Zigbee or read the review, you’ll know that the fingerprint method of unlocking the door is pretty much second to none. This might not be the case if the fingerprint sensor was located on the keypad, for example, but because it’s placed in the right position for your thumb when holding the handle to open the door, it just comes as second nature to use this method. Obviously, this unfortunately is an issue if you’re missing a thumb, hand or arm, but for many people, I think this is the method they’ll use without a second thought. It’s certainly the case with the A100 and would be for this lock if it were in regular use here. It’s exceedingly fast and usually accurate when correctly reading your print. If it doesn’t get your print, it’ll just play a voice that states ‘failed’, but in my tests, as long as you place your print firmly and squarely on the sensor, this rarely happens.
If we’re talking about speed, then the IC cards are probably even faster, if less natural to use, although bear in mind, you need to get the card out to use it, whereas your fingers are just there! You only get two of these cards, although I’m sure you can purchase more if needed.
Using the keypad is ok, and although it’s not fast, it does afford you the luxury of controlling who comes and goes, at times and dates of your choosing, as well as also being a handy backup option.
The emergency keys are probably the only option you would use as a last resort, partly because it’s very unlikely that all of the aforementioned options are going to fail in one go, but also because the keyhole isn’t really in the most convenient place. I get why, as it is really only meant as an emergency, but nonetheless, it’s probably even slower than using a traditional key and lock, due to its location.
Control via the app is an interesting one because, in the past, all the locks we’ve used or tested (Aqara, Vocolinc, Tedee, Nuki, Terncy, Reagle, August, and more) use Bluetooth as their primary method of communication, either directly via the phone and/or your Apple Home Hub (Apple TV, HomePod/Mini), or via a proprietary Bluetooth to WiFi hub from the company concerned. Because this lock only uses Zigbee, as expected, the reaction times are fast. Not 100% of the time, I’ll grant you, but more consistently than Bluetooth. Much of the time you’re not going to really notice this because for the most part, you’re going to be using the lock directly (fingerprint, code etc), but if there’s an instance where you get a visit from someone you know who doesn’t have a code, opening the lock via Apple Home or the Tuya Smart app, is going to be fast. This, as you can see in my video review is also the case even when you’re not on the same network as the ZemiSmart hub, so the long delay you experience with Bluetooth when you’re out and about is even more noticeable when you see how fast this lock reacts.
Having been in a position to compare this lock to the Aqara A100 Zigbee, it’s afforded me a good way of viewing opposite ends of the market in terms of cost. I really love the Aqara lock for many reasons – built quality, ease of use, integrations (Apple HomeKey and Aqara/Zigbee), as well as the overall design. It would be unfair to compare the ZemiSmart lock to this because the price difference alone makes it clear that the company has had to cut corners to make it affordable to a lot of users, so yes, the build quality and finish aren’t up there compared to the A100, although for a budget lock of this type, it’s actually better – and feels more solid – than I expected, in all honesty. What lets it down is really only the app, with the lack of clarity in how entry methods and how they’re applied to users are achieved.
If I didn’t have access to the Aqara A100, and the ZemiSmart lock could have been fitted without a sliver of a gap being left after installation, I would actually have been happy to use the ZemiSmart lock in place of the smart lock I’d been using for the past two years – namely the Nuki Lock 2.0. As it stands, this is not meant to be, but I would certainly recommend this if you are able to replace your current mortice lock, and just can’t get hold of or afford an Aqara lock, because, despite the flaws, it does many of the same things pretty well. What could take this lock to the next level is to at least add Apple’s guest Access feature. It’s a small thing, but one more feature that would allow me to stay within the Apple Home app. I’ve already mentioned this to my contact at ZemiSmart, so I guess time will tell as to whether this is achievable. My guess is that it’s not, as so far I’ve not seen any other locks with integrated keypads take this feature on.